
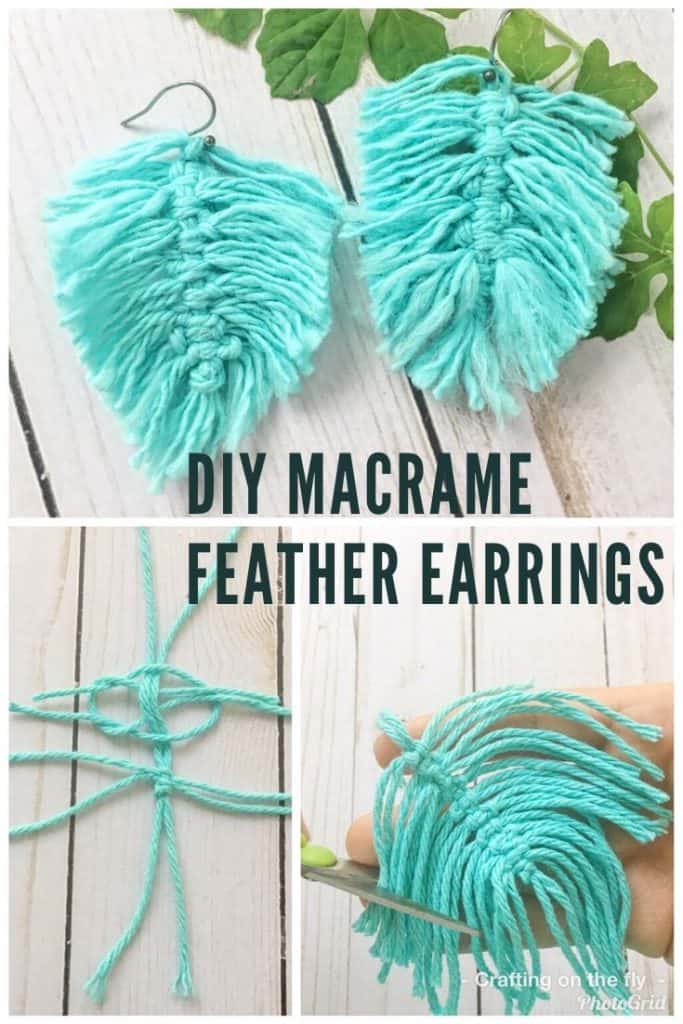
Learn how to make Stunning Macrame Feather Earrings
I have been following this new macrame trend with open eyes. It is amazing what you can create with string and a few knots. It is also fascinating how many different types of knots you can use to create so many different types of macrame. I especially love elaborate macrame wall hangings and room dividers.
Those seem like a lot to tackle and so I wanted to start out with something small. Enter the Macrame feather earrings.
I love this light blue string that has the look of a robin’s egg. But you can choose any color for your own pair of feather earrings. Just make sure to use yarn that is made of several ply’s of string so you can feather the ends.
Once you completed this beginner Macrame DIY and want to work on more projects, try your hands on my Macrame Necklace and Macrame Keychain Tutorials.
As an Amazon Associate I earn from qualifying purchases. If you make a purchase through my link, I will make a small commission with no extra cost to you. “
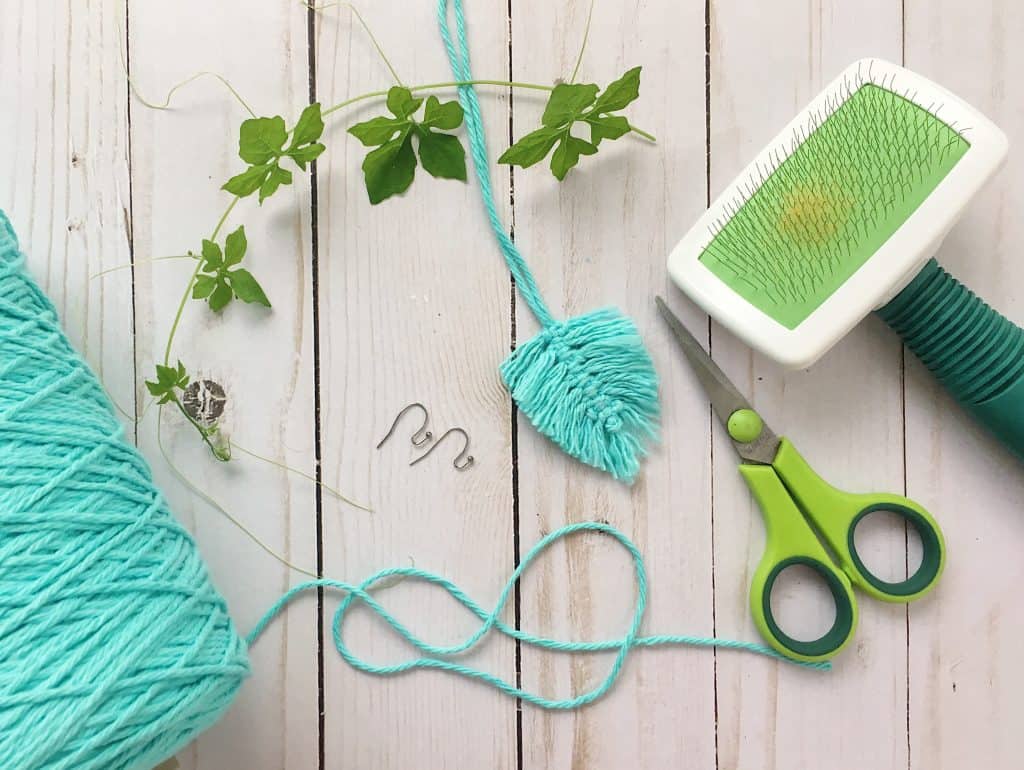
Macrame Feather Earrings Materials:
- Lily Sugar ‘n Cream Cotton yarn (color Seebreeze)
- ear wires
- Fabric Stiffening Spray
- scissors
- dog brush (optional)
Here is a quick video if you want to see the knots in action!
Start out with a 10″ string and fold it in half.
Then also cut 17 5″ pieces of the string.
Use one of those strings to tie a knot like in the picture below in the center of the longer string.
Now you have to add the feather to the center string.
There will be 8 of the same sections to make up the length of the macrame feather. Add more rows if you are making a larger feather macrame piece.
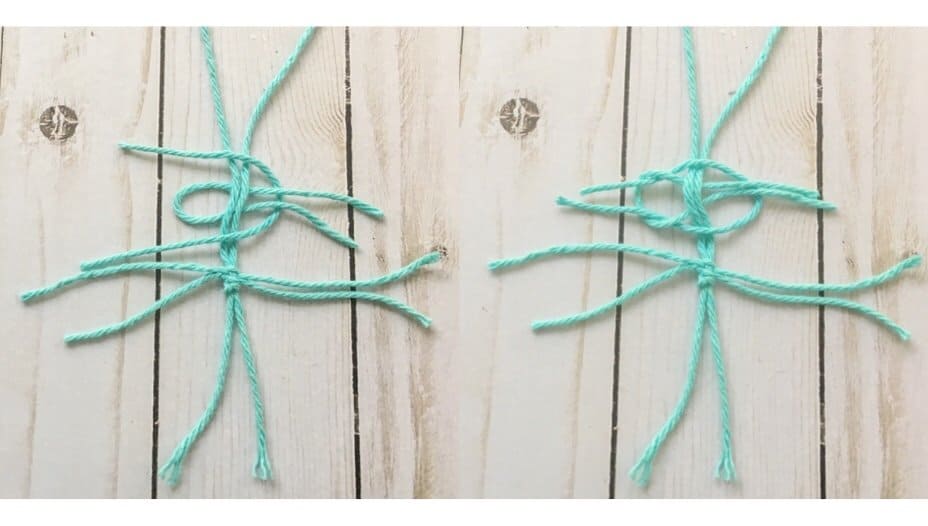
- Fold a string in half and place it under the center string with the loop on the left
- Take another string folded in half and place the loop under the ends of the previous string on the right side
- Now place the ends of the second string inside the loop of the first string (right side)
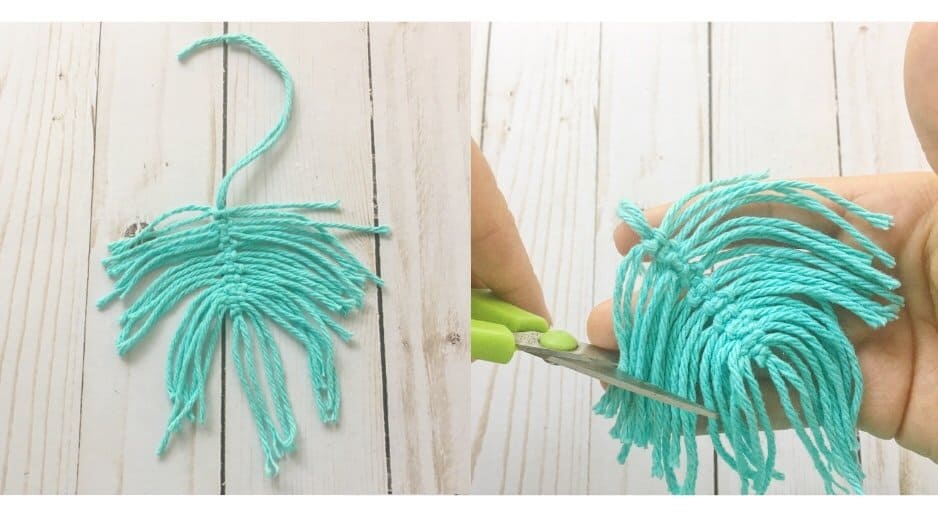
4. Continue adding rows of sting with the same basic macrame knotting technique and push each row down to the end
5. Then cut your macrame creation into a feather shape
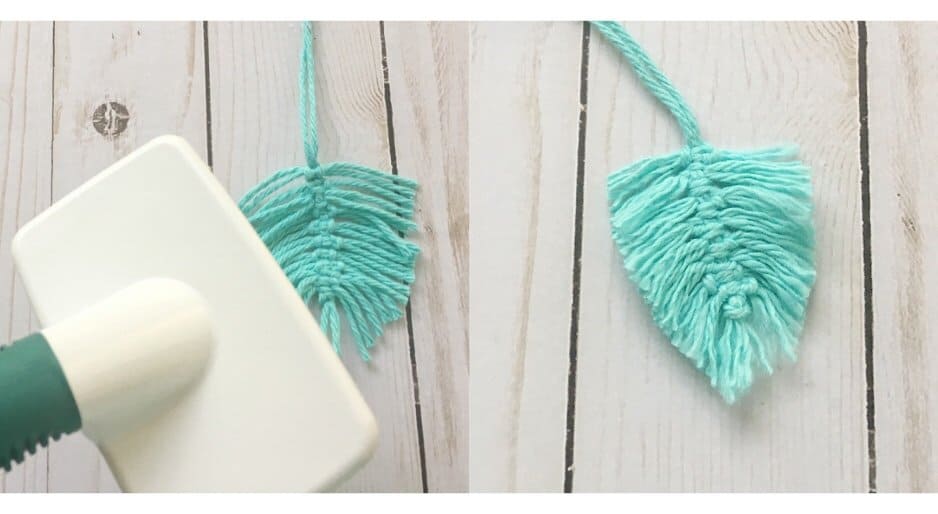
5. Now you just need to brush the string so it feathers out. You can either do that with a grooming brush for cats and dogs or just use your fingernails to take the strands of the string apart.
Pro Tip!
If you would like longer feathers or small feather, just adjust the amount of rows you use and cut the shape accordingly. You can also make them in any color you fancy and use them for necklaces, key chains and so on. Just make a bunch!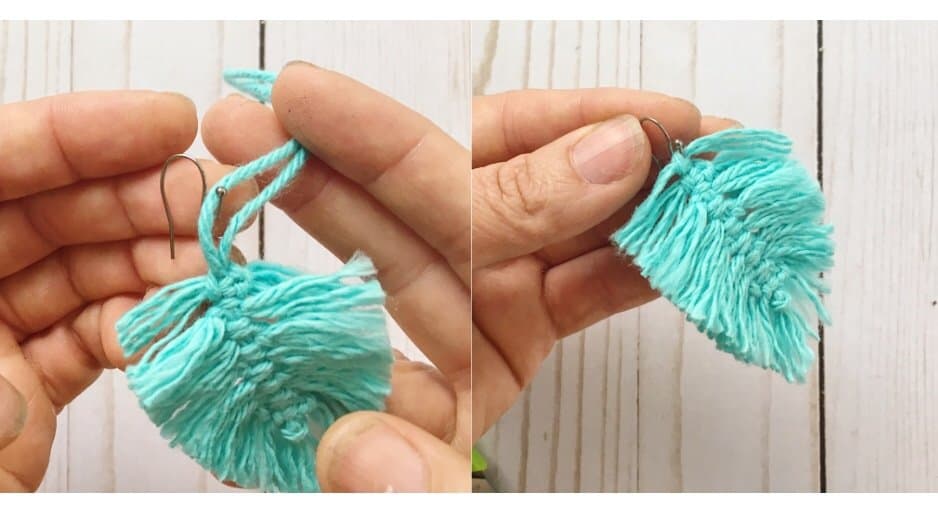
5. Finally, just tie a knot around the ear wire with the long string on top
6. Cut the string to the size of the other feather strings and comb it again
7. The stiffener is added at the end. Spray it all over the yarn to really saturate it. It is a bit sticky. Now comb it again and lay it out perfectly. So exactly the shape you would like it to stay in. Then let it completely dry. After that, you might find a few strands of yarn to be longer then the rest. So this is a good time to do a final cutting before they are ready to be worn.

I hope you will enjoy these macrame feather earrings as much as I do. Comment below if you have any questions and show off your own feather macrame creations here and on Instagram #kaileacrafts