
Granny Square Hex Cardigans are popping up everywhere right now. I created a more refined version with this cropped and fitted Hexagon Jacket.
Granny squares are a classic crochet motif that can be combined in various ways to create a multitude of designs. By adapting the traditional granny square pattern into a hexagon shape, you can add an extra layer of complexity and visual interest to your project. This versatile pattern allows you to play around with different colors and textures, making it perfect for showcasing your creativity and personal style. In this article, we’ll provide a step-by-step guide on how to crochet a granny square hexagon cardigan, as well as tips and tricks to make the process smoother.

As an Amazon Associate I earn from qualifying purchases. If you make a purchase through my link, I will make a small commission with no extra cost to you. “

Hexagon Cardigan Materials:
- I used Premier Puzzle Yarn in shades of brown. For the medium fitted size I made, you need 2 balls. You will need more if you want to make longer arms and also make the jacket longer, This is a bulky weight size 5 yarn.
- Crochet Hook 4.5mm
- Scissors
- Needle
Crochet Terms (US):
This pattern is written using standard US crochet terminology.
- Ch = Chain(s)
- St(s) = Stitch (es)
- Sl St = Slip Stitch
- Dc = Double crochet
- Sc = Single crochet
- Sc2tog = Single crochet decrease
- BLO = Back loop only
Gauge
No gauge needed. Adjust width and length by adding more rows of clusters. Start by making it fit around the arm as wide or tight as you like. Then you make your arm longer by adding more rounds of clusters. You can also make the cardigan longer by adding more rows of clusters to the end of the cardigan.
Explanation:
First, the granny square is worked in the rounds as a hexagon. Later, length and width is achieved by adding rows of clusters.

Step 1: Working the Hexagon Base
Round 1: magic ring, ch3 (counts as first dc), 2dc into the magic ring, ch1, *3dc into the magic
ring, ch1*, repeat * 4 more times, sl st to the 3rd ch of the ch3 to join.
Round 2: ch3, 2dc in the last space you just made in the previous round, ch1, *3dc in the next space, ch1, 3dc in the same space*, repeat * for 4 more times, 3dc in the last space, ch1, sl st to the 3rd ch of the ch3 to join..
Round 3: ch3, 2dc in the last space you just made in the previous round, *3dc in the next space, (3dc, ch1, 3dc) in the next space*, repeat * for 4 more times, 3dc in the next space, 3dc in the last space, ch1, sl st to the 3rd ch of the ch3 to join.
Round 4: ch3, 2dc in the last space you just made in the previous round, *3dc in the next 2 spaces, (3dc, ch1, 3dc) in the next space*, repeat * for 4 more times, 3dc in the next 2 spaces, 3dc in the last space, ch1, sl st to the 3rd ch of the ch3 to join.
Round 5: ch3, 2dc in the last space you just made in the previous round, *3dc in the next 3 spaces, (3dc, ch1, 3dc) in the next space*, repeat * for 4 more times, 3dc in the next 3 spaces, 3dc in the last space, ch1, sl st to the 3rd ch of the ch3 to join.
Round 6: ch3, 2dc in the last space you just made in the previous round, *3dc in the next 4 spaces, (3dc, ch1, 3dc) in the next space*, repeat * for 4 more times, 3dc in the next 4 spaces, 3dc in the last space, ch1, sl st to the 3rd ch of the ch3 to join.
Round 7: ch3, 2dc in the last space you just made in the previous round, *3dc in the next 5 spaces, (3dc, ch1, 3dc) in the next space*, repeat * for 4 more times, 3dc in the next 5 spaces, 3dc in the last space, ch1, sl st to the 3rd ch of the ch3 to join.
Round 8: ch3, 2dc in the last space you just made in the previous round, *3dc in the next 6 spaces, (3dc, ch1, 3dc) in the next space*, repeat * for 4 more times, 3dc in the next 6 spaces, 3dc in the last space, ch1, sl st to the 3rd ch of the ch3 to join.
Round 9: ch3, 2dc in the last space you just made in the previous round, *3dc in the next 7 spaces, (3dc, ch1, 3dc) in the next space*, repeat * for 4 more times, 3dc in the next 7 spaces, 3dc in the last space, ch1, sl st to the 3rd ch of the ch3 to join.
Round 10: ch3, 2dc in the last space you just made in the previous round, *3dc in the next 8 spaces, (3dc, ch1, 3dc) in the next space*, repeat * for 4 more times, 3dc in the next 8 spaces, 3dc in the last space, ch1, sl st to the 3rd ch of the ch3 to join.
Note: if you need it in bigger size, you can increase number of rounds using the same sequence.


Assembly:
- ch3, 2dc in the last ch-1 space from previous round, *3dc in the next 8 spaces, (3dc, ch1,
3dc) in the next corner*, repeat * 4 times, 3dc in the next 8 spaces, 3dc in the next corner, ch1, (fold in half), **sl st to the corresponding space in the other side, 3dc in the next space in the first side**, repeat ** across until the end, sl st in the last space from 2 sides.
Note: if you need the sleeves longer, you can increase number of rows with making 3dc in each space across.

Step 2: Let’s make ribbing for the sleeves!
- Using smaller hook size, white yarn, working across the last round of the sleeves, ch6, sc in 2nd ch from hook, sc in the next 4ch, *sc2tog, sc in the next st, working across the 5sc made before, in BLO, sc in next 4st, back to work in both loops, sc in the last st, ch1, turn, in BLO, sc across the row*, repeat * across the armhole, sl st in the last st, sl st along the edge to close.
- Repeat for the second sleeve.

Step 3: Now we will lengthen the back and front sides of the sweater, starting at any side
- Ch3, 2dc in the same space, 3dc in the next space, make 3dc in each space across, repeat across, dc in the last st, ch3, turn.
- Repeat previous step 2 more times or until reach the desired size.
- Repeat all previous steps for the right piece.
- Add some rows to the back side of the sweater, here we will add 3 rows to one side and 2 rows for the second side.

Step 4: Let’s attach 2 pieces together!
ch3, turn, sl st to the corresponding space in the second piece, 2dc in the space of the first piece, *sl st to the corresponding next space in the second piece, 3dc in the next space of first piece*, repeat * across the row until finish attaching, sl st in the last space of the second piece, dc in the last space of the first piece, fasten off.

Step 5: Adding edging around the opening
Round 1: Right side facing up, start at corner, ch2, sc into each st all around from/neck/other side of front to other corner, 2sc into corner, *sc, Sc2tog, rep from * along the bottom of the sweater, slst to start

You can get creative and make several different versions of these crochet gloves by using different shades of pink and white or make them in a solid color without the heart design.

I hope you will enjoy this Hexagon Cardigan Crochet Pattern as much as I do. Comment below if you have any questions and show off your own cardigans here and on Instagram #kaileacrafts
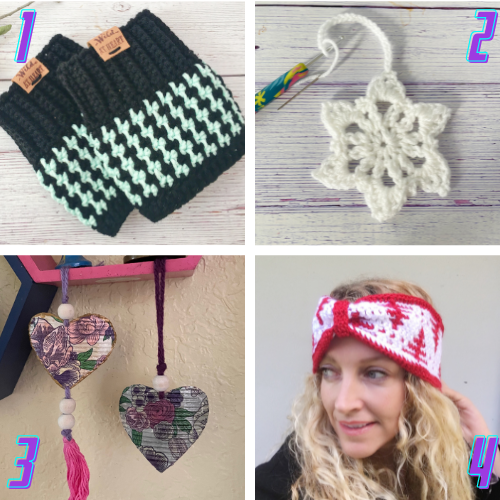
- Houndstooth Boot Cuff Crochet Pattern – Create this intricate yet easy pattern to warm up your legs.
- Snowflake Crochet Pattern – Crochet snowflake ornaments
- Heart Ornament Recycle DIY Tutorial – Create beautiful heart ornaments from old tin cans
- Mosaic Crochet Crochet Pattern – Crochet a red and white Nordic headband