How to Make a Macrame Dream Catcher
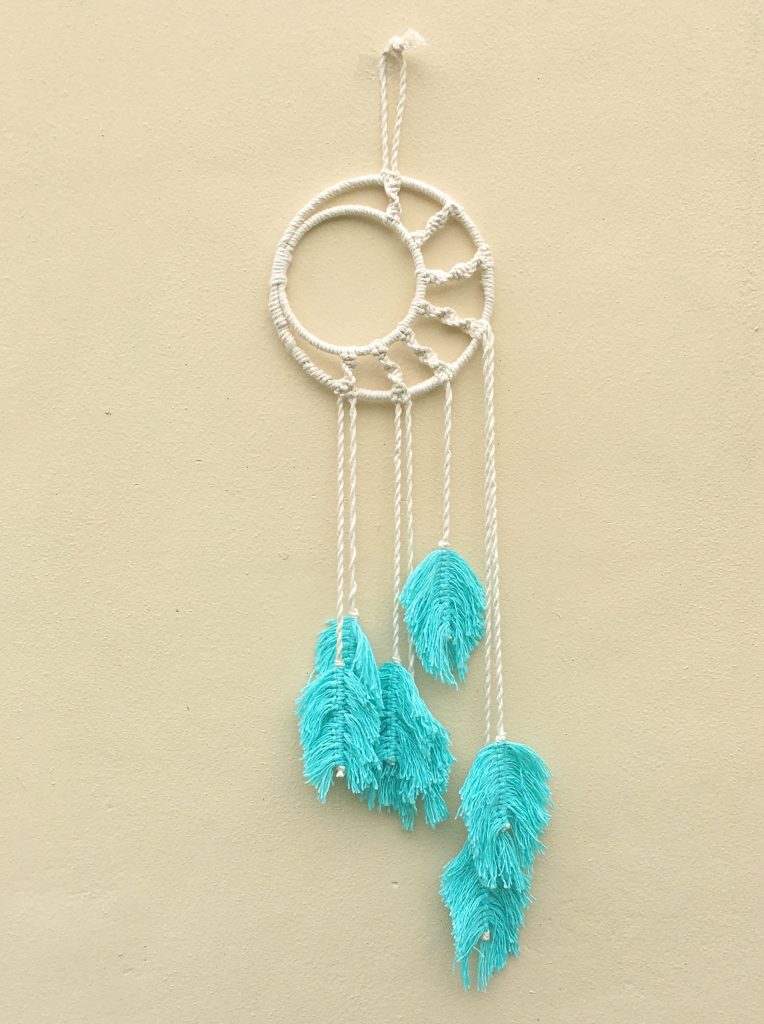
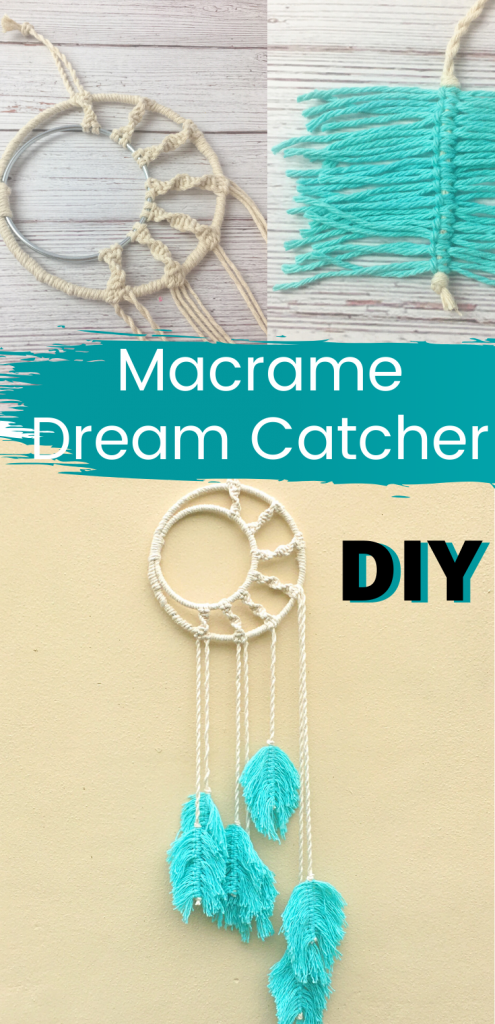
It is amazing how much you can do with simple macrame knots! This beginner Macrame wall hanging looks sophisticated and intricate yet only uses 3 easy macrame knots. This Macrame dream catcher is perfect for any boho home decor and I already found the perfect spot for it.

Want to learn how to make this macrame dream catcher?
All you need is 2 metal rings to create the illusion of a sun and a crescent moon. Do you see how the 2 parts come together? Then I twirled the long macrame cords to act as posts for the blue macrame feathers that dangle below the macrame moon. You can use another color for the feather or even use the same natural color macrame cord. totally depends on your home decor and personal preference. I just LOVE that shade of blue. So I always tend to go for blue details.
As an Amazon Associate I earn from qualifying purchases. If you make a purchase through my link, I will make a small commission with no extra cost to you. “
Macrame dream catcher materials
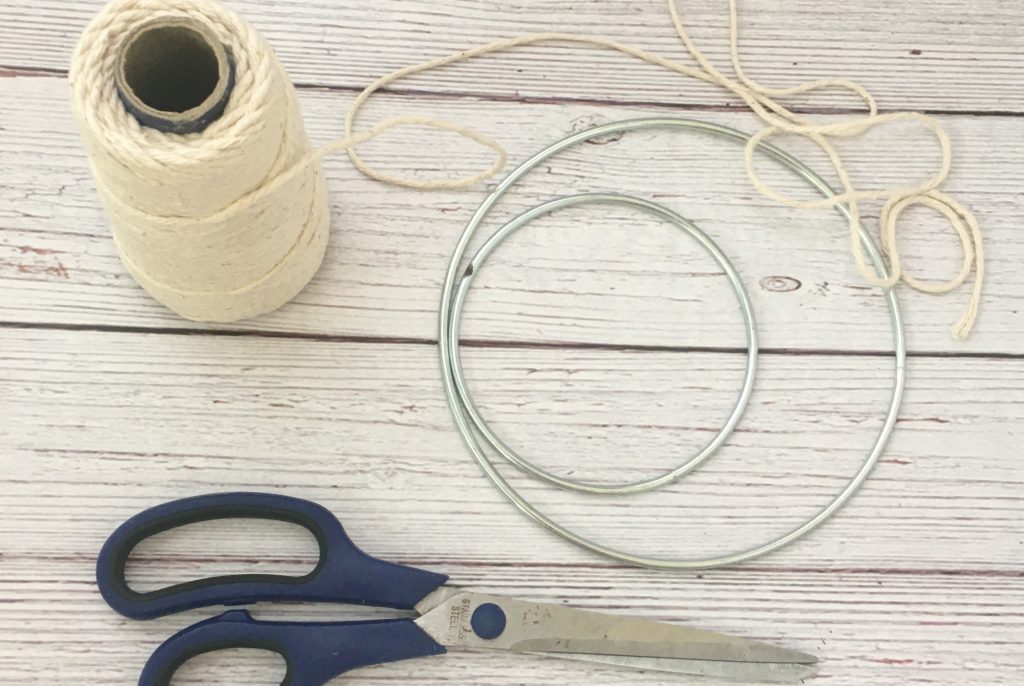
- Macrame Cotton Cord
- 2 Metal Rings sizes 4″ and 6″
- Fabric Stiffening Spray
- Hot Glue Gun (I love this cordless glue gun) or fast drying glue
- Scissors
Looking for more macrame DIY tutorials?
You can also make some macrame feather keychains by following along with my Macrame Feather earring tutorial here.
Or try my Macrame Necklace tutorial here.
How to Make a Macrame Dream Catcher
For the 7 sections along the crescent moon you will need the following lengths of sting:
- 2 strings 20″ long
- 2 strings 30″ long
- 6 strings 40″ long
- 4 strings 60″ long
and then another 60″ to wrap the inside ring.
For the 7 feathers you will need 15 sections each with 2 strings per section:
- 210 blue strings 5″ long
That’s a lot of pieces of string but well worth it for all the feathers!
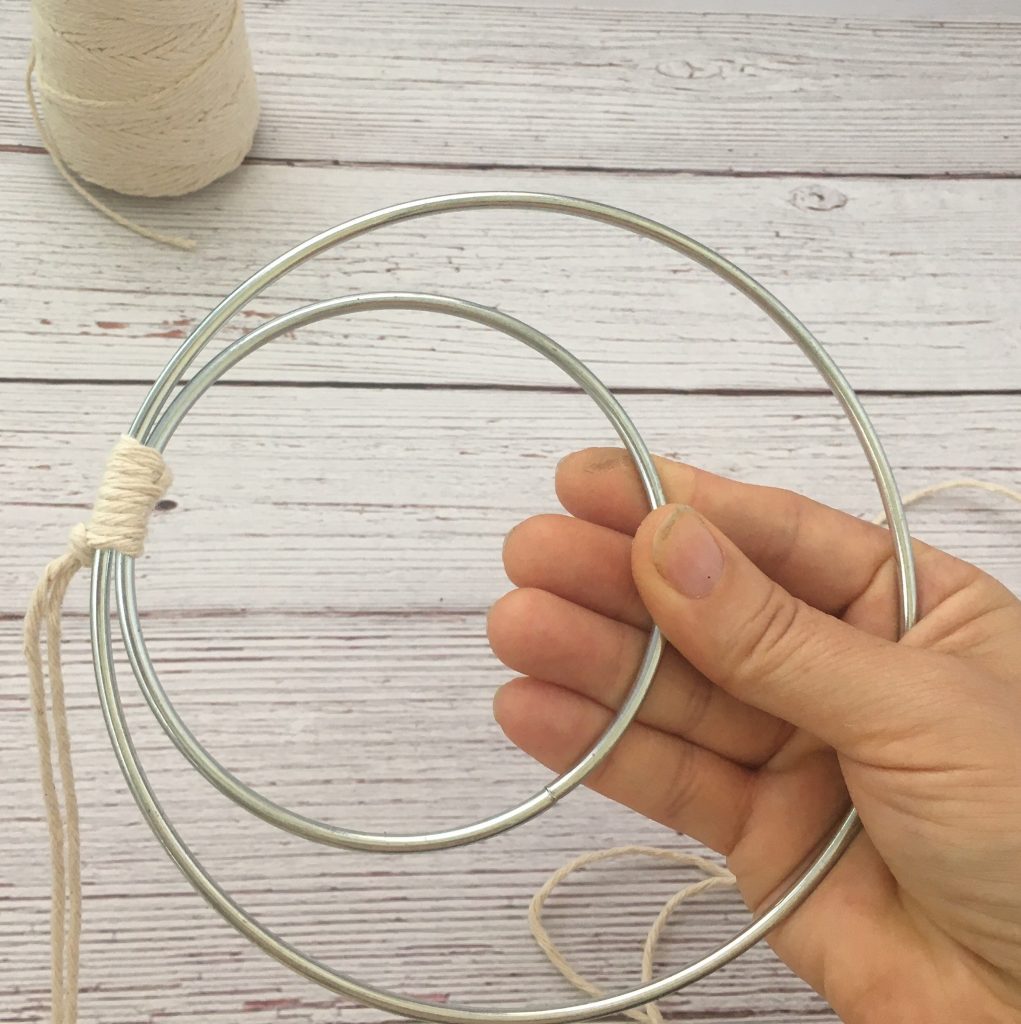
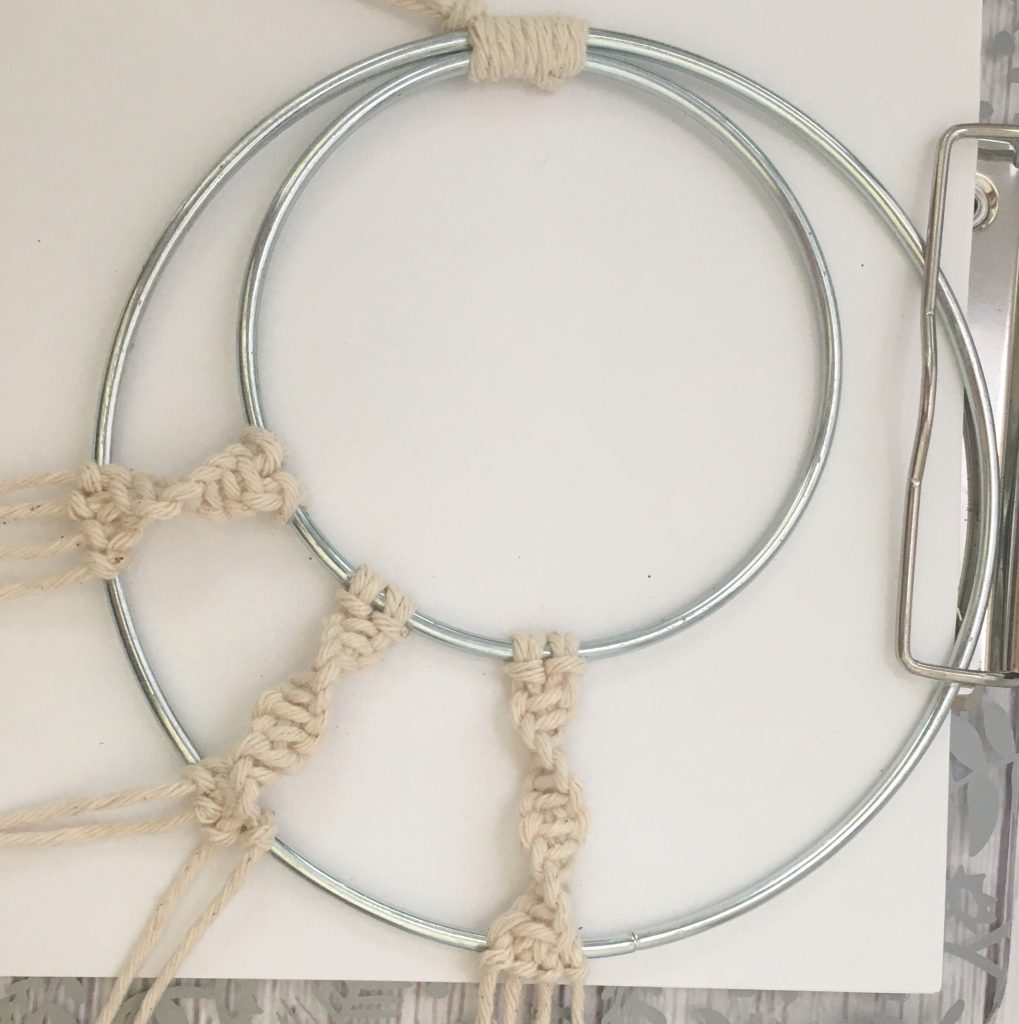
First you need to anchor your 2 rings to one side so it makes the crescent moon shape. Just use some macrame cord and tie the 2 strings together on one side. This is just to hold it in place while you macrame on the other side. Later we will take the knot off and wrap it all with the macrame cord.
Each of the 7 sections has a twisted cord feature that looks really intricate but is very easy to make by just doing the same knot over and over again. It is called the Half Knot. By doing this knot over and over again, the knots start to twist around. For the first section, the smallest on, you will need to do that half knot 6 times.
- 1st section: 6 half knots
- 2nd section: 8 half knots
- 3rd section: 10 half knots
- 4th section: 11 half knots (half way point)
- 5th section: 10 half knots
- 6th section: 8 half knots
- 7th section: 6 half knots (this is the top)
Making a Macrame Half Knot
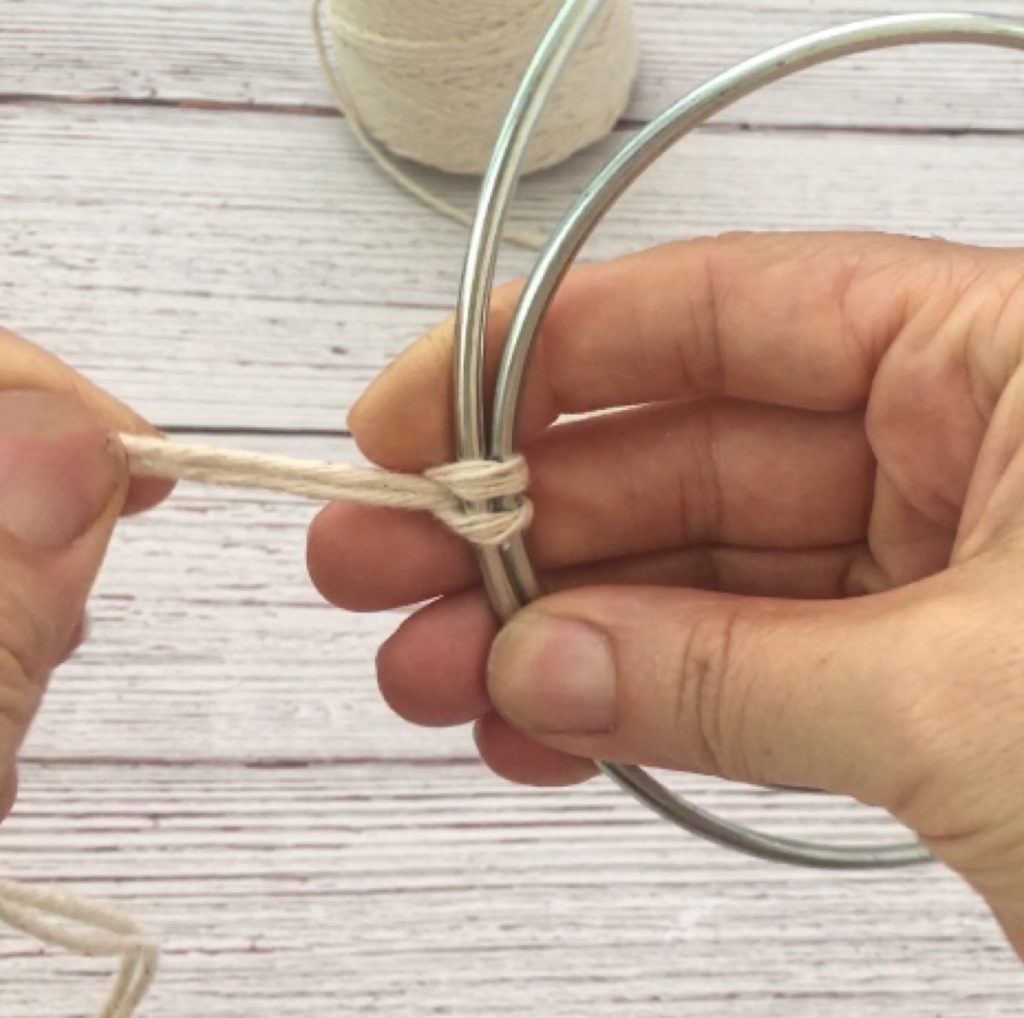
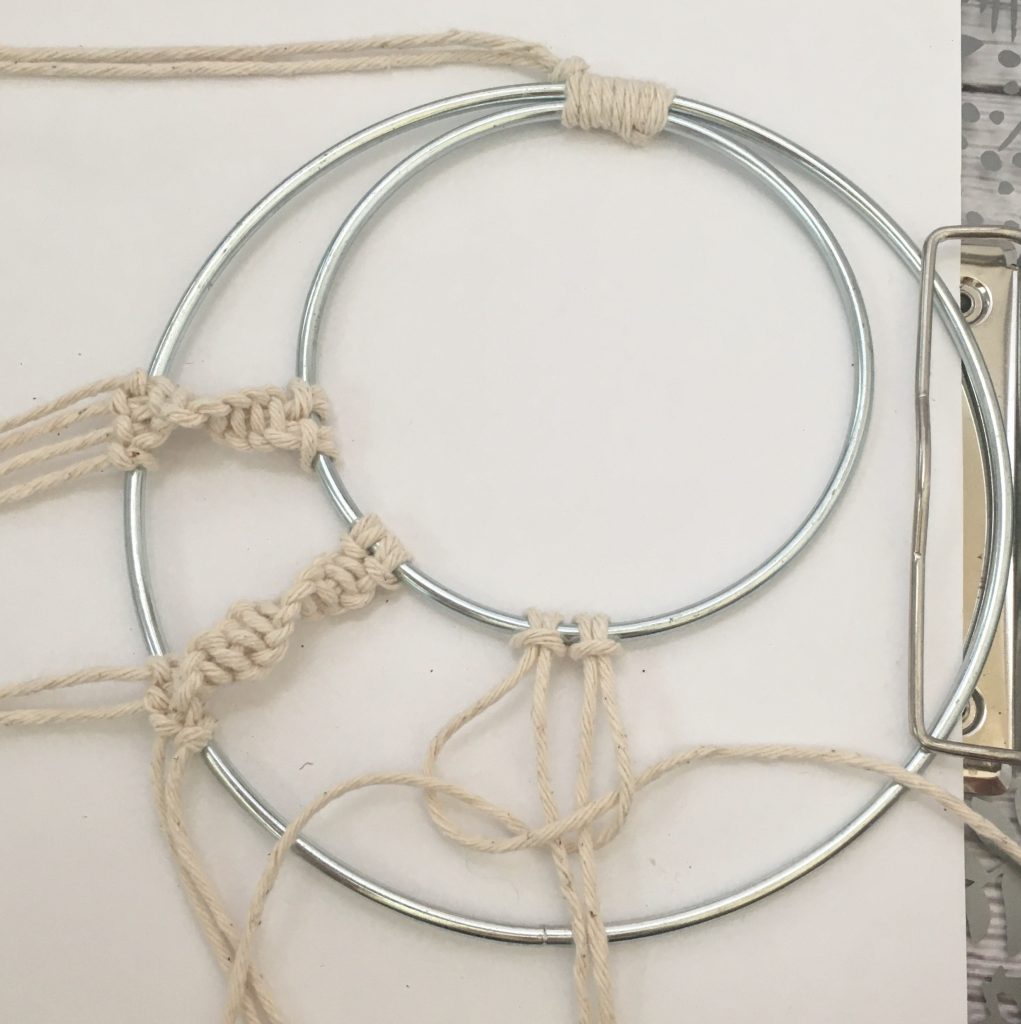
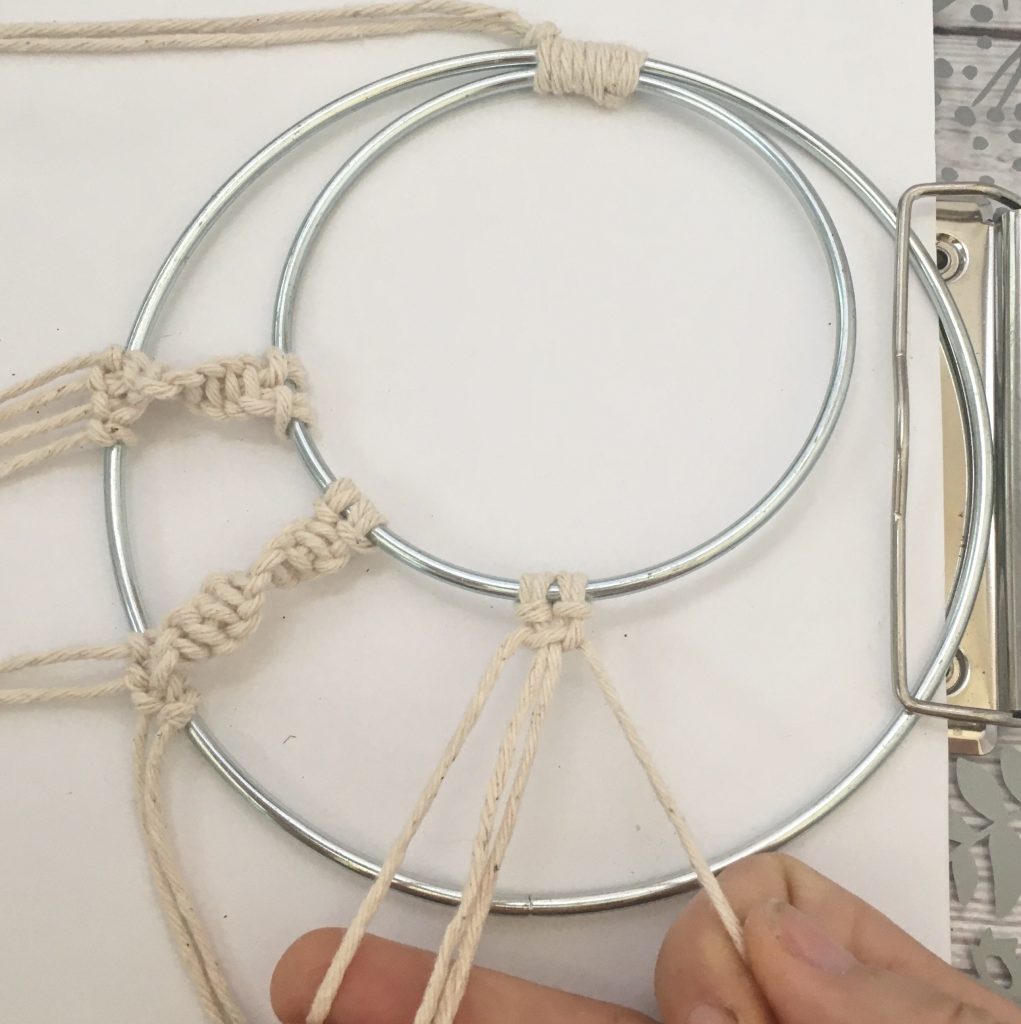
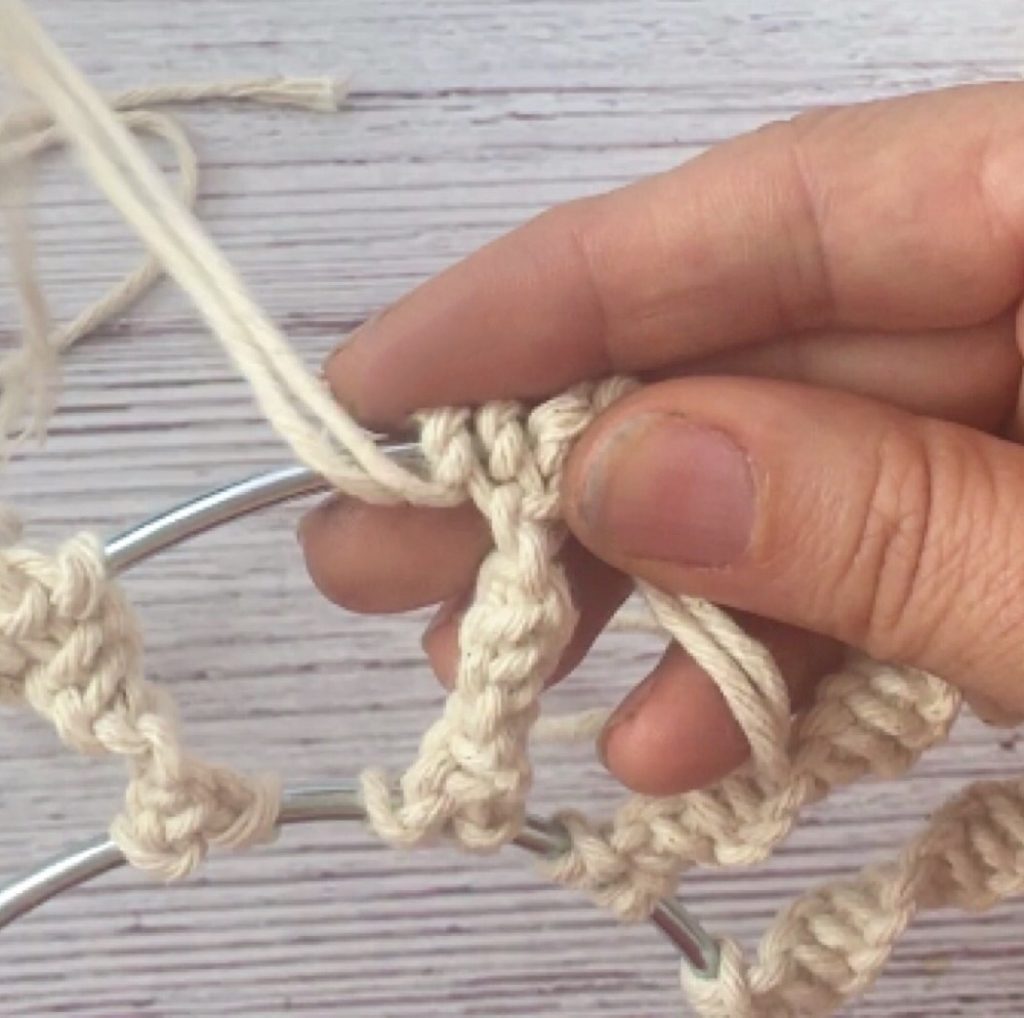
For the first section, attach two 40″ strings to the inner metal circle with a Larkshead knot by folding the string in half. Then separate the 4 strings so the 2 in the center are together and the 2 on each side (the outsides) will wrap around the 2 center strings with the half knot.
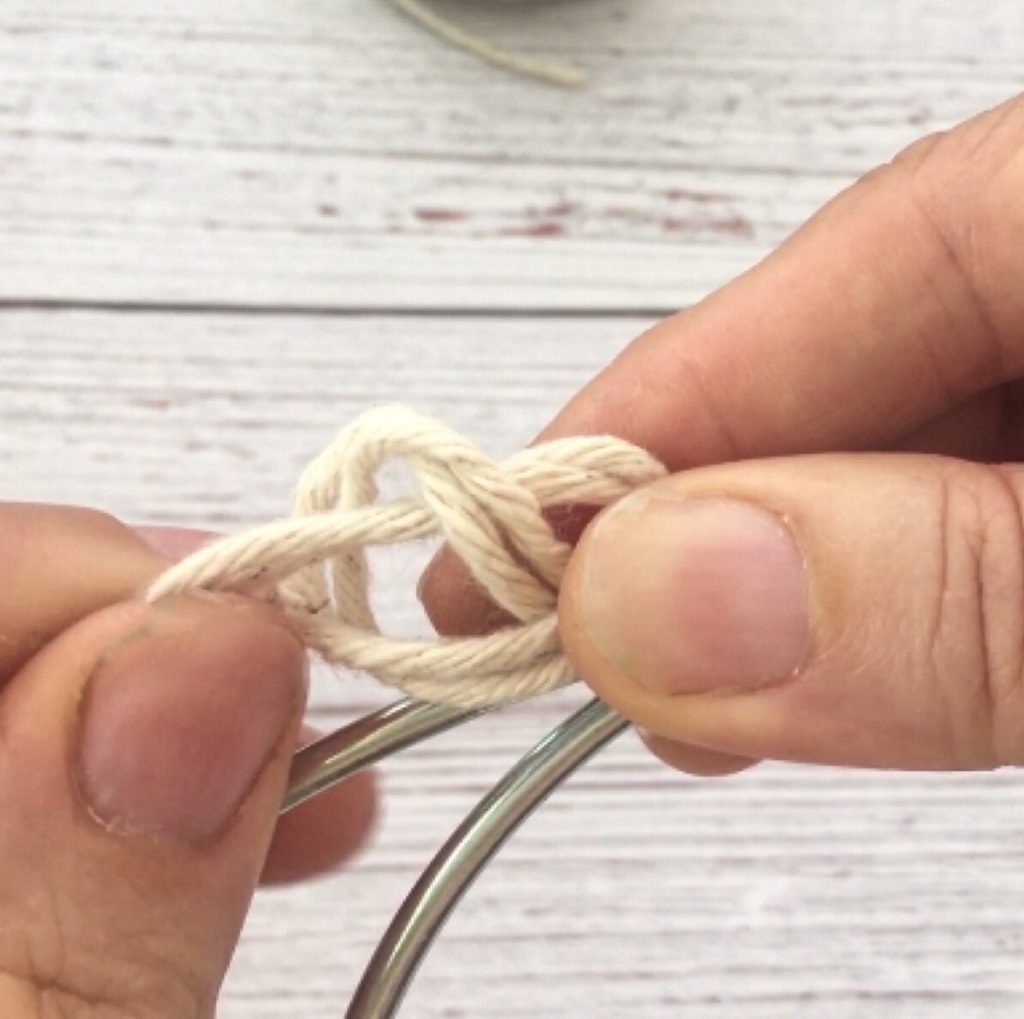
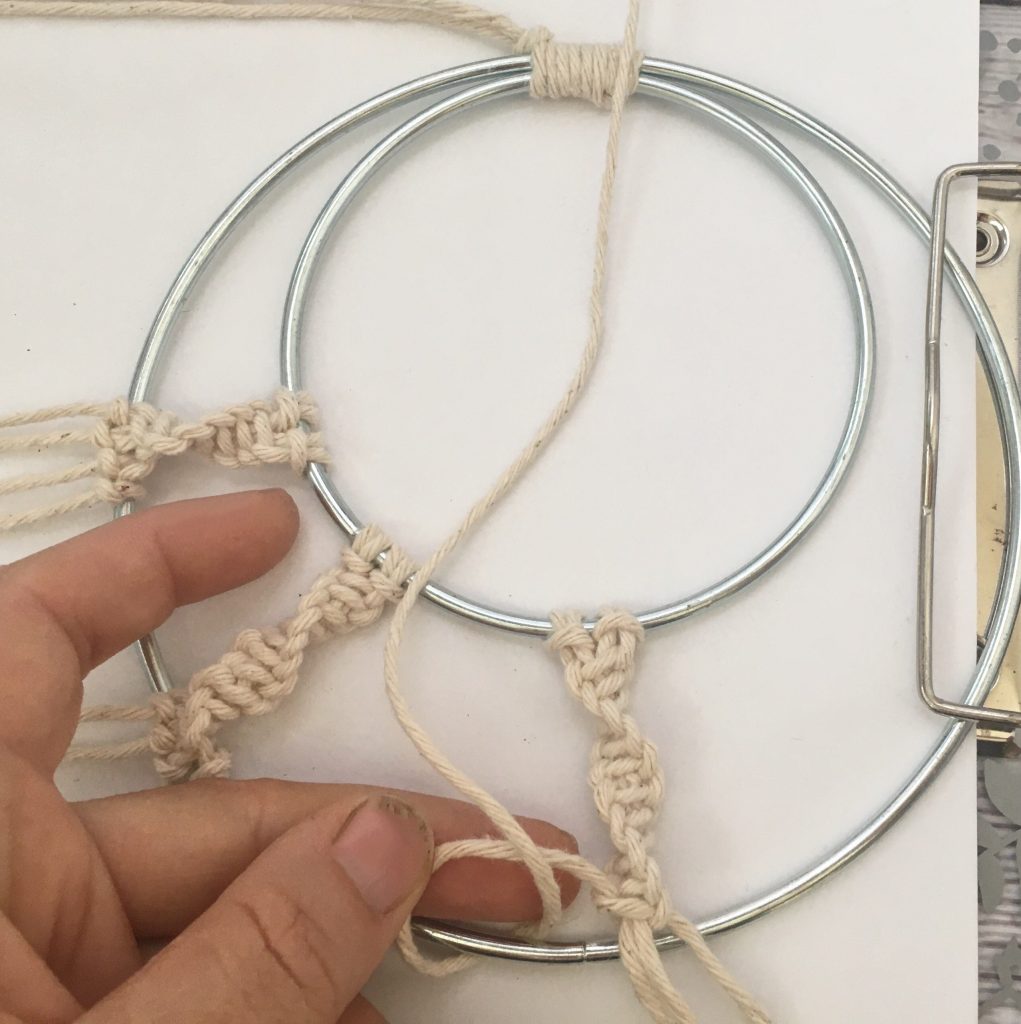
First, fold the left string over the 2 center strings, then place the right side string over the left string and under the 2 center strings. Now pull that right string out on the left side through the loop that the left string created.
So over, under, and up
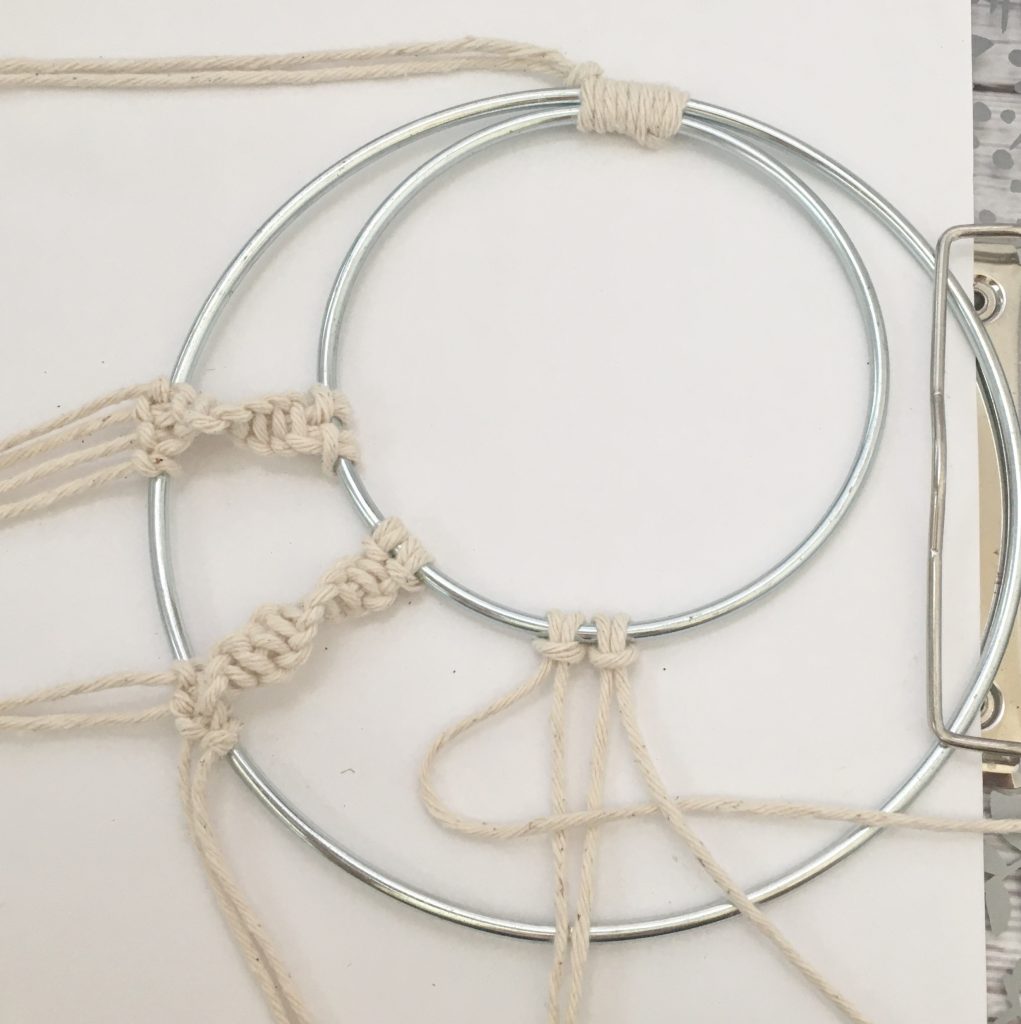
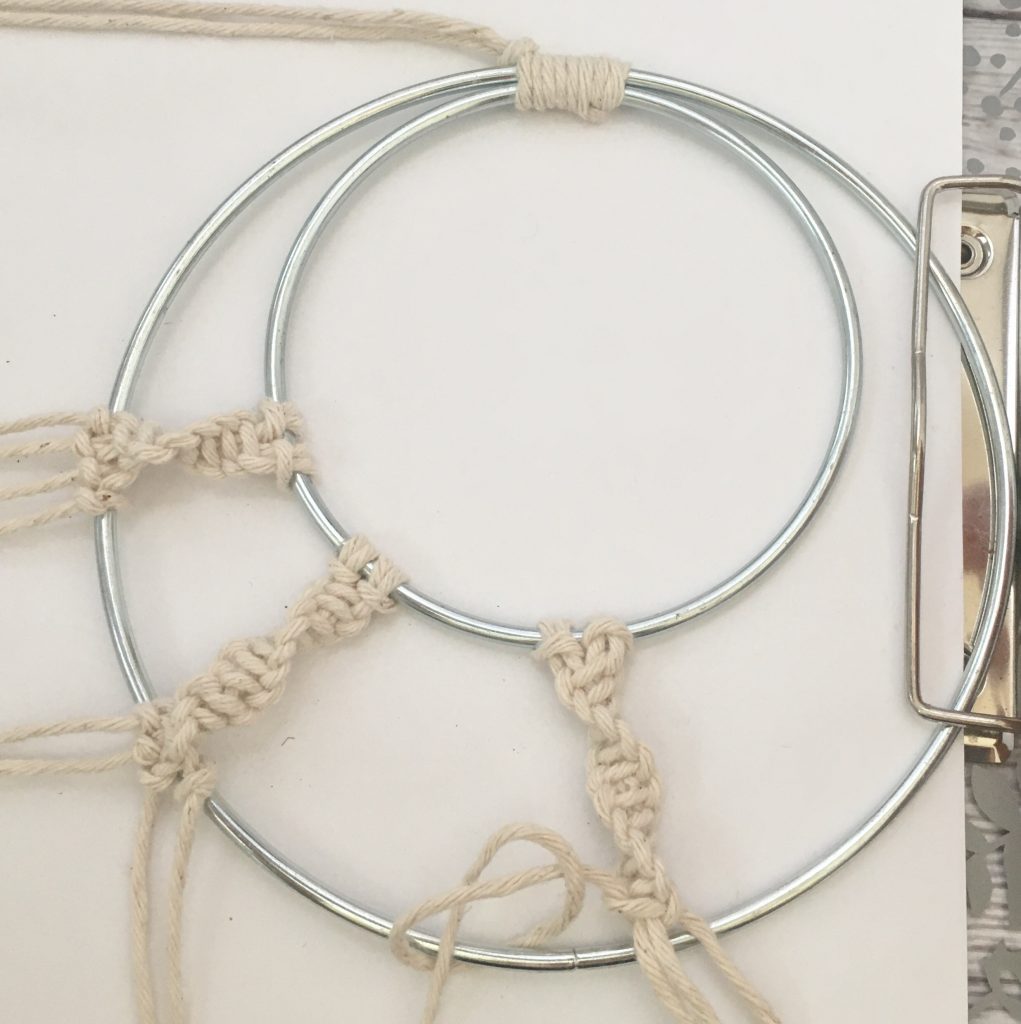
Then just pull it tight and repeat until you reach the other side/ the large metal ring. The knots will want to twist around at some point. Just try and keep them straight. Once you are done with all your knots for that section, help it turn around and secure all 4 strands on the large circle.
To do that, wrap the first string around the large ring. Come back on the inside and pull the string through the loop back to front. Do that to all 4 strings and pull tight.
Do that for all 7 sections of the macrame crescent moon. Use the lengths of strings as followed starting from the bottom:
- 1st section: 2 strings 40″ each
- 2nd section: 2 strings 40″ each
- 3rd section: 2 strings 40″ each
- 4th section: 2 strings 60″ each
- 5th section: 2 strings 20″ each
- 6th section: 2 strings 60″ each
- 7th section: 2 strings 30″ each
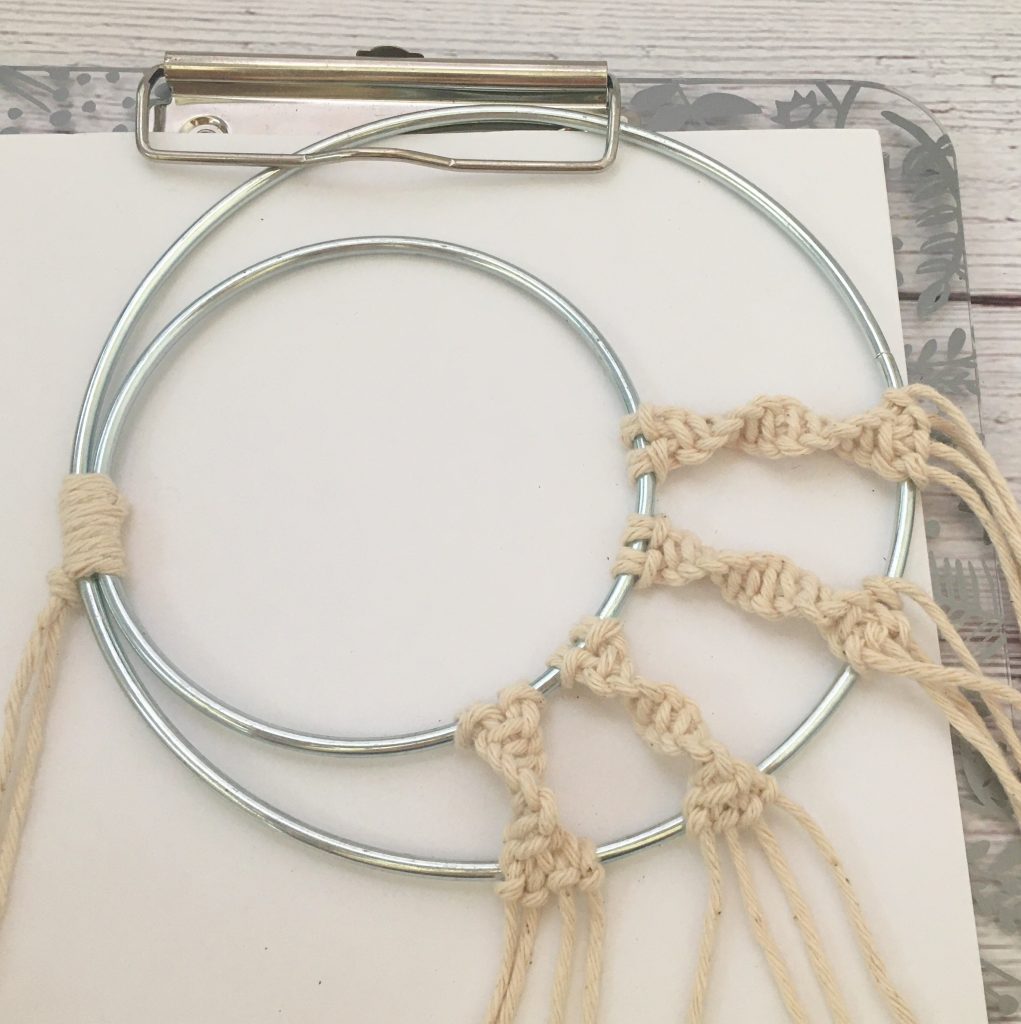
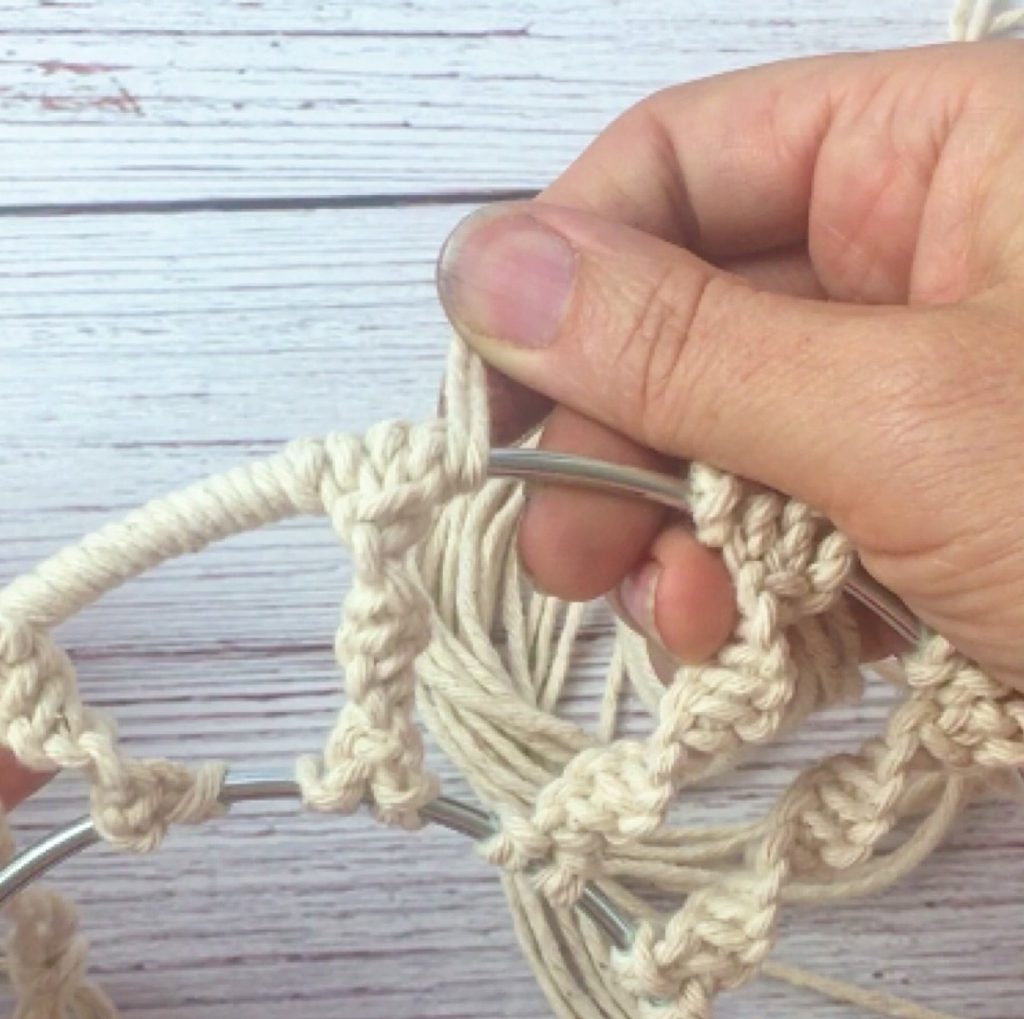
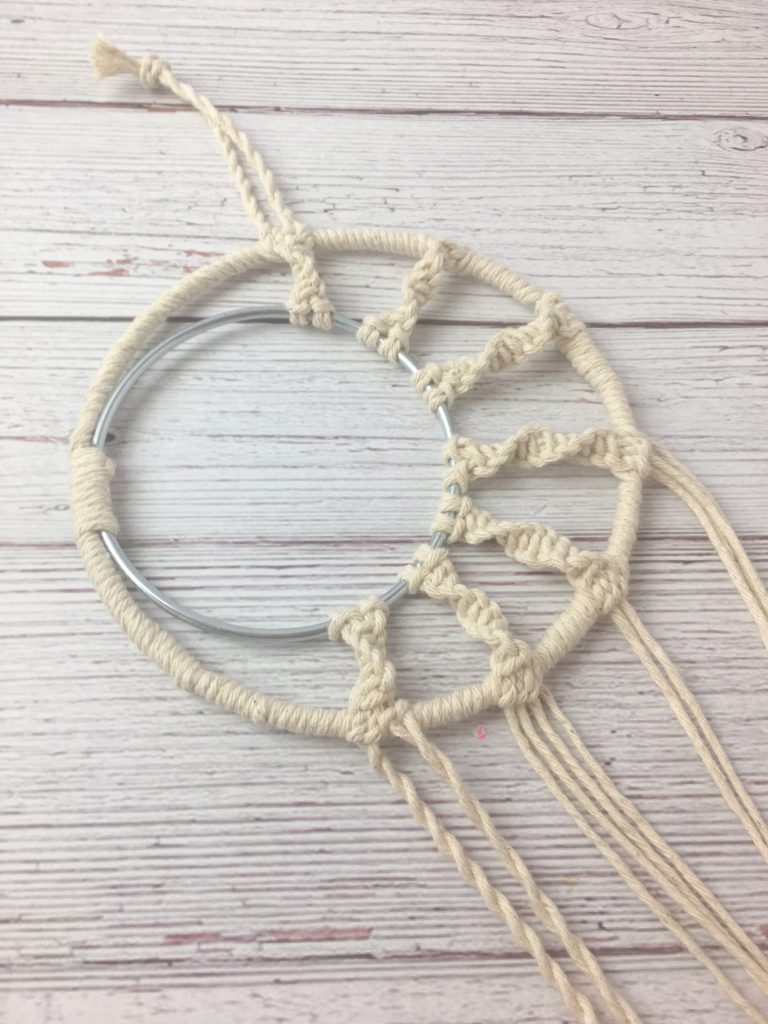
Once you competed all 7 sections, it is time to wrap the outer large metal ring with some of the ends. The strings of the 7th section, the one on top will become the loop to hang the dream catcher from. We are going to use the section to the right, the 6th section to wrap the metal with. Use 2 of the strings to wrap to the left and 2 to the right.
Wrapping the metal rings with Macrame cord
When going to the left with the 2 strings, undo the first knot we did to keep the two metal rings together and just wrap right over the 2 rings a few times. Then keep going wrapping the outside ring. Tape it to the metal ring once you almost reach the first section.
Then go back to the top and wrap the other 2 string to the right side. When you reach the 5th section, the one with the short strings, just wrap over them a few time and cut the rest off. Then keep wrapping so they can’t be seen.
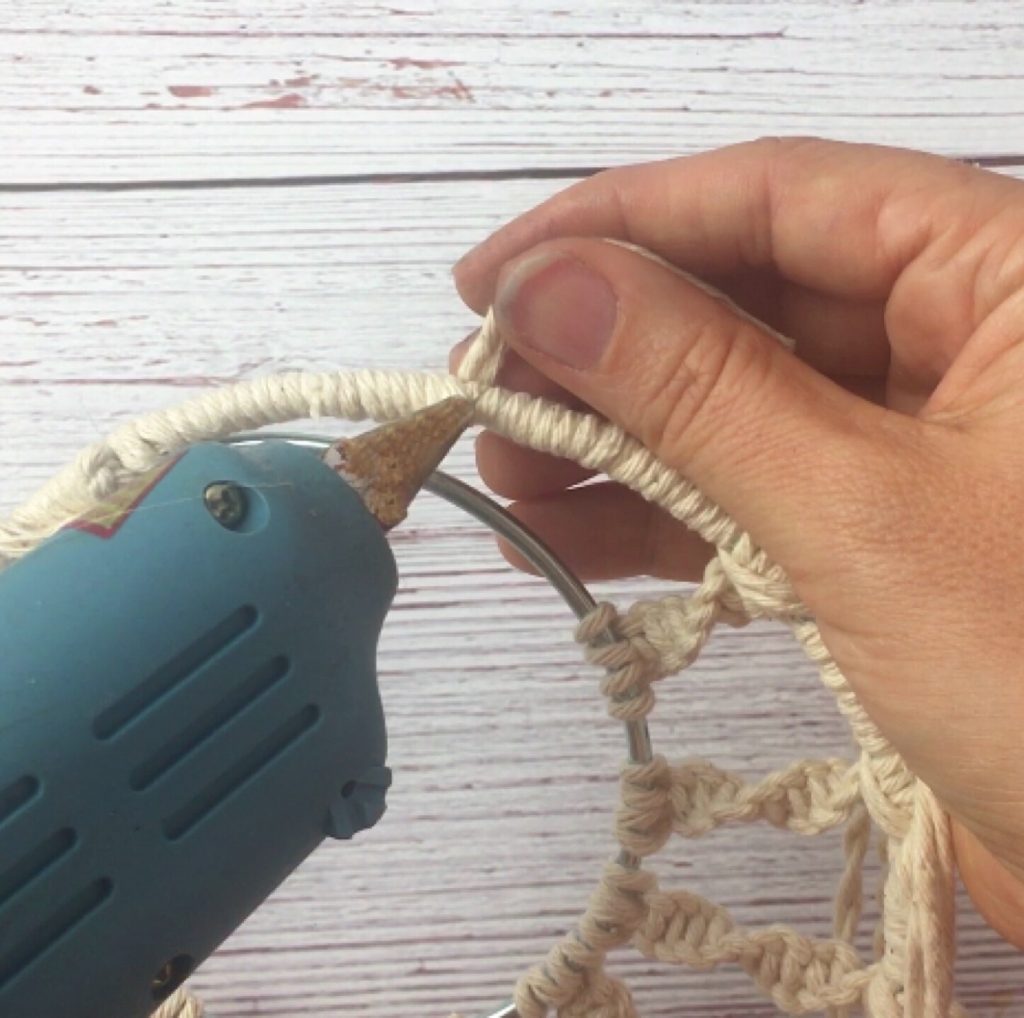
Keep wrapping around until you meet the other side that is already wrapped. Finally, use a hot glue gun to glue the ends tightly and it looks like a continues strand. It might be easier to see that in my video but it is shown in the last photo above.
Twisting the long Macrame Strands
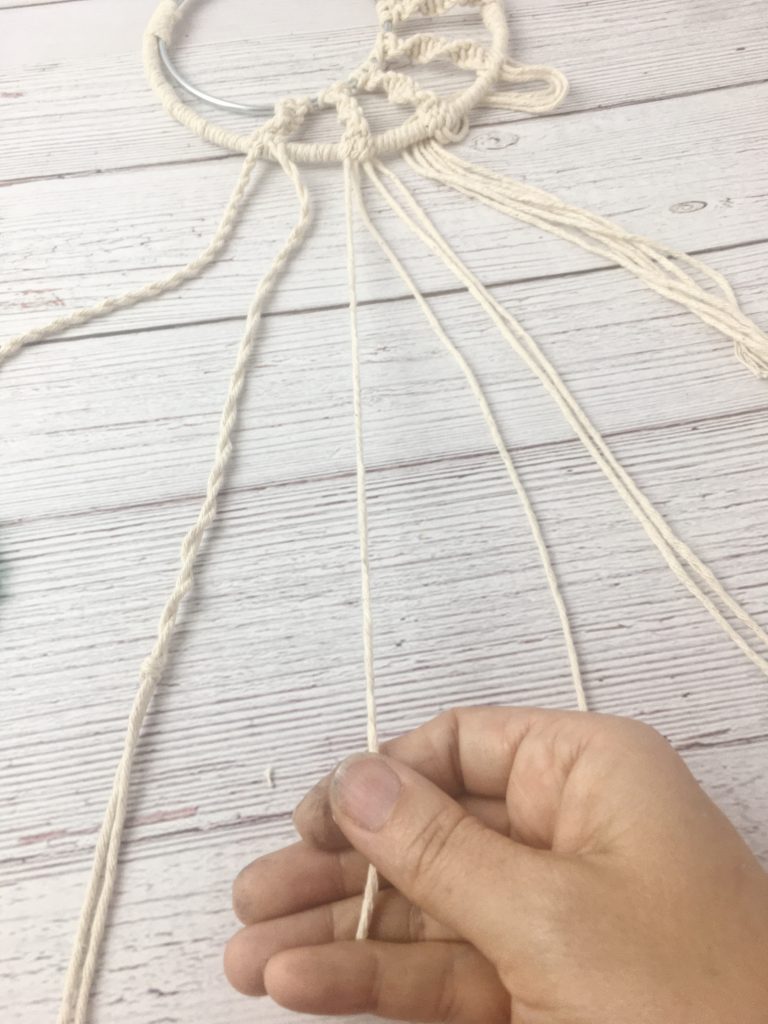
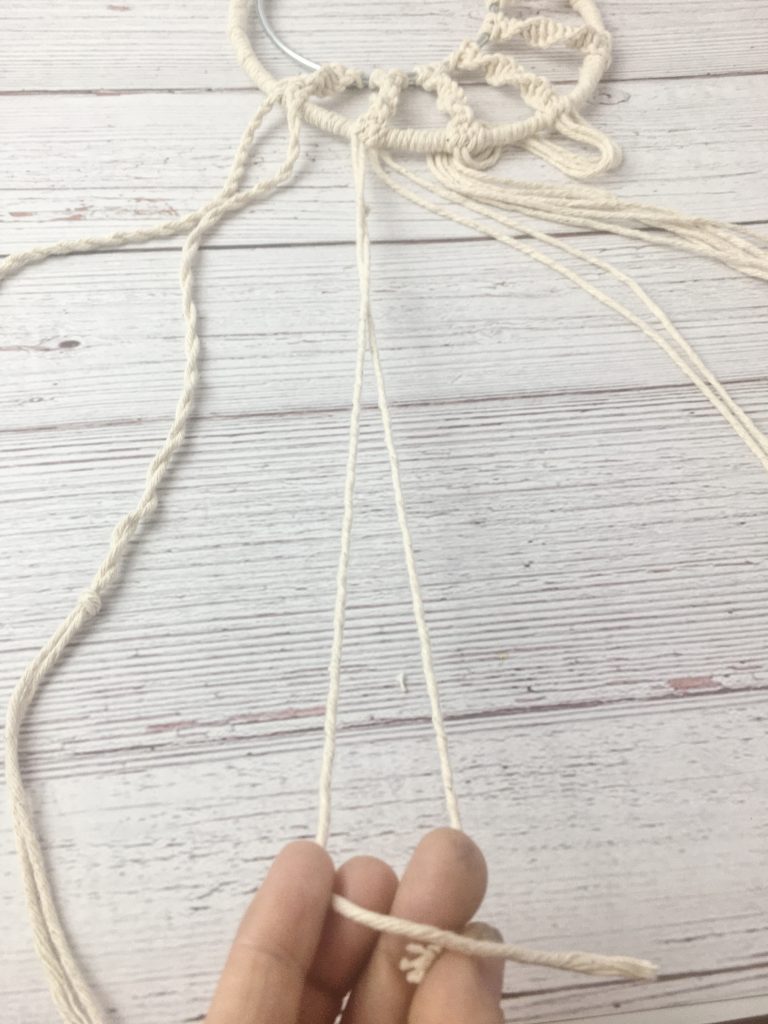
Now it’s time to twist the macrame cord and add feathers to the ends. I twisted 2 strands of macrame cord together for each feather. To do that, you need to twist both strands to the right until they want to just twist onto themselves. Then twist them together in the opposite direction. Finally, just put a knot at the height you would like your feather to hang. I did a different height for each strand. Then place another knot about 3″ below. The feather will sit in between the 2 knots.
For the top, twist the strands to about 3″ and place a knot at the end. This forms the loop to hand your Macrame Dream Catcher from.
How to Make Macrame Feathers
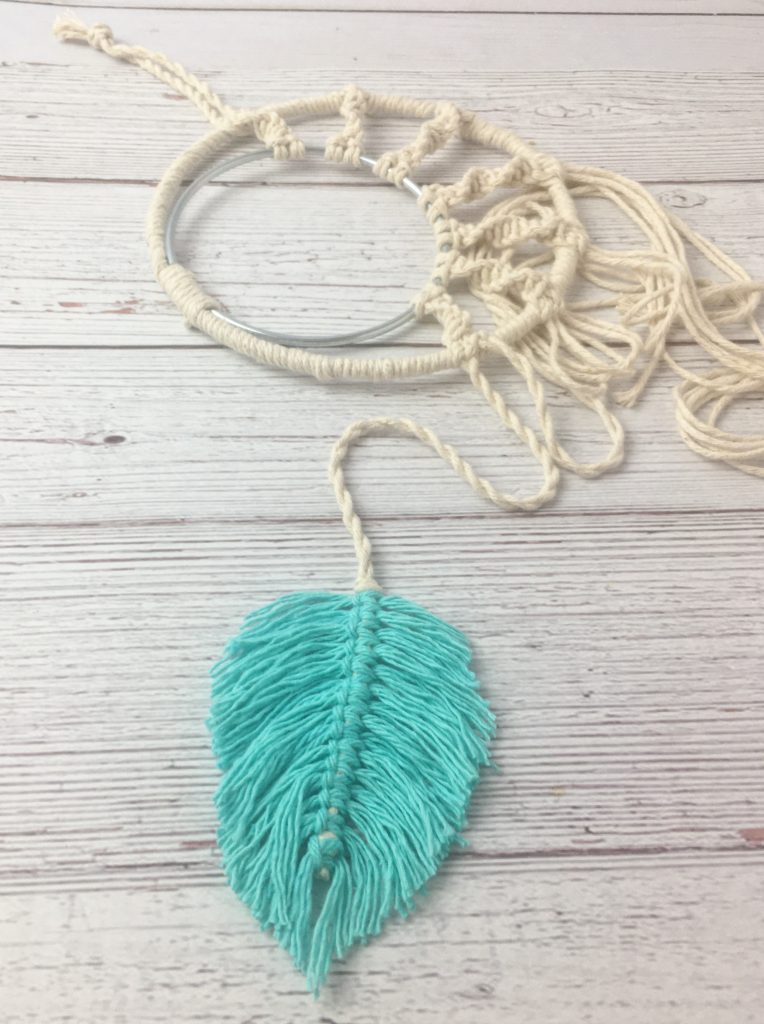
The macrame feathers hang from the remaining 7 twisted strands. You create them in between the 2 knots that are about 3″ apart. This will give you space for 15 rows.
- Each feather needs 30 strings at 5″ long
So for the 7 feathers we need a lot of short strings! But hey, it’s the process that counts!
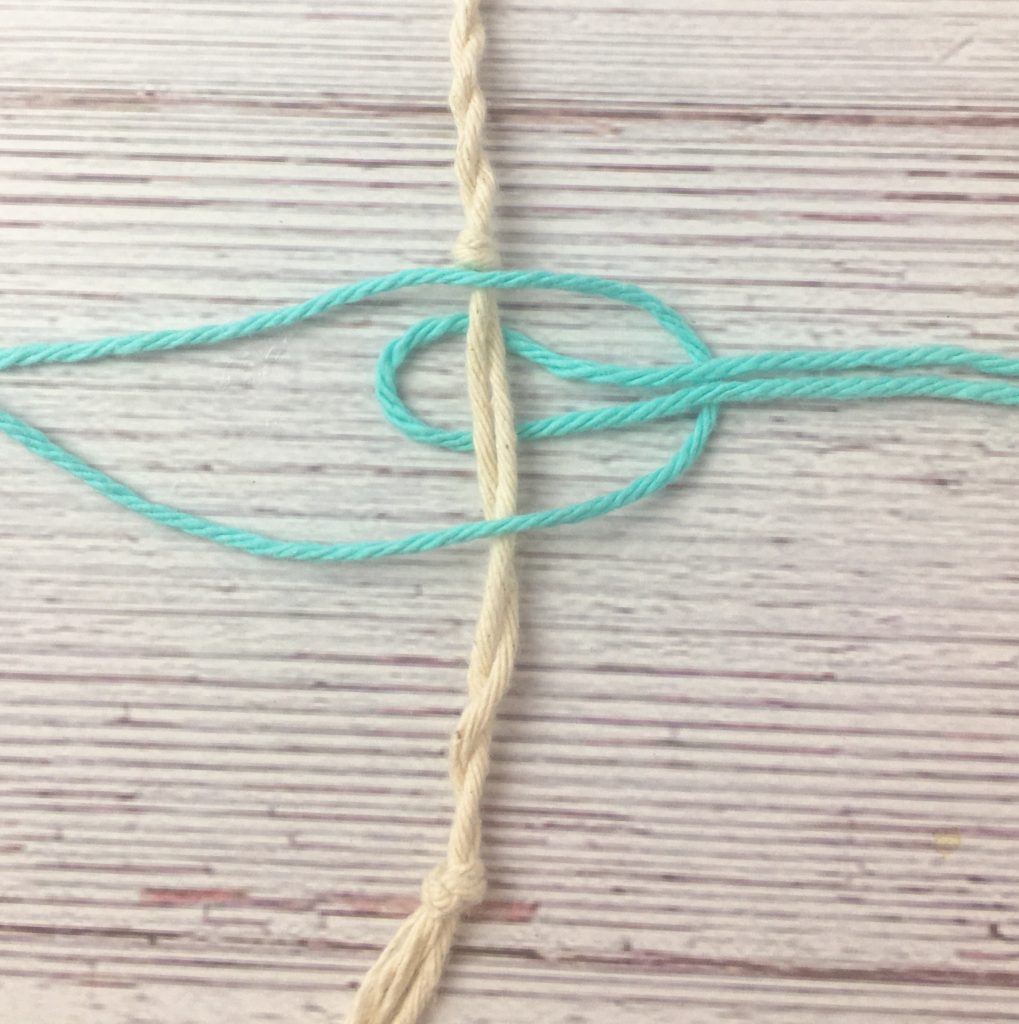
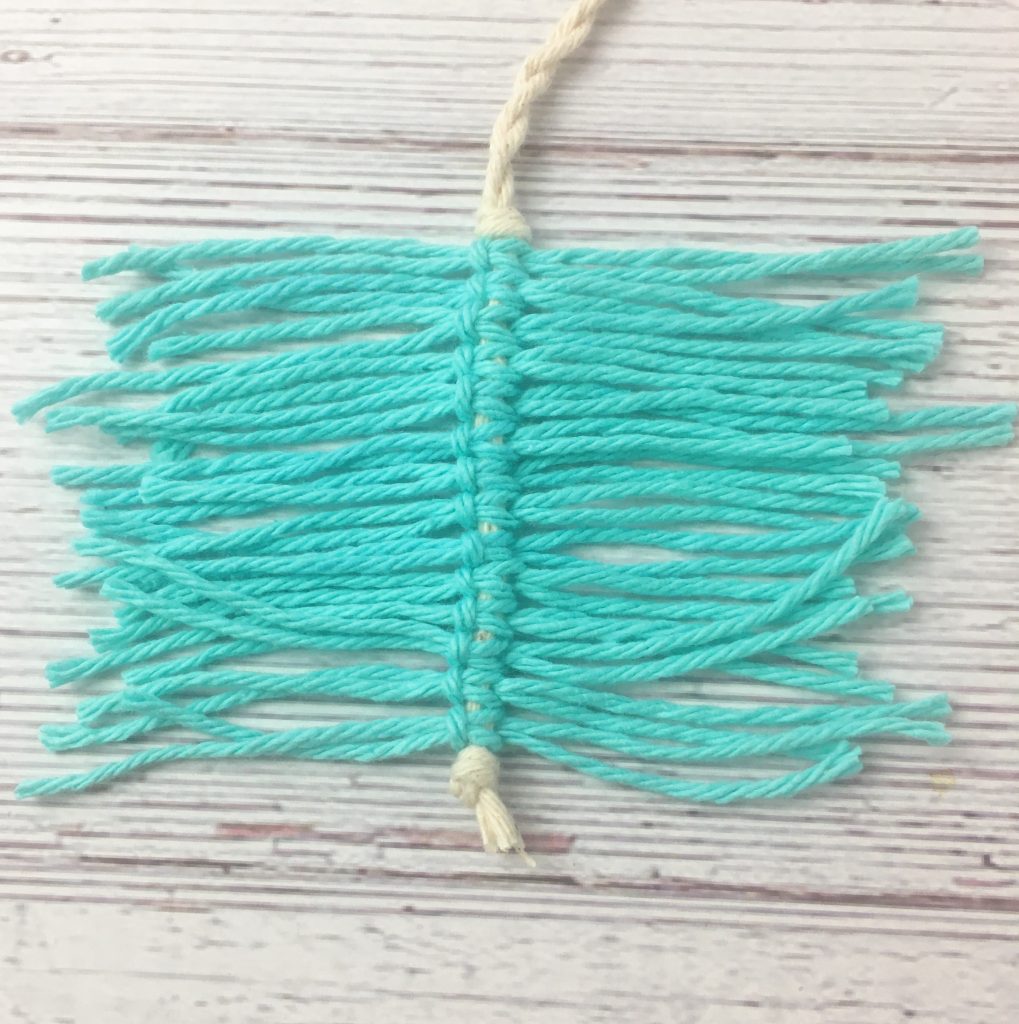
- Fold a string in half and place it under the center string with the loop on the left
- Take another string folded in half and place the loop under the ends of the previous string on the right side
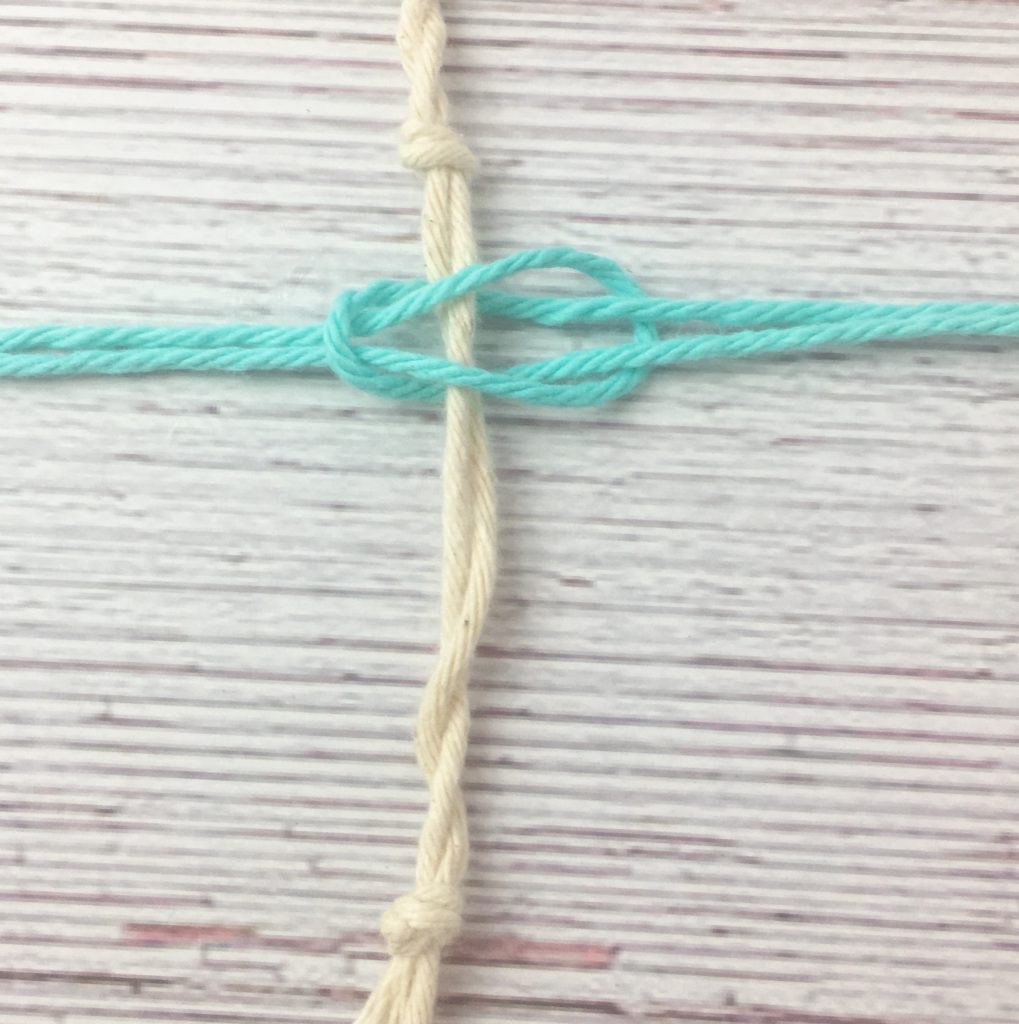
- Now place the ends of the second string inside the loop of the first string on the left side
- Now pull both sides tight and repeat until you have the length of the feather
Put the last 2 strings on the bottom knot to cover it up.
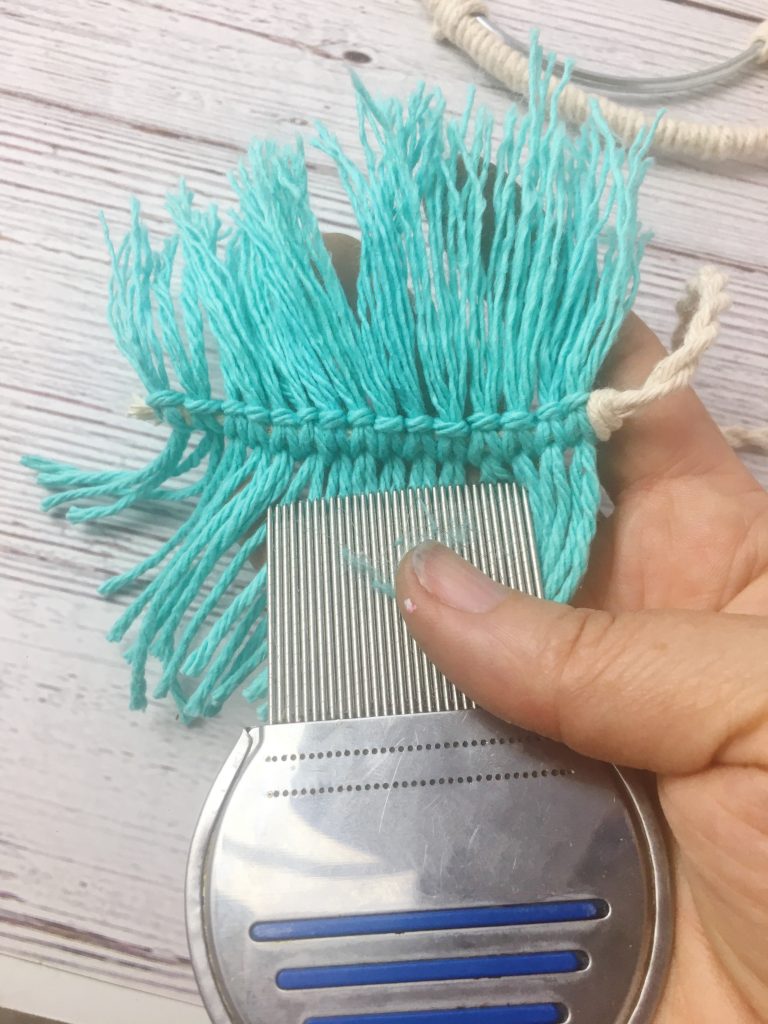
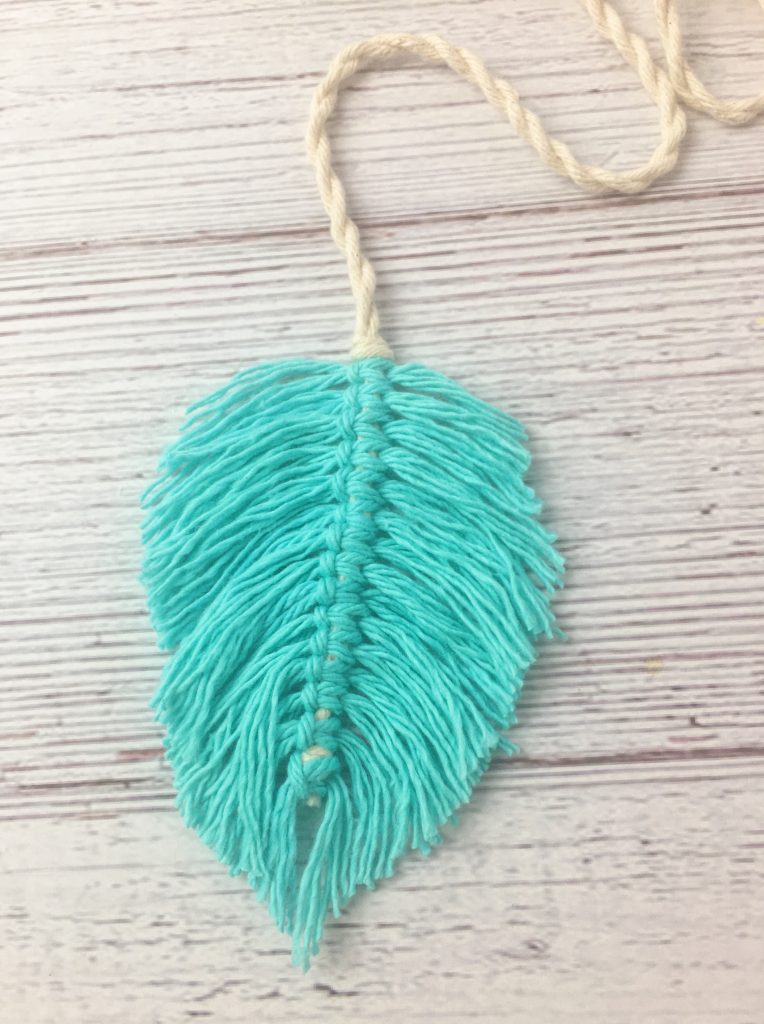
Now it’s time to comb the macrame feather so the individual strands of the yarn separate and become feather like. You can use a dog grooming comb a fine tooth comb or a pick. Or just separate them with your fingers if you don’t have any of those around.
And finally, cut the macrame feathers into this beautiful feather shape! Now you will need to spray the feathers with fabric stiffener or they just turn limp as soon as you pick it up.
And the final step is to wrap the small inner metal ring with the macrame cord. Cut about 60″ and start where the two rings meet. You can use glue to attach it in the back and then keep wrapping around just like you did for the larger metal ring. Once you get to the other side, glue the end behind the double section and you are done!
I hope you will enjoy this Macrame Dream Catcher Tutorial as much as I do. Comment below if you have any questions and show off your own Macrame Dream Catcher Creations here and on Instagram #kaileacrafts

