

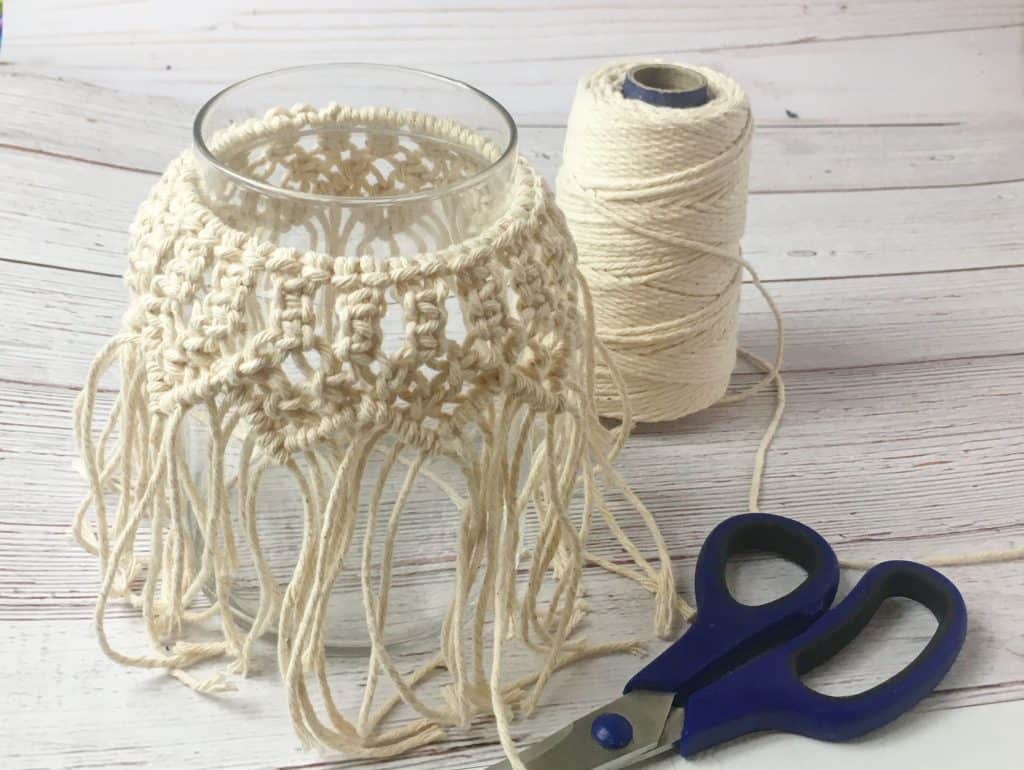
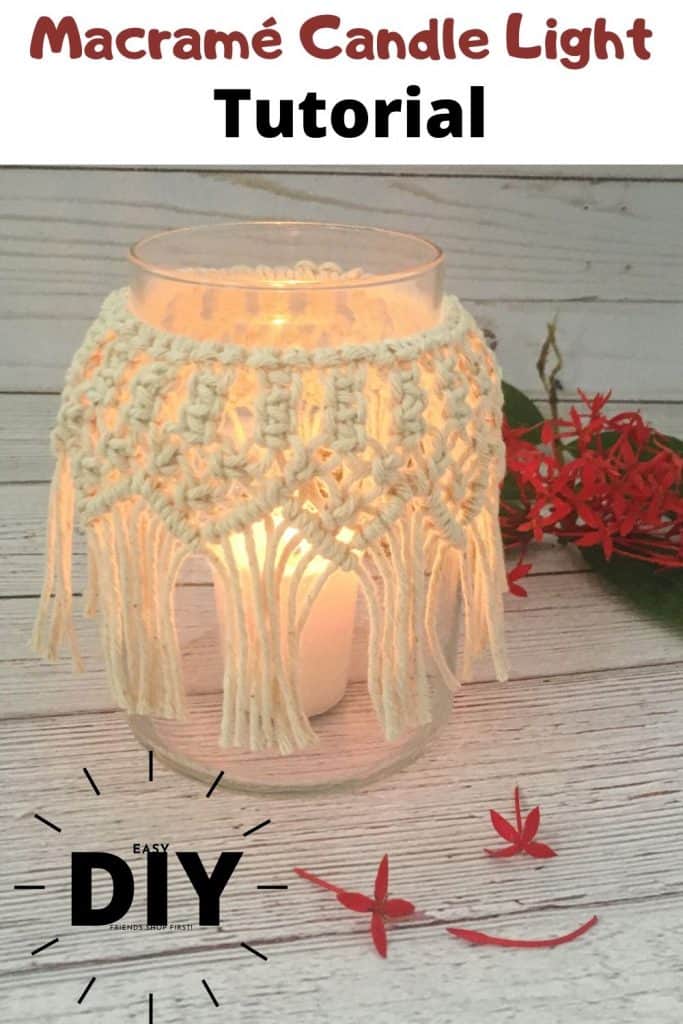
Macrame Candle Light Holder Tutorial
Ever since I learn how to make macrame pieces, I have been in love and looking for different ways to make more easy DIY Macrame decorations. When I saw this glass jar, I knew I wanted to turn it into a macrame candle holder right away.
It does look like a lot of macrame knots that you have to make to finish this macrame project, but it actually came together quite quickly! And really, I only used 3 different macrame knots to create this easy macrame candle holder.
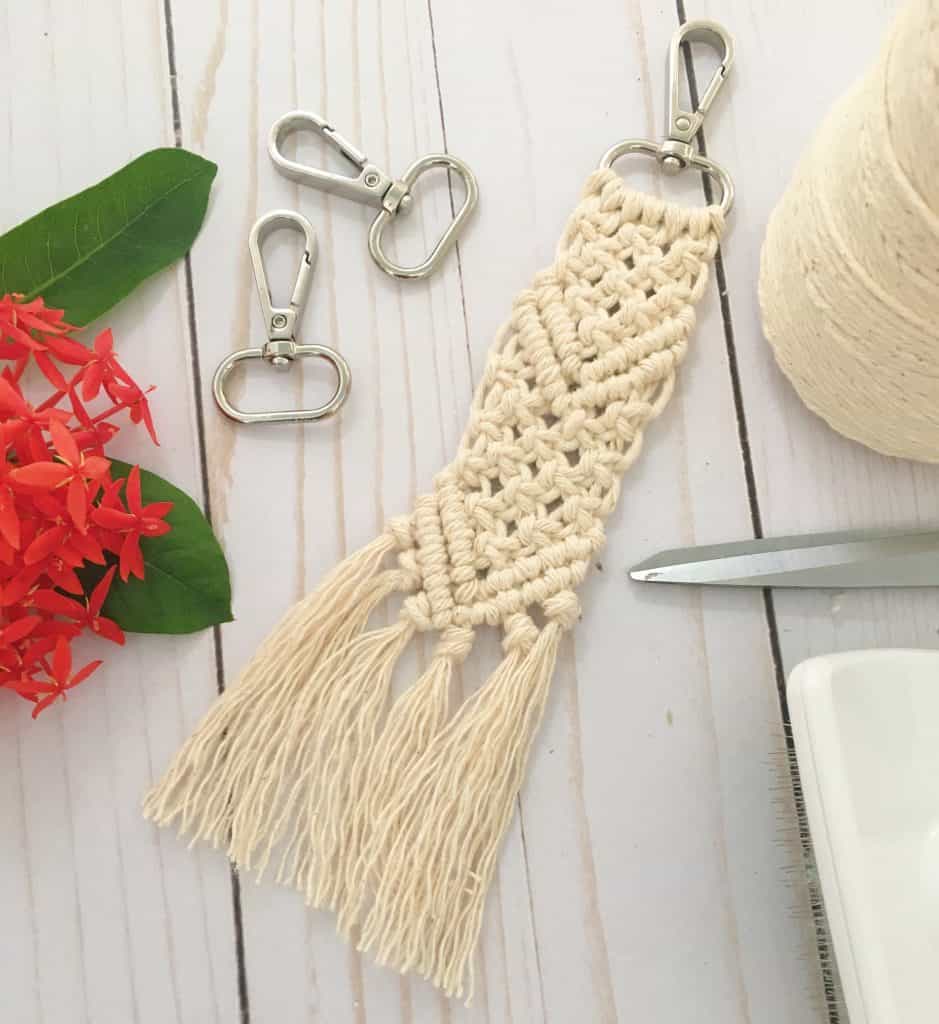
If you are looking for an even quicker macrame tutorial, try your hand on this easy DIY Macrame keychain made with the same macrame cord.
“As an Amazon Associate I earn from qualifying purchases. If you make a purchase through my link, I will make a small commission with no extra cost to you. “
Candle Light Materials:
- Macrame Cotton Cord
- Glass Jar
- Scissors
Looking for more macrame DIY tutorials?
You can also make some macrame feather keychains by following along with my Macrame Feather earring tutorial.
Or try my Macrame Necklace tutorial. They all make beautiful Christmas Stocking stuffers!
How To make a Macrame Light Holder
The pattern for this macrame candle jar has a repeat of 4 double strands.
So each 4 double strands make up one pointy part of the design. So if you are using a different size jar, you can calculate your cords based on this repeat of 4 double strands.
For this jar, you will make 12 pointed designs, so you need 48 double strands. But then take 1 away since the strand that goes around the rim of the jar and holds all the other strings will be used as the last double strand.
And try to make the strands at least twice as long as the jar. So for this jar we need them 12″ long.
- First you need to cut 47 pieces that are each 24’long.
- 1 piece 34’long.
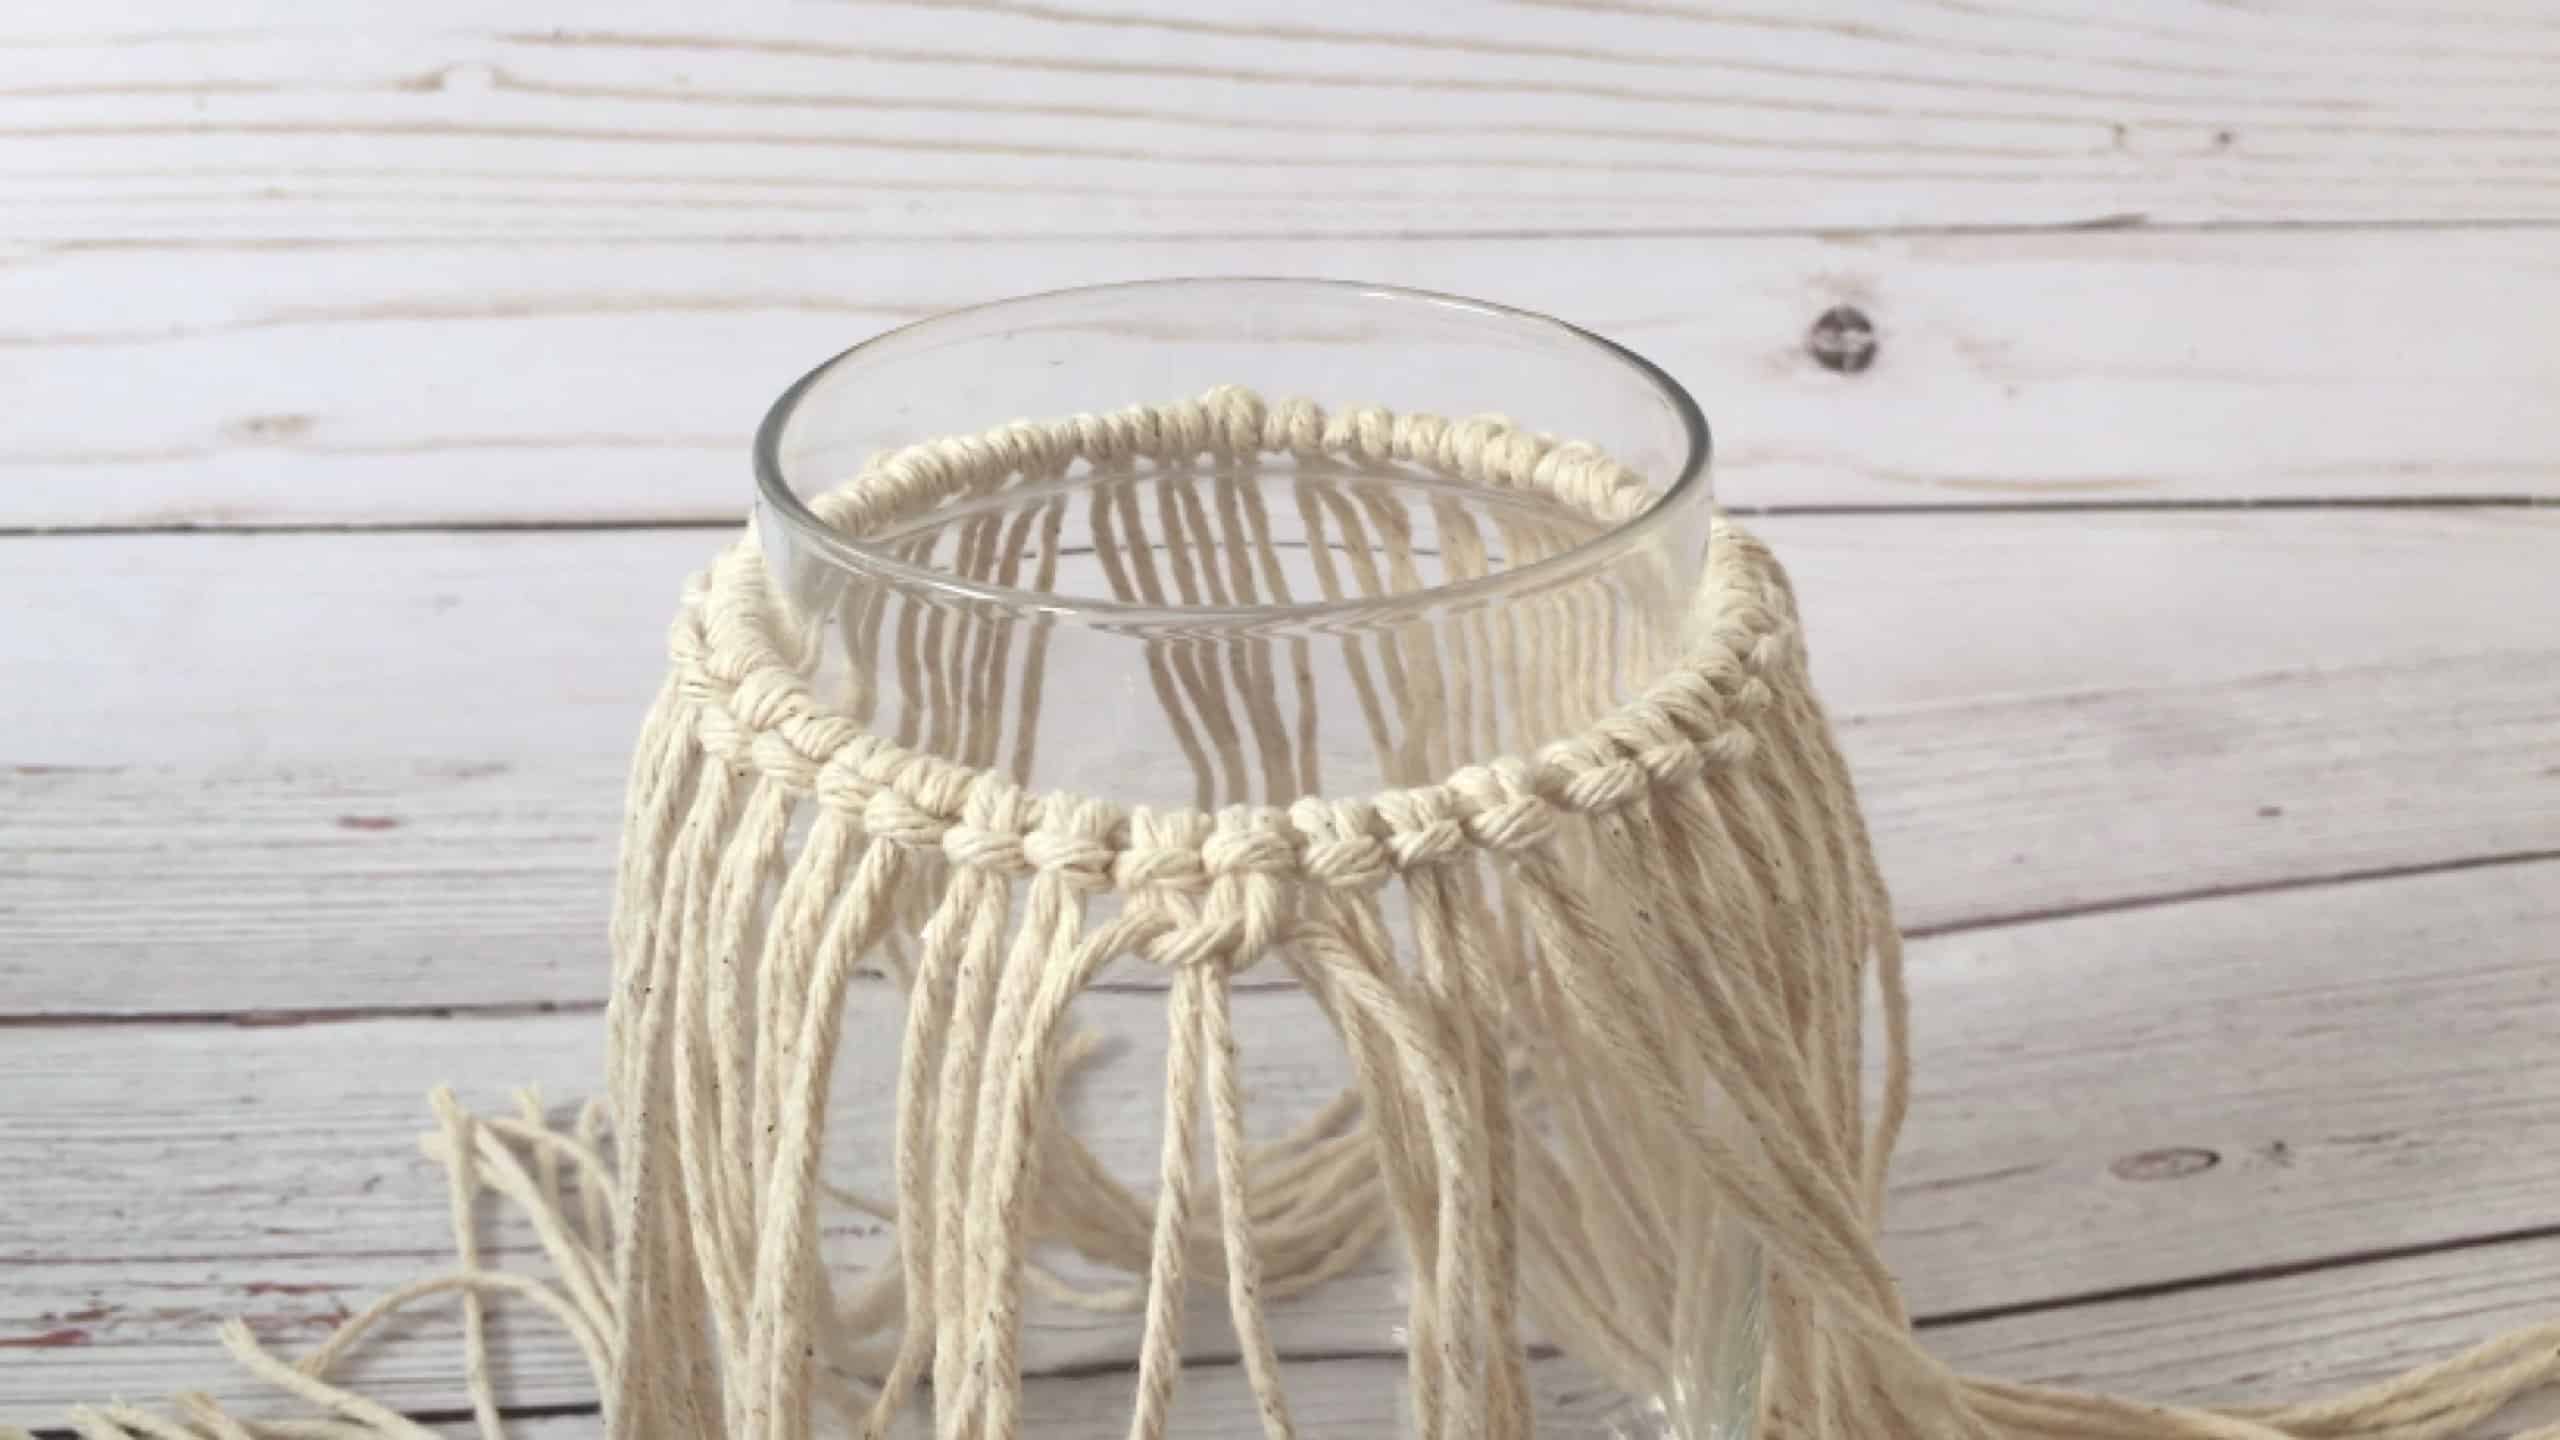
Then fold each piece in half and attach it to the one longer piece with a Larkshead knot.
Once you attached them all to the longs string, attach the string to the brim of the glass jar with a regular knot. The ends of the long string will be used as the last pair of regular strings.
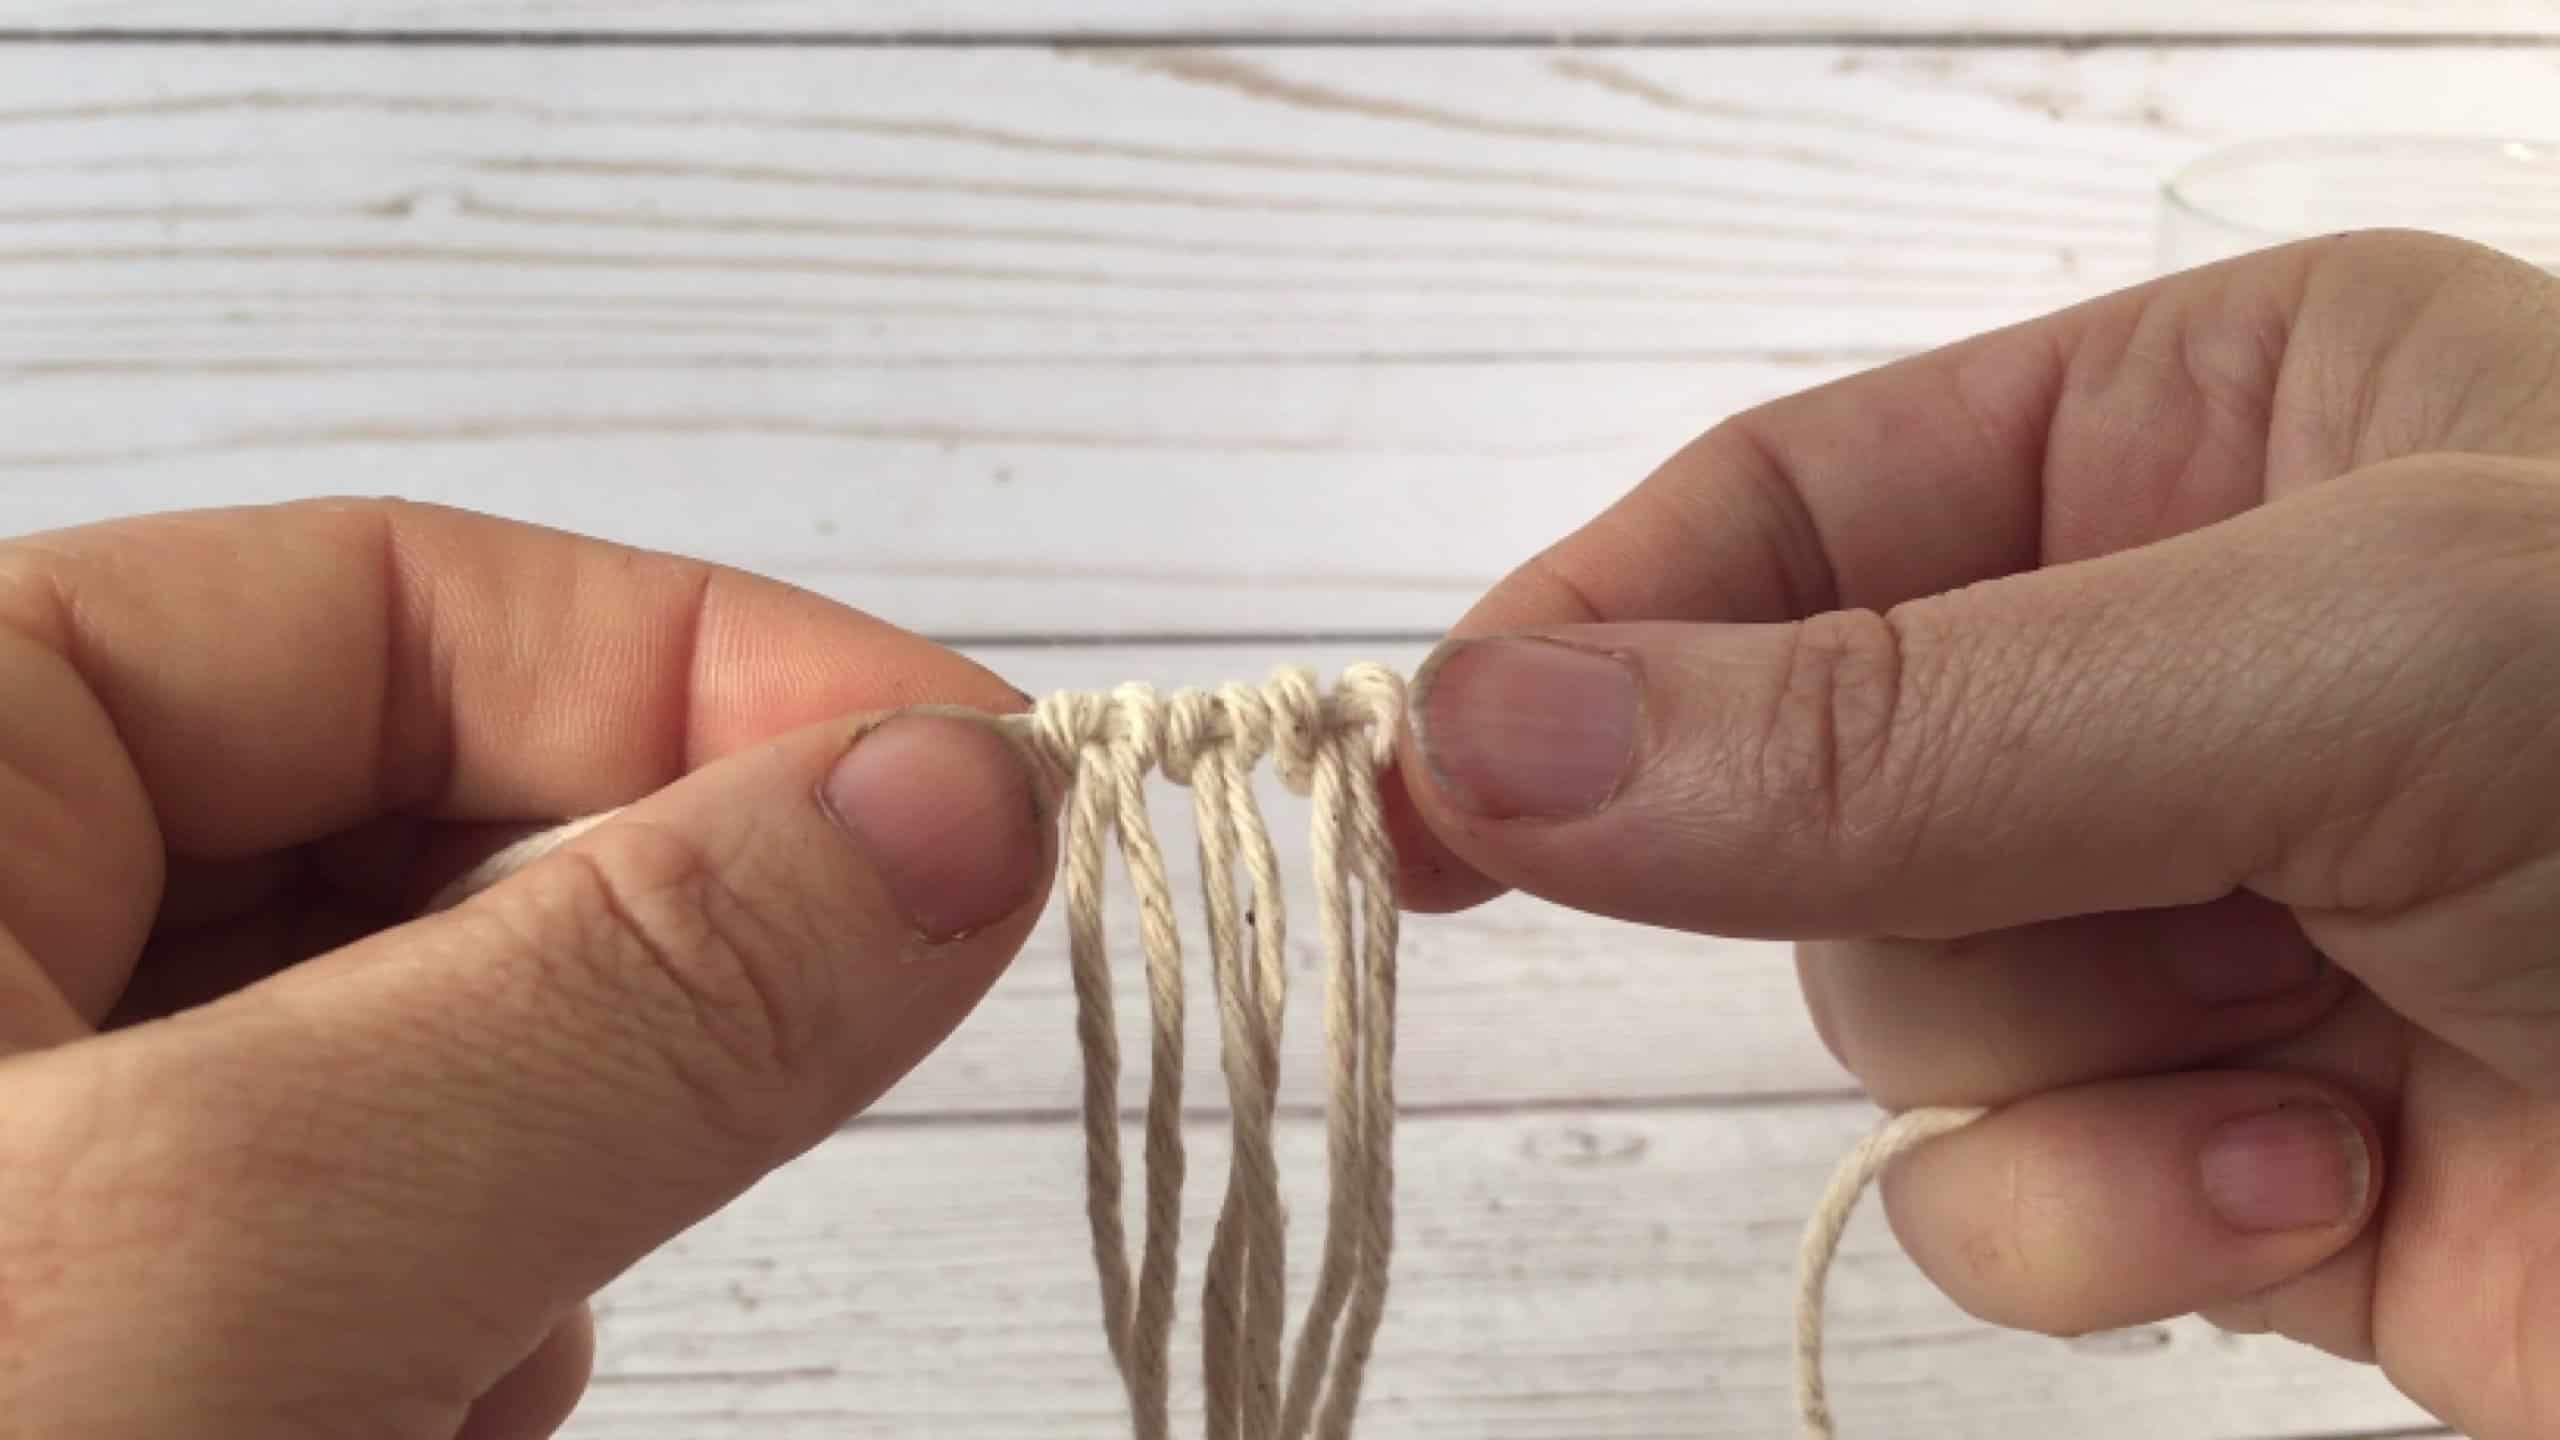
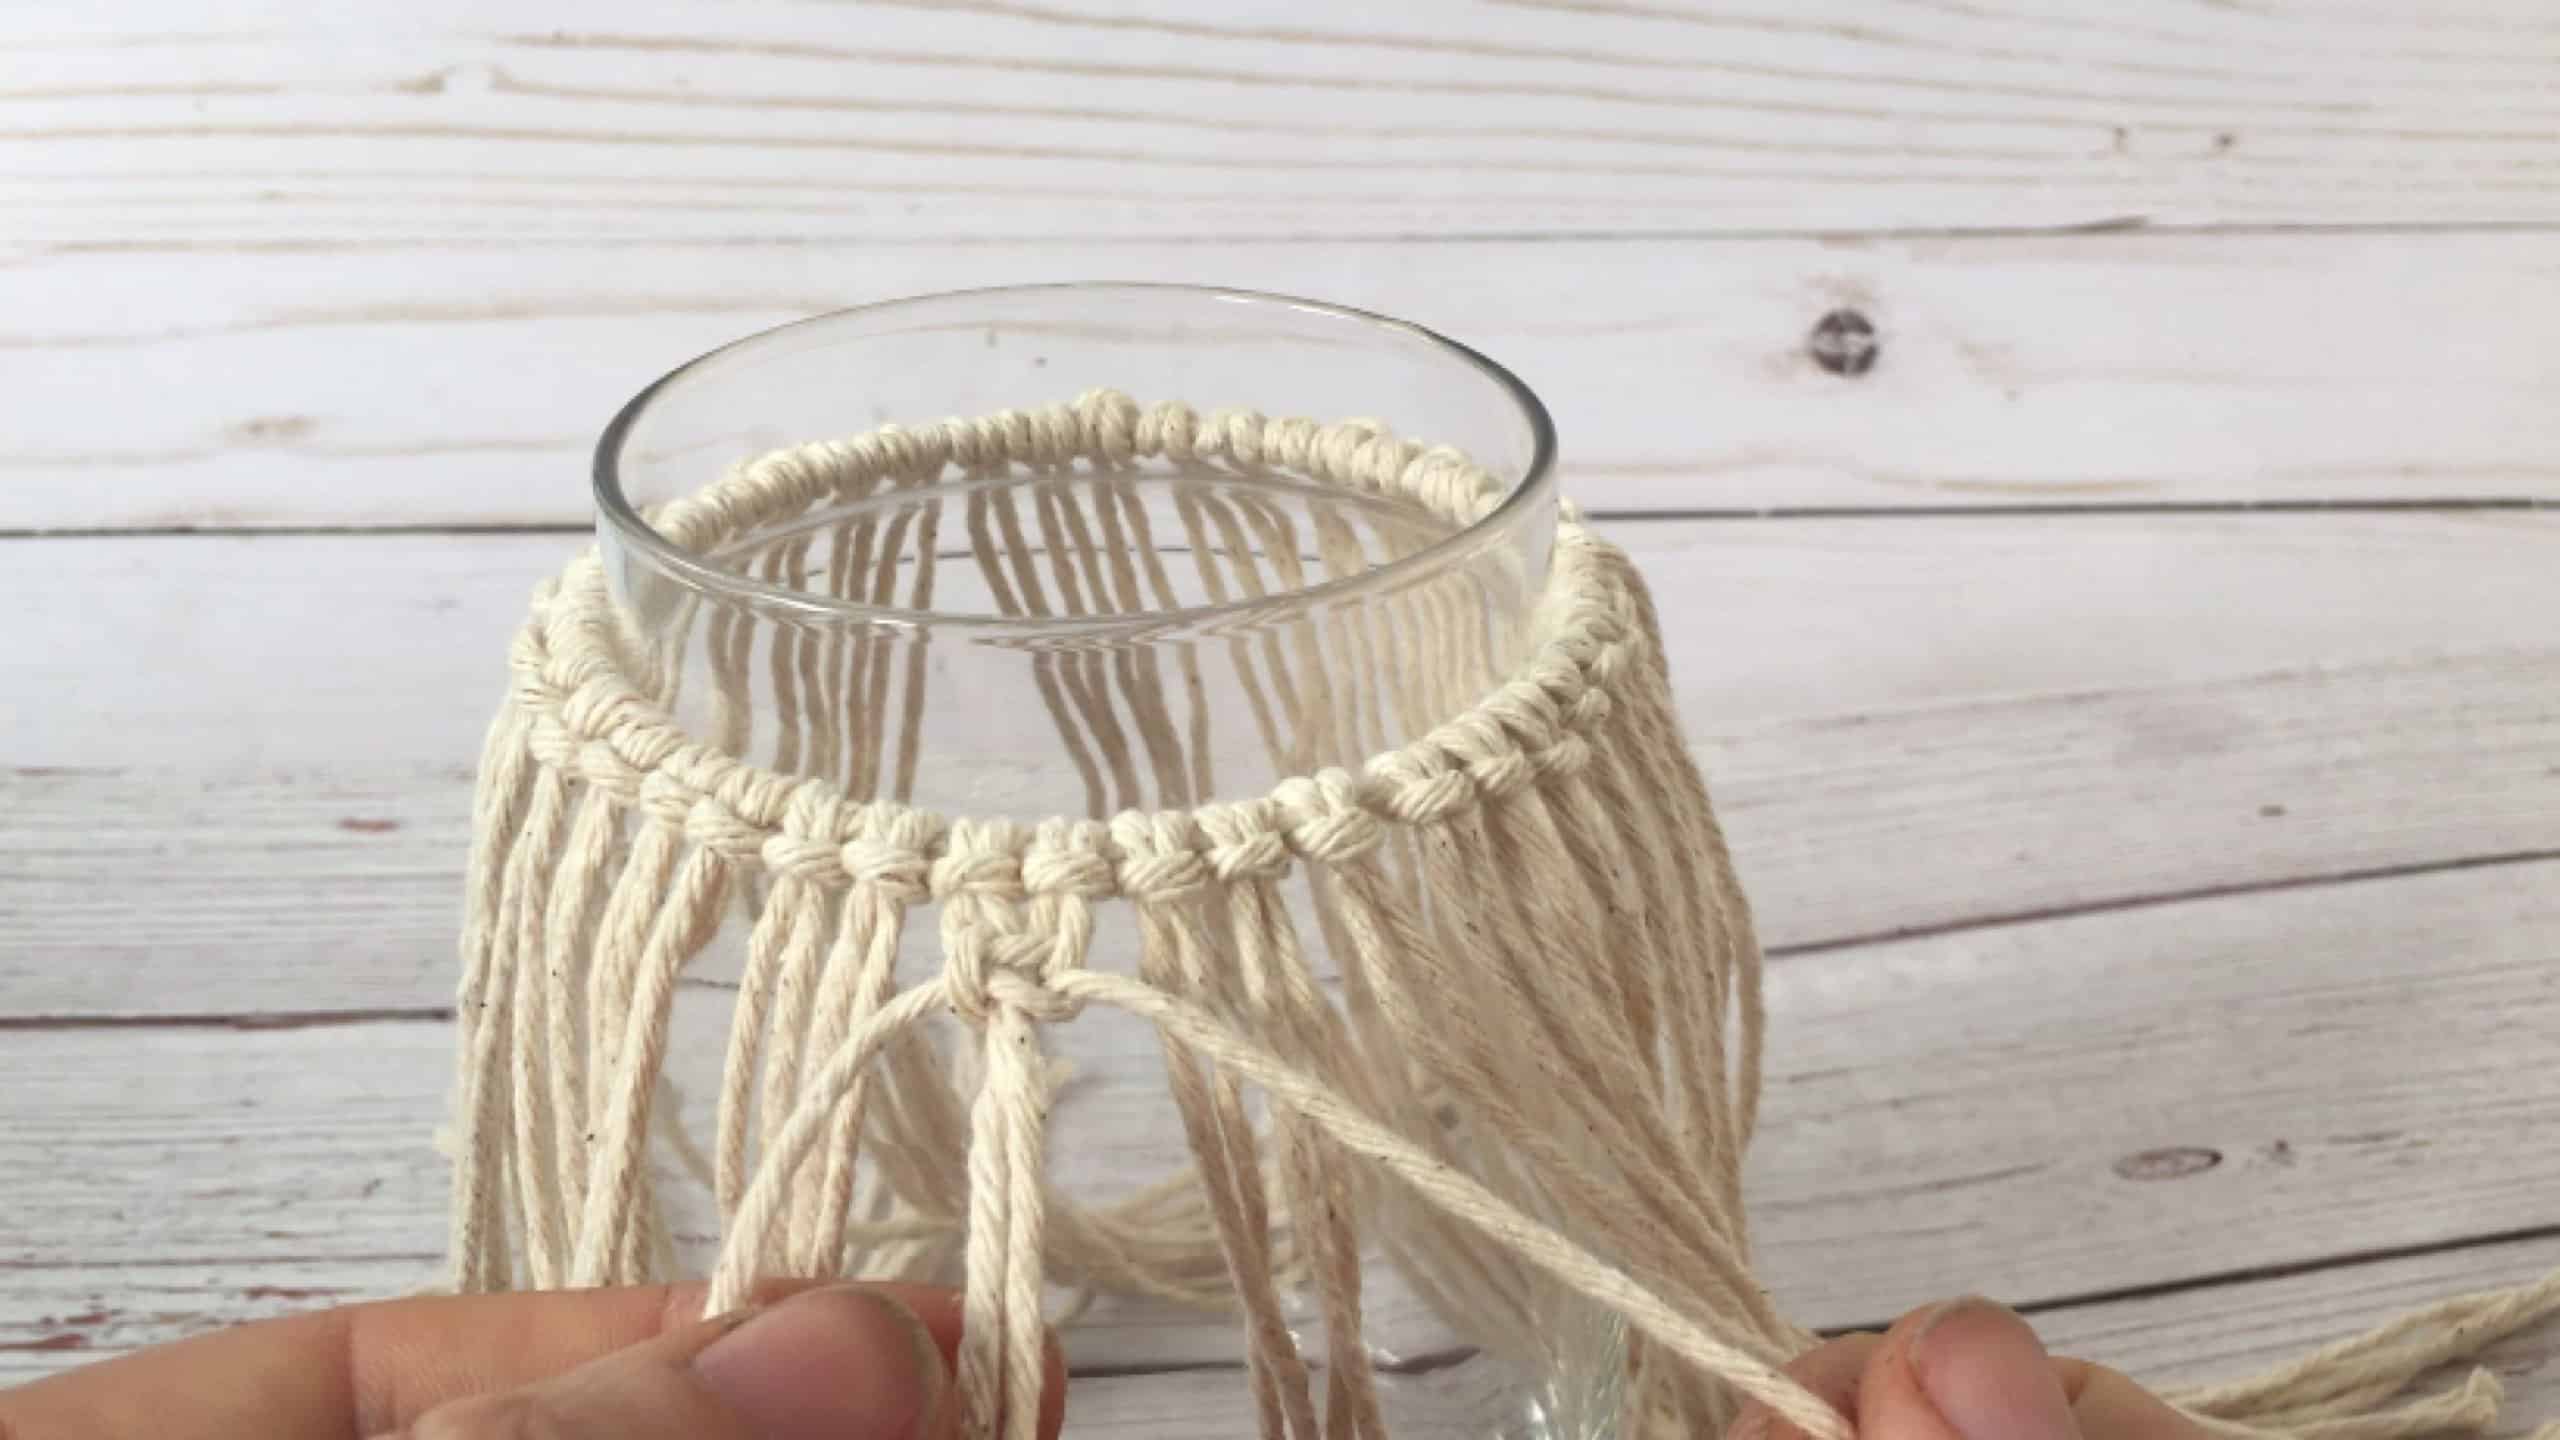
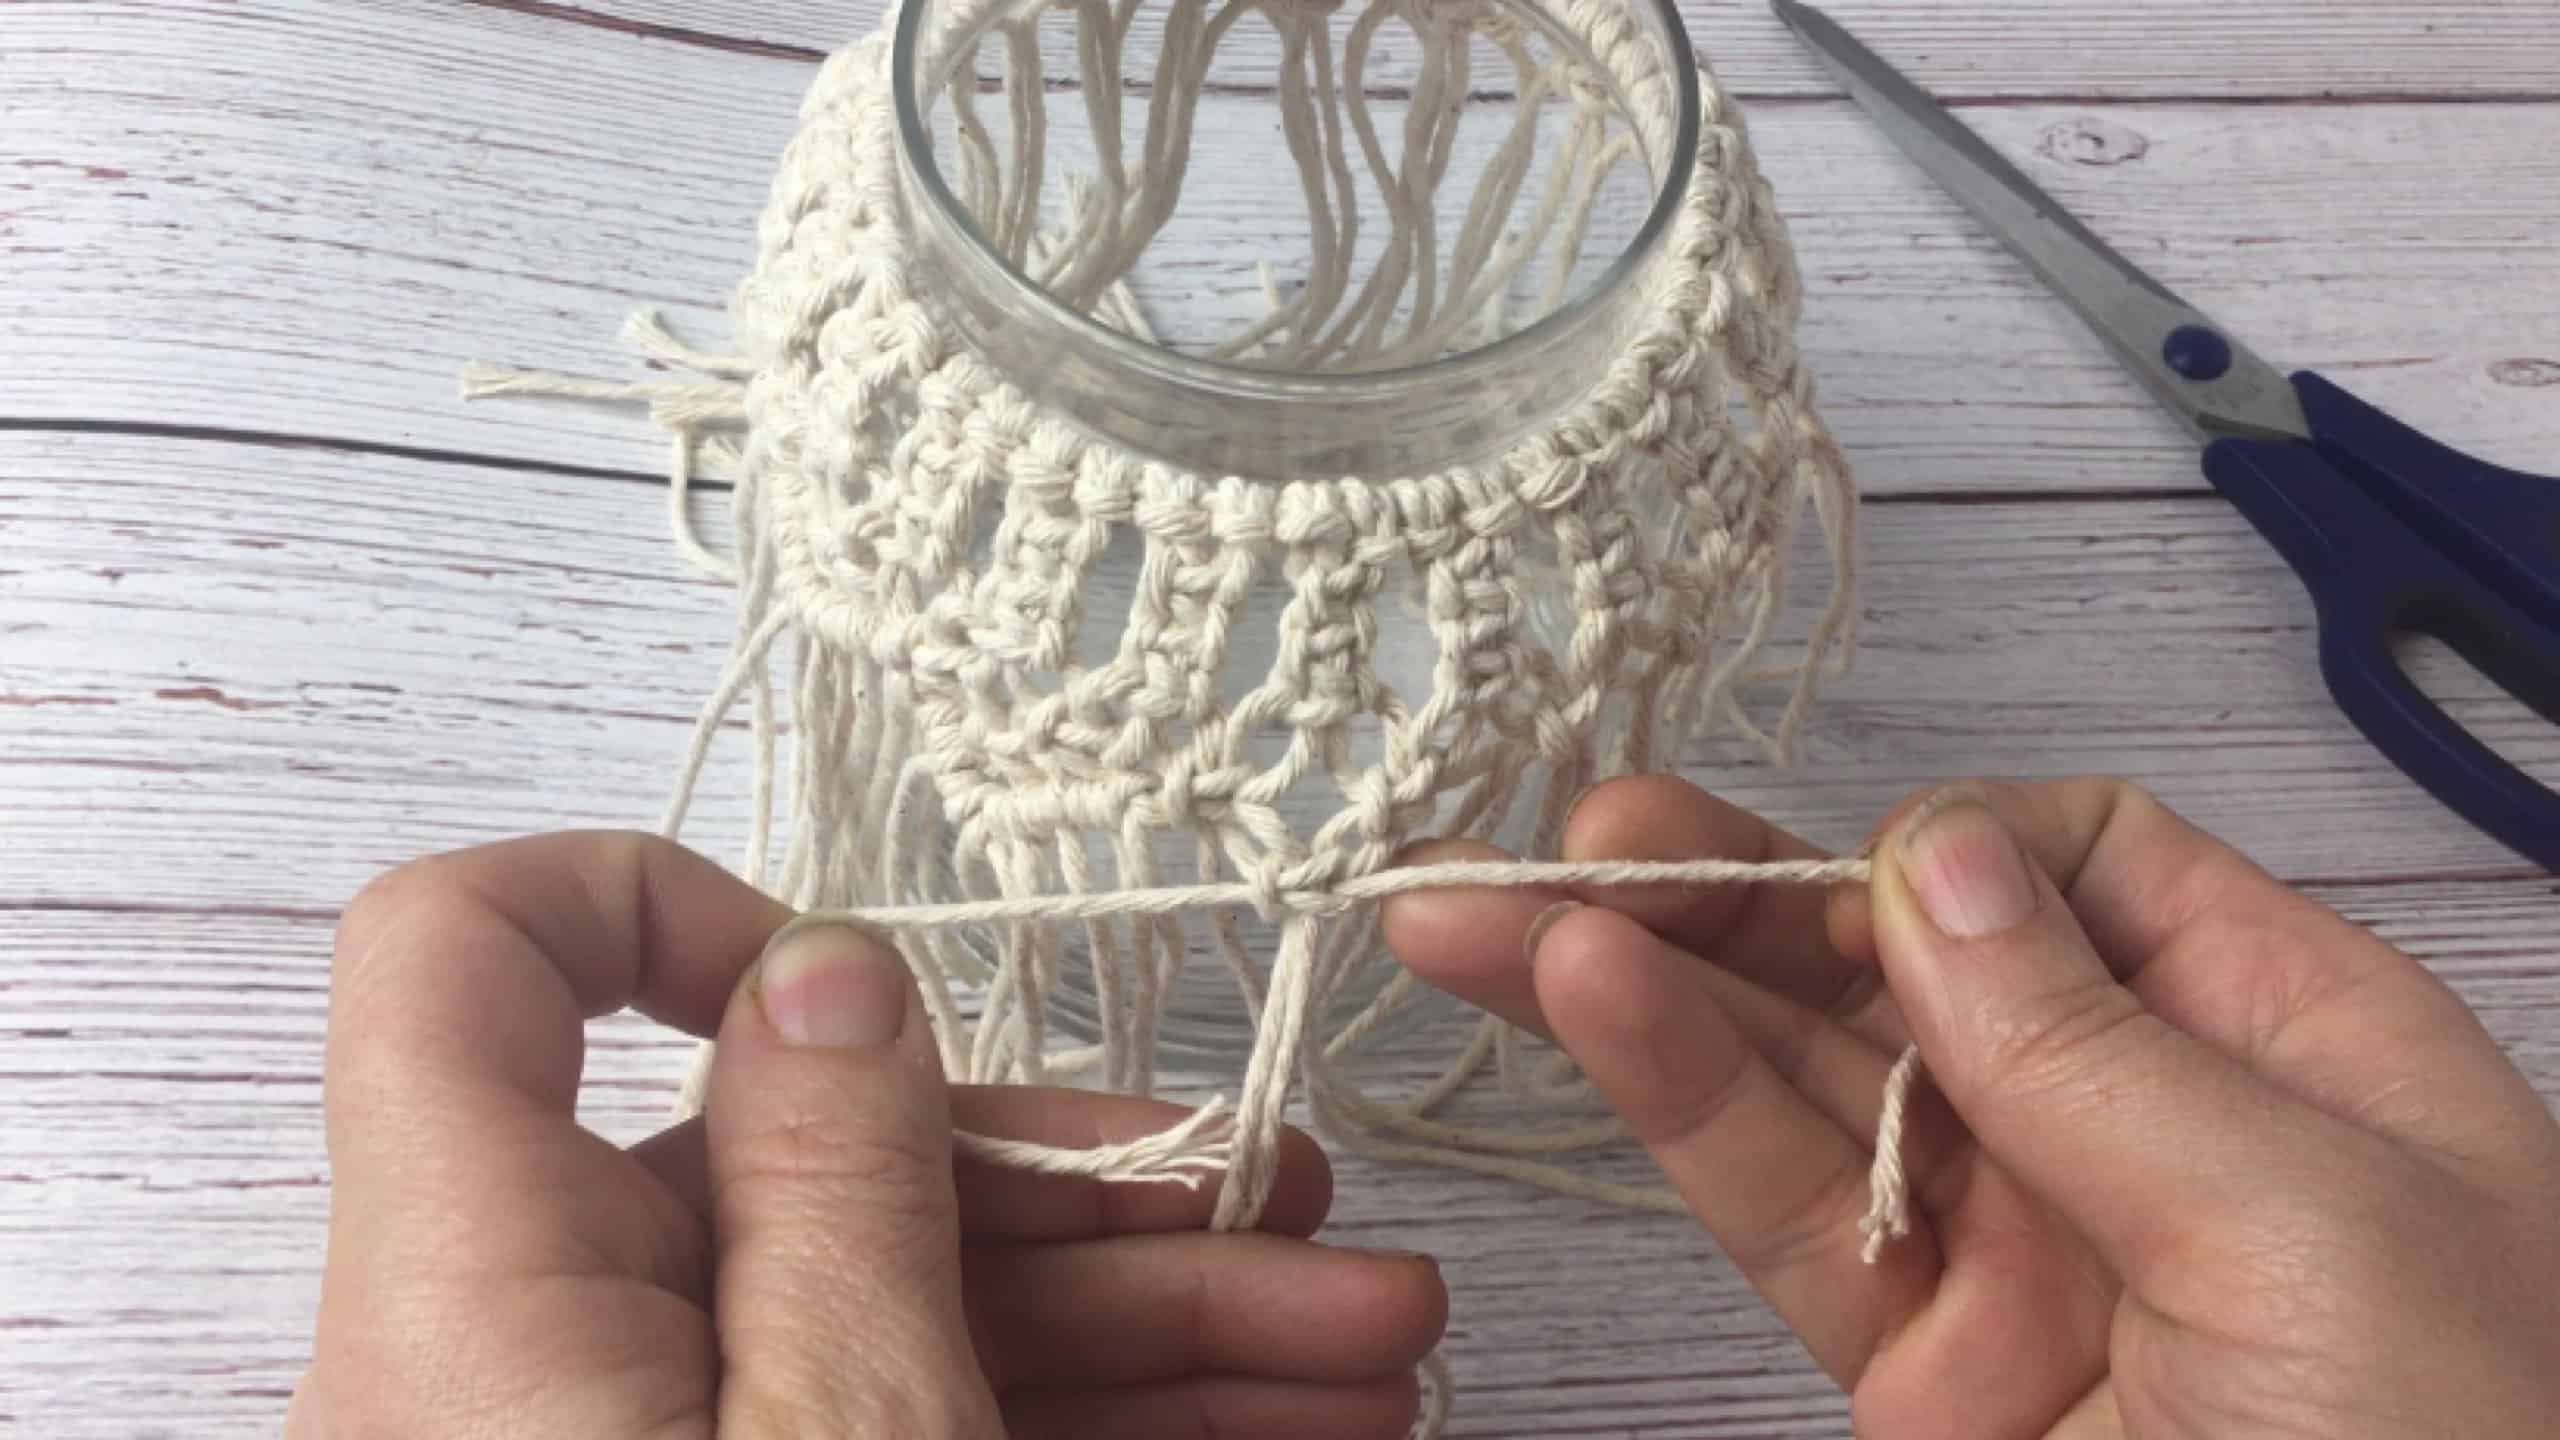
Select 2 Larkhead knots so you have 4 strands. Use the middle 2 strands as centers and tie the outside strands around it as followed.

Place your left string over the 2 center strings and under the right string.
Do the opposite with the right string by placing it under the center strings and over the left string. And pull tight.
Now do the opposite by placing your left string over the 2 center strings and under the right string.
Do the opposite with the right string by placing it under the center strings and over the left string.

And pull tight. That completes 1 square knot.
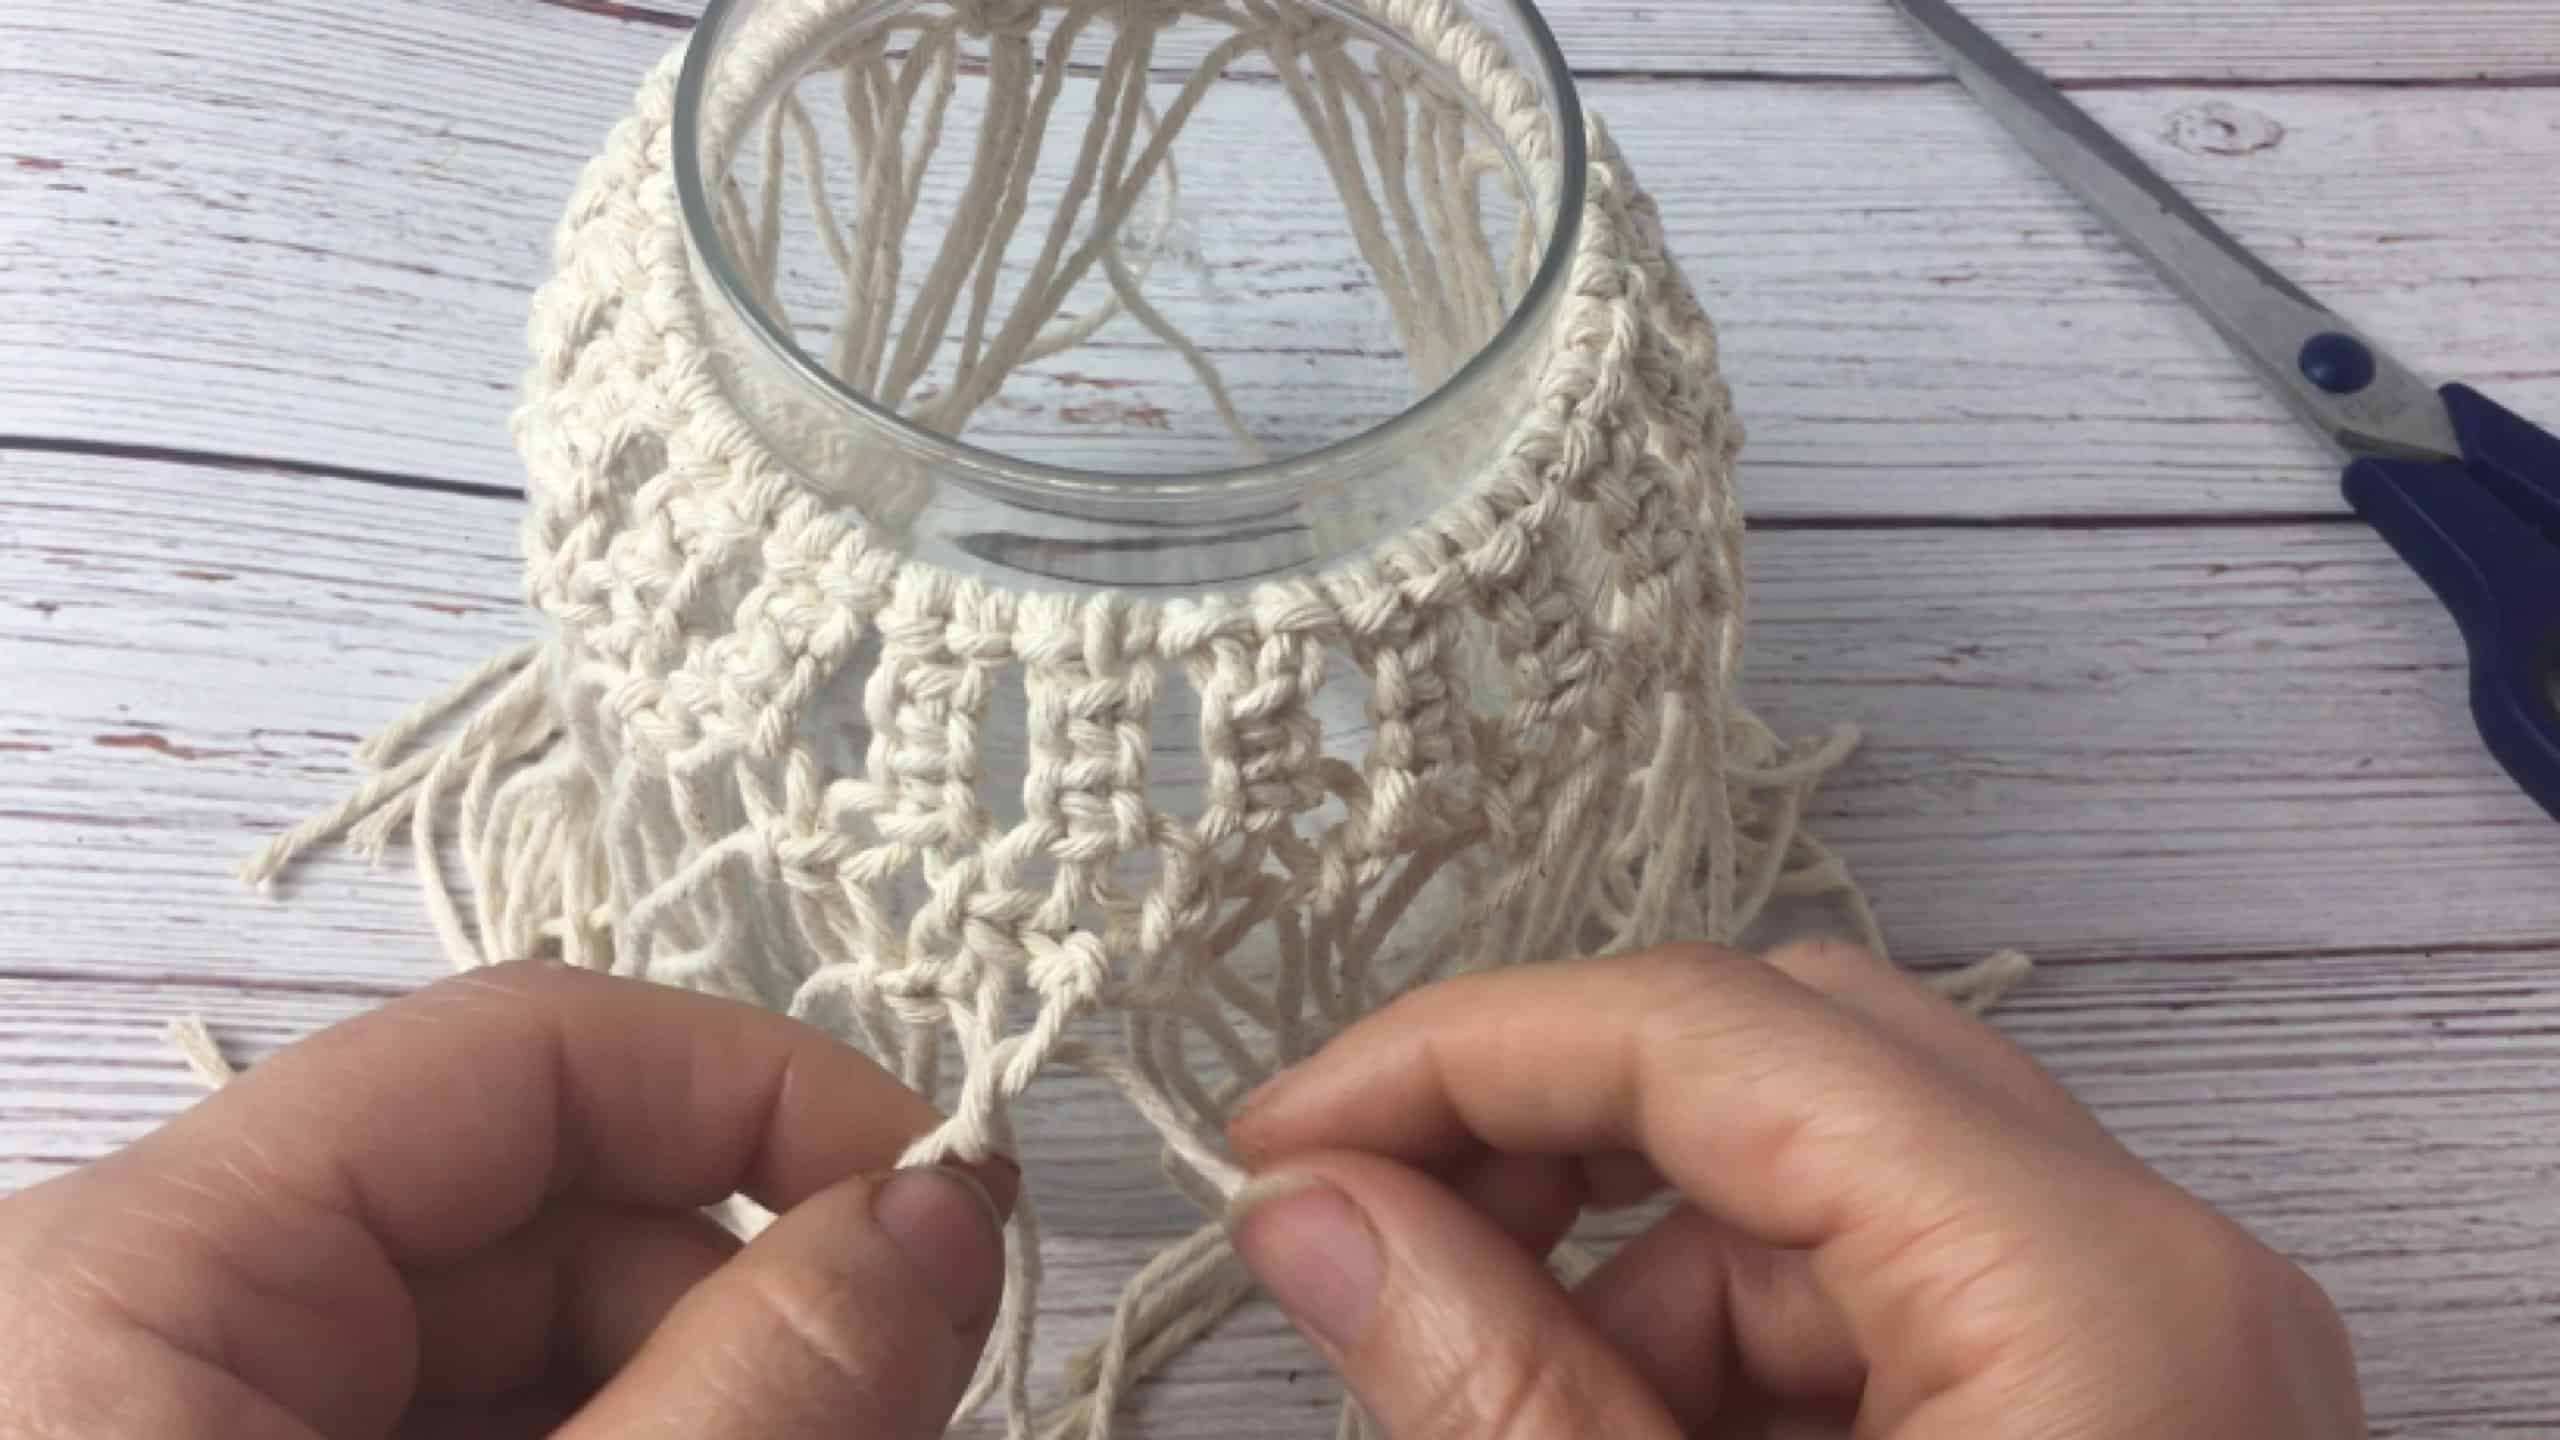
Make a total of 3 square knots per grouping. So 3 square knots below each other for each group of 4 strings all the way around.

Now add a round of Square knots in between every other row of 3 square knots as shown in the photos below. This will be the center of each zig zag point that finises off the macrame decoration.

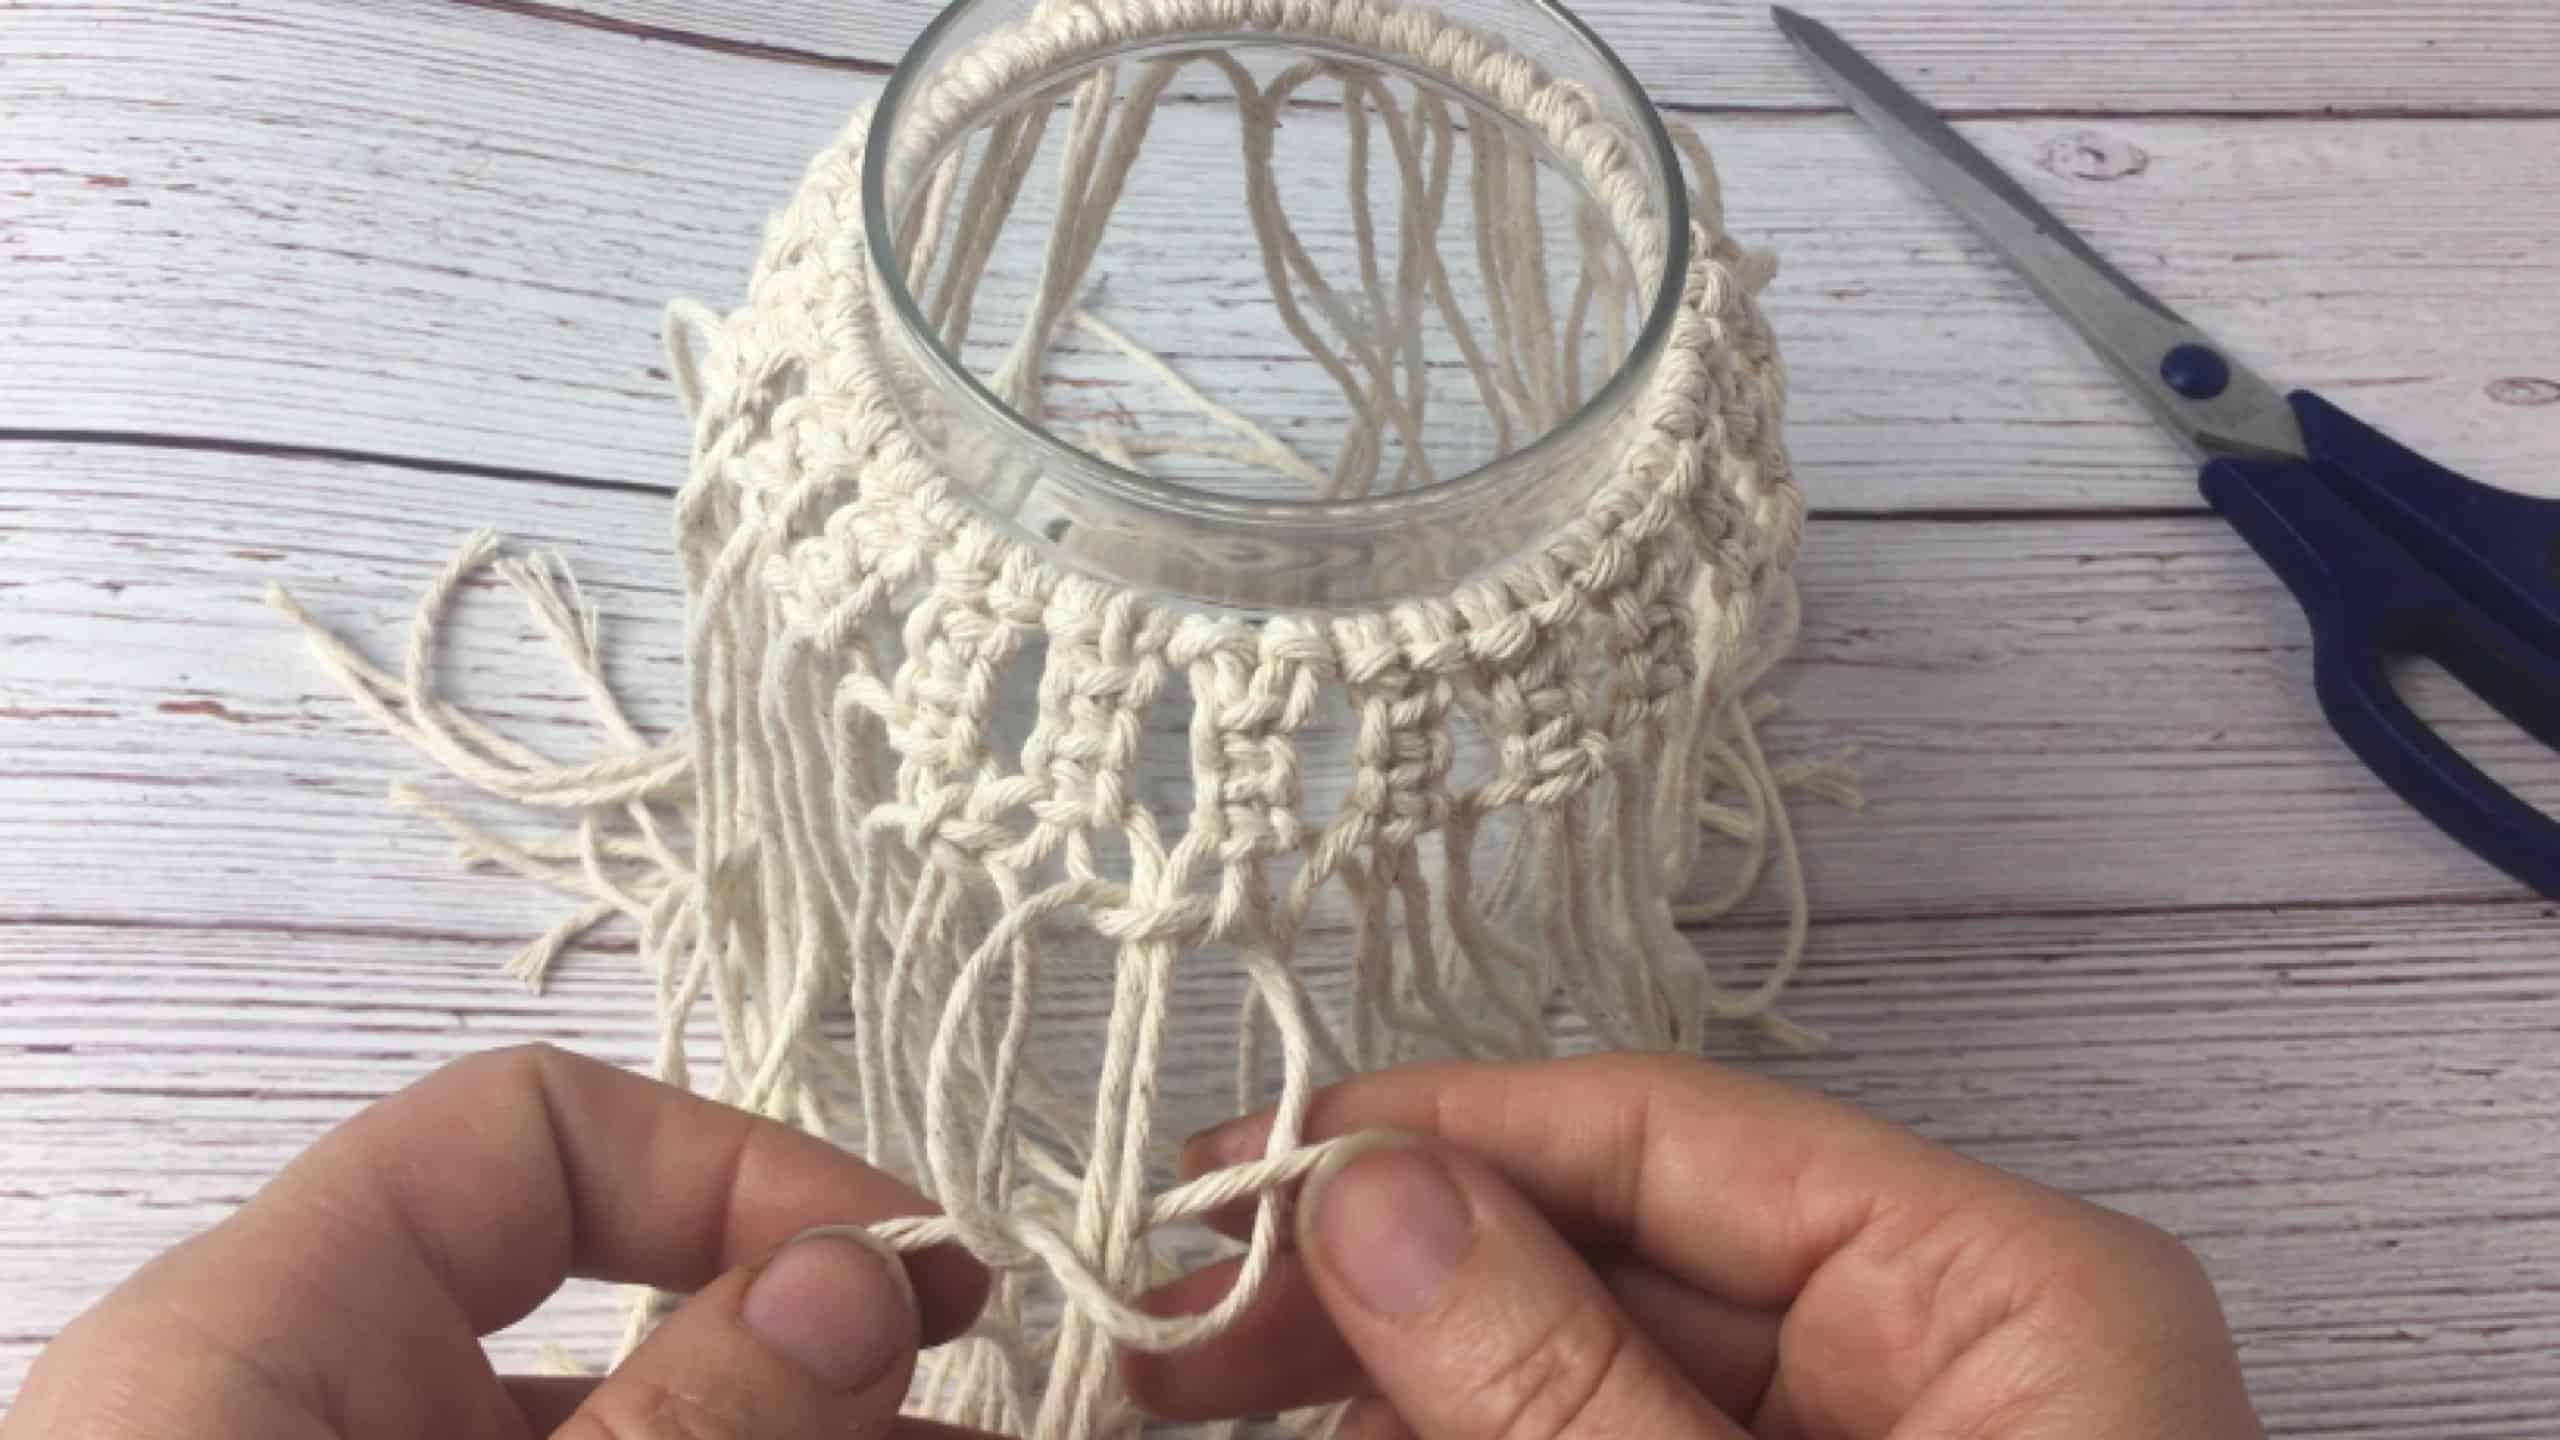
Once a round of square knots is added around the jar, add another round below each row of 3 square knots. So in between the previous round of square knots.
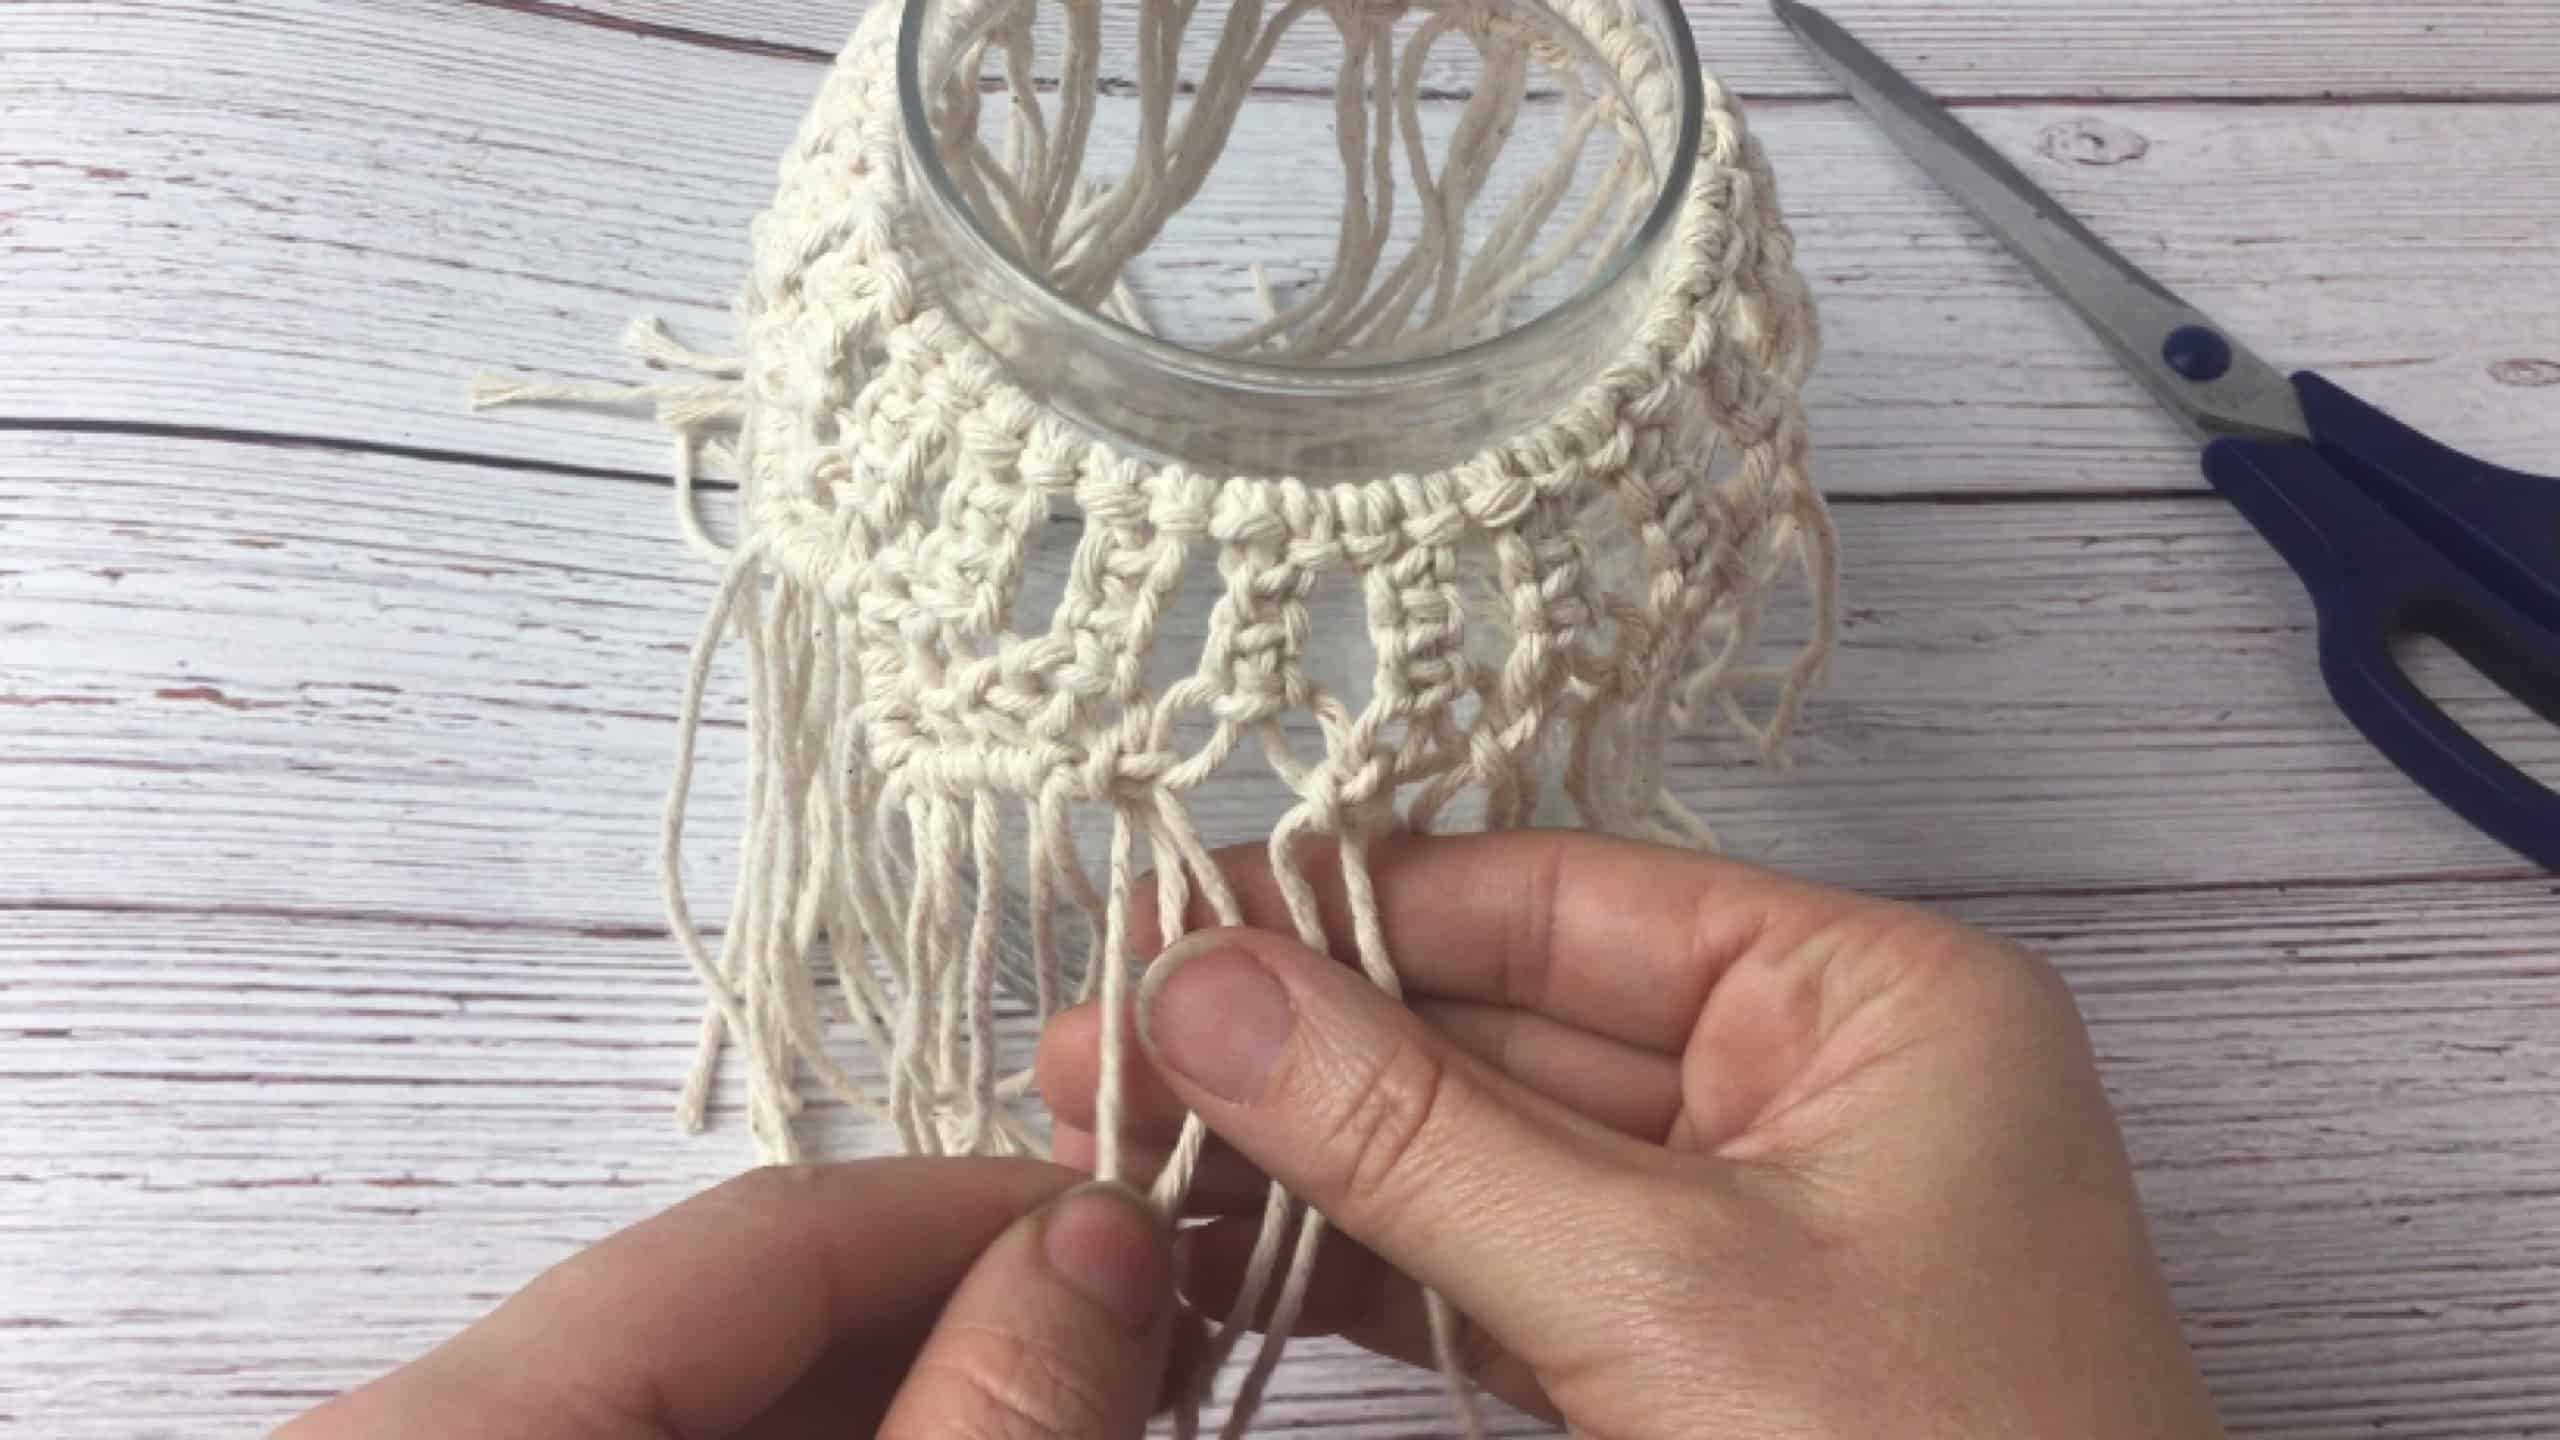
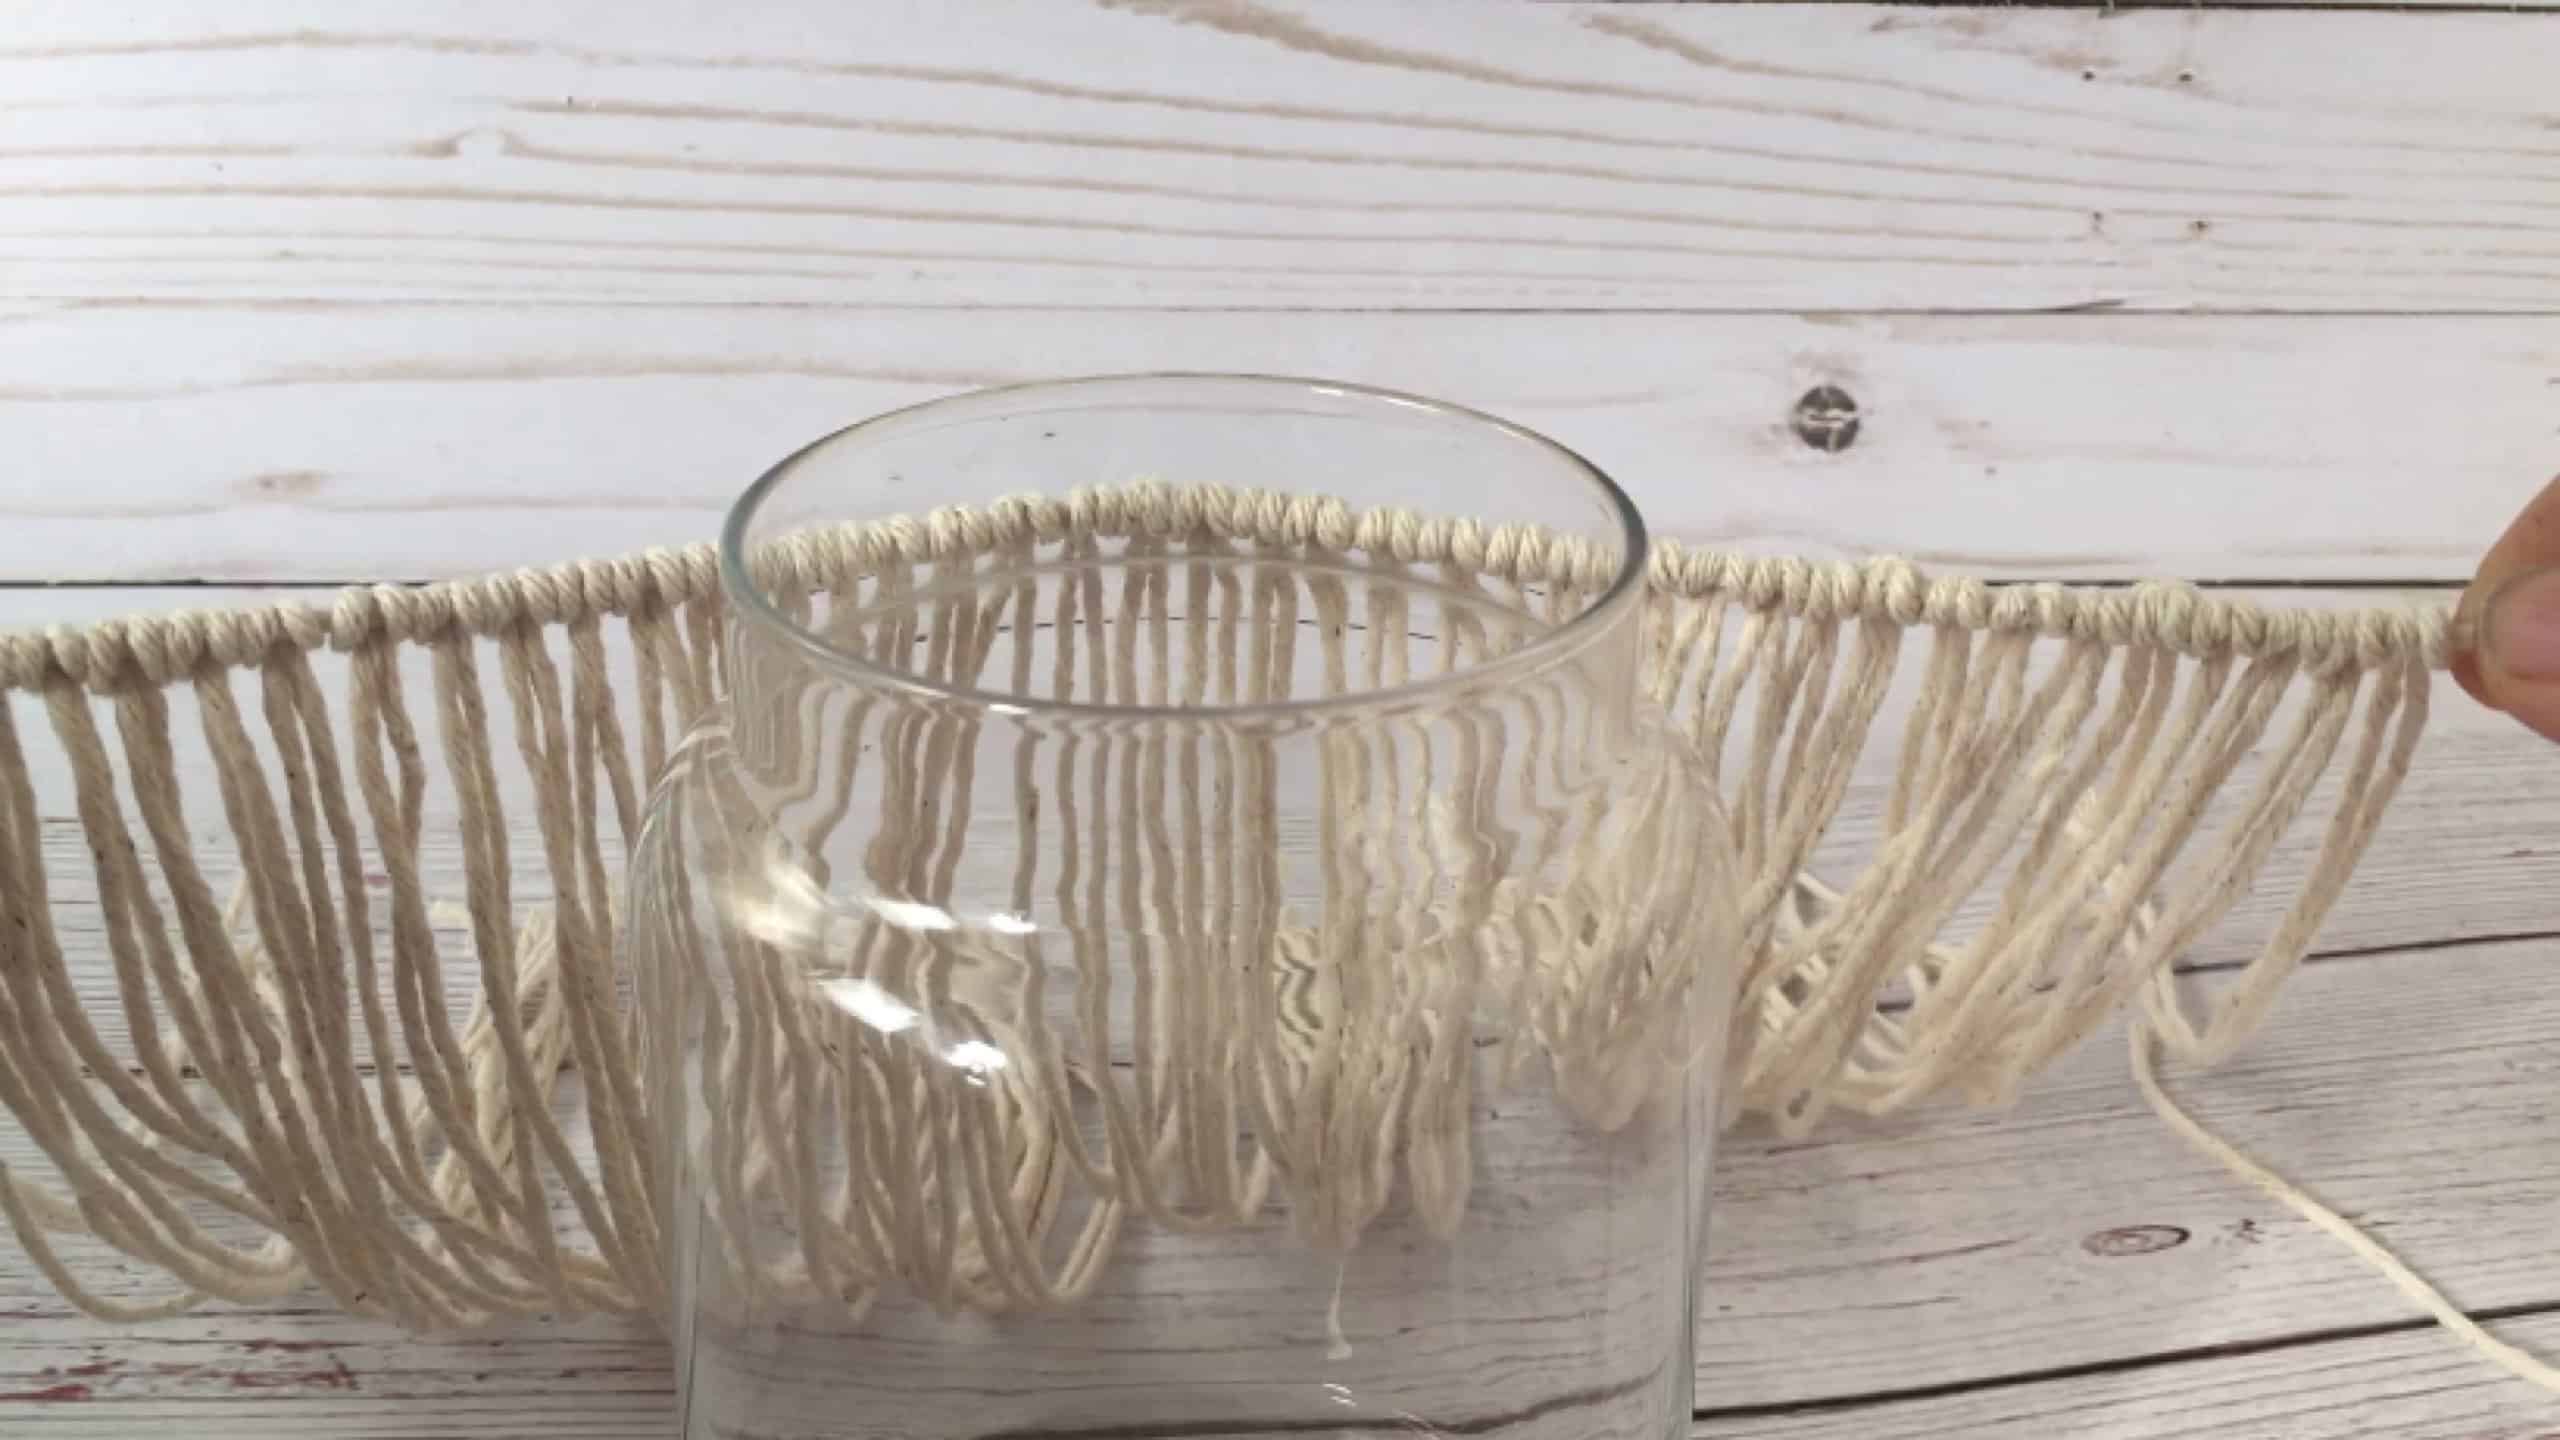
Now you just have to add the zig zag finish all around.
That one is done with Half Hitch Knots.
Start with the 2 strings right below the cluster of 3 Square knots and work your way down and away from the center from both sides.
Loop the string that is under the knot bearing cord over it and through the hole between the knot bearing cord and the string itself. Pull tight.
Do the same again and pull it tight. This completes 1 Half Hitch.
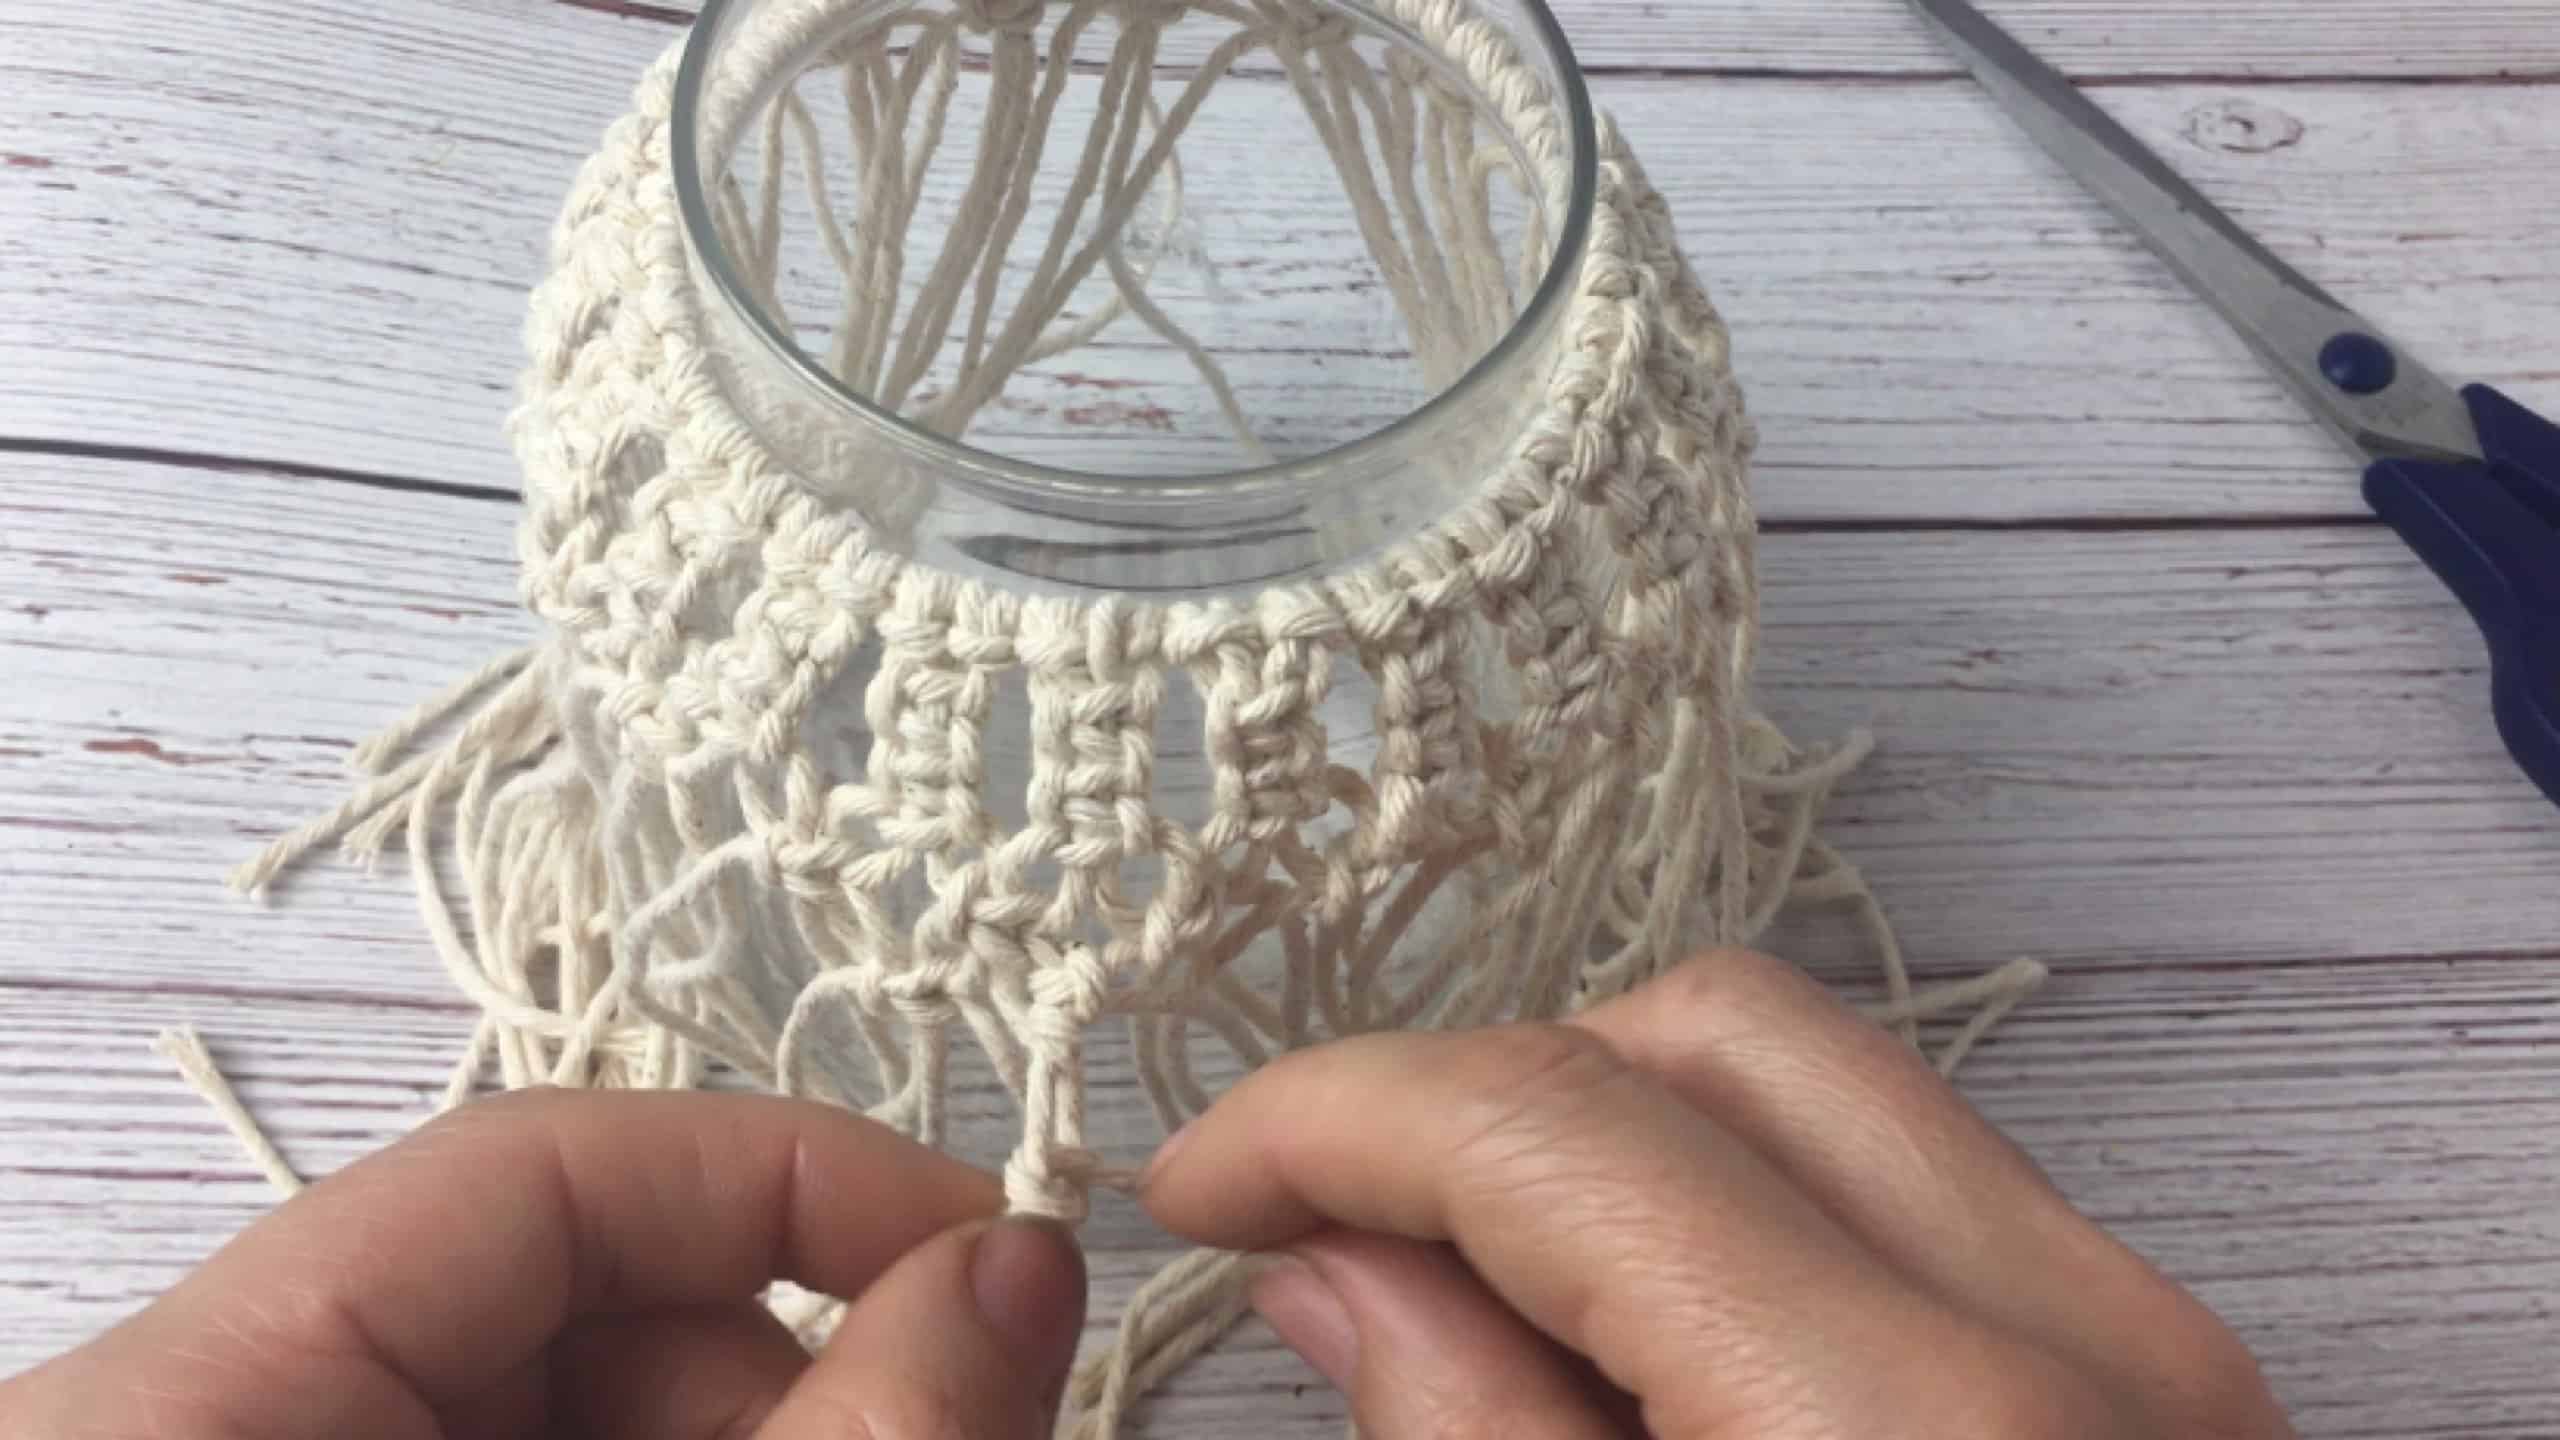
Keep making Half Hitch Knots with each string until you reach the center. So a total of 4 Half Hitch Knots.
Then repeat the same on the other side but the opposite way. So all the knots on the left are angled to the left and pulled out on the left.
Now repeat that all around.

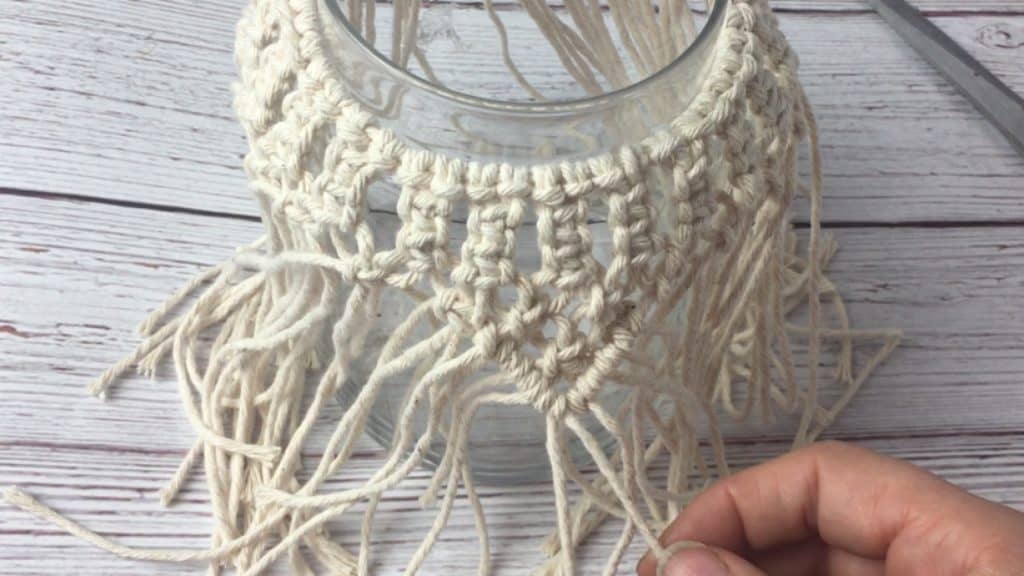
Now you just have to straighten out the strings so that they hang nice and flat. And finally, cut them to the same length around. All that is left now, is to add a candle. but it on the table, admire your work and relax
Pro Tip!
Do you have some other glass jars around? Maybe even Mason jars? Turn them all into different macrame creations by changing up the pattern a little for each one. Instant center pieces for any table!
I hope you have fun making this macrame project. Comment below if you have any questions and show off your creations here and on Instagram #kaileacrafts