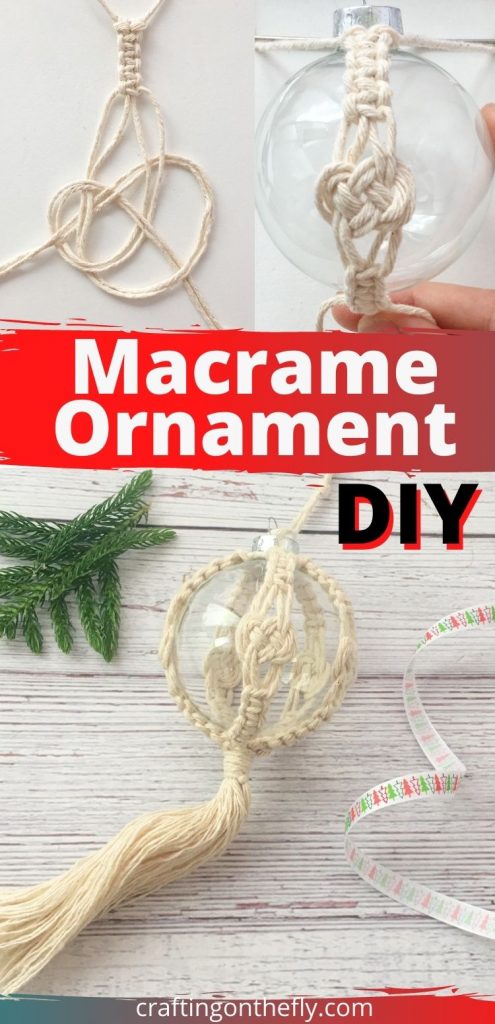
Learn how to make a Macrame Ornament for the Holidays
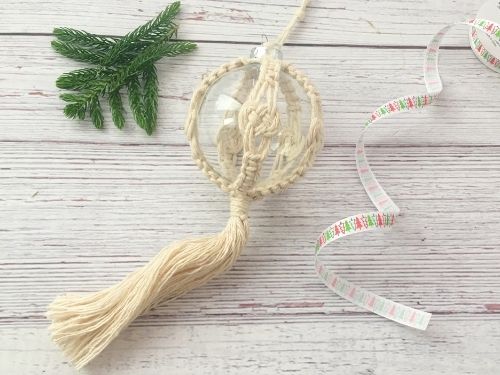
It is starting to get colder. Even here in Florida and this year I can’t wait for the holidays to come around. So I am already starting thinking up handmade Christmas ornaments for my Christmas Tree to decorate but also to give as holiday gifts. Can’t start early enough!
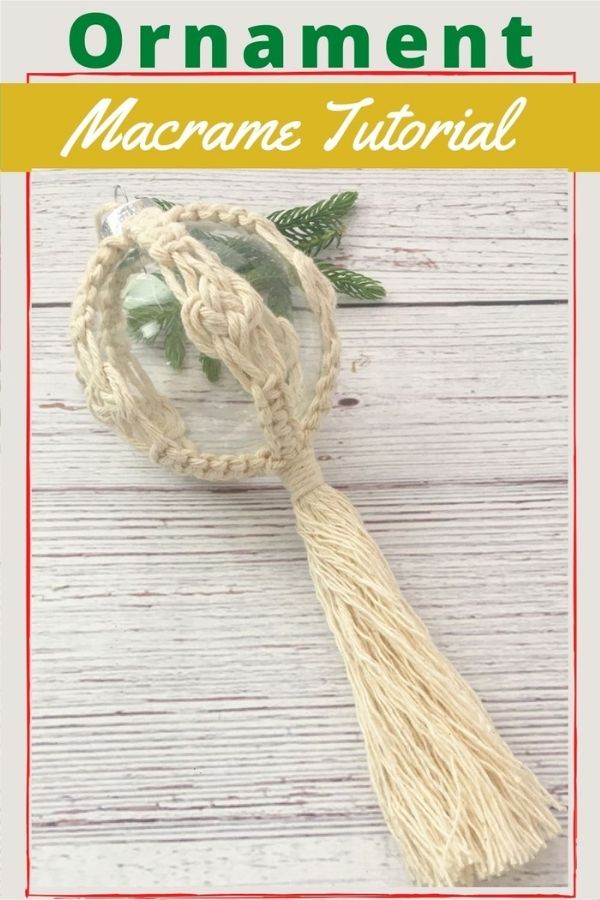
These macrame ornaments are easy to make even for beginner macrame crafters. Yes, they look sophisticated and timeless. Add a bit of tinsel or glitter inside the glass ornament to jazz it up and add color and sparkle!
As an Amazon Associate I earn from qualifying purchases. If you make a purchase through my link, I will make a small commission with no extra cost to you. “
This Macrame Love Knot ornament will look great next to my Macrame Christmas Tree Ornament. So, if you are looking to make even more macrame ornaments, try your hands on that macrame tree.
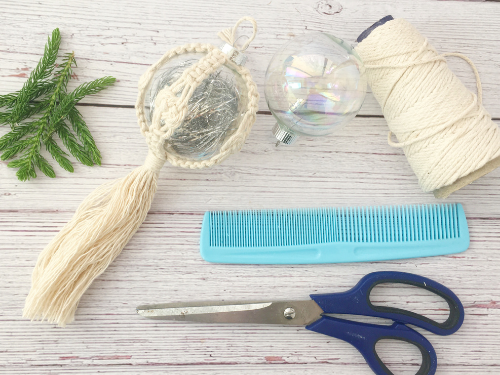
Macrame Ornament Materials
- 70mm Glass Balls
- Macrame Cotton Cord
- Tinsel and glitter to add inside the glass ball (optional)
- Clipboard to hold the strings (one with a straight clip like in the link)
- Comb
- Scissors
How to Make a Macrame Love Knot Ornament
For this tutorial, I used real glass ornament. They just have more sparkle but you have to be careful not to break them. Or use these Plastic Ornaments instead.
First cut 10 stands at 40″ each.
Use 1 of the stands as your base that you will tie around the top of the Glass ornament.
To create your macrame holiday ornament. attach 9 strands to the first strand with a Larkshead knot. Fold a piece of yarn in half and place it under the first strand. Then pull the 2 ends through the loop to encase the first strand with the new string and pull tight. Do the same with all 9 strands.
Now it is best to clip your first strand to a clip board so it won’t slide around and you can pull at the strings and get the knots tight. Push 2 strands (4 strings) together and the rest away for now.
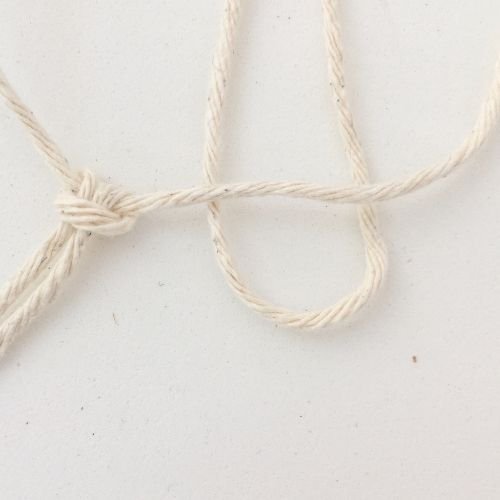
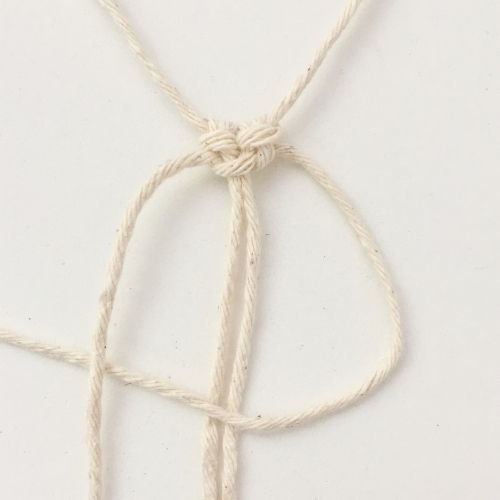
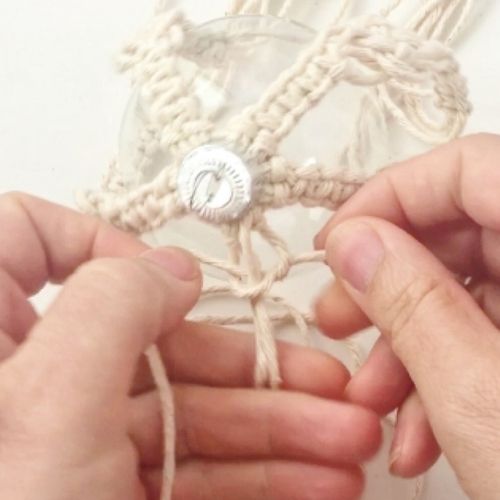
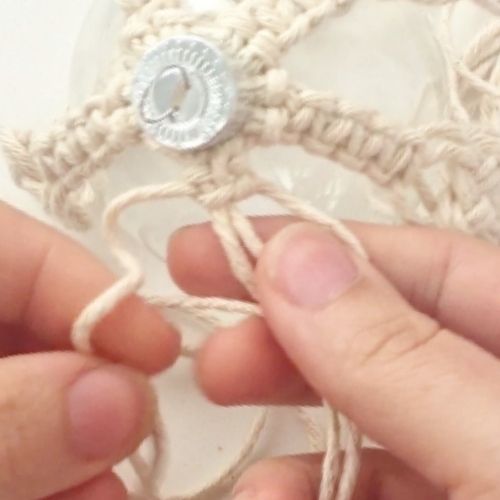
1st Photo: Place your left string over the 2 center strings and under the right string.
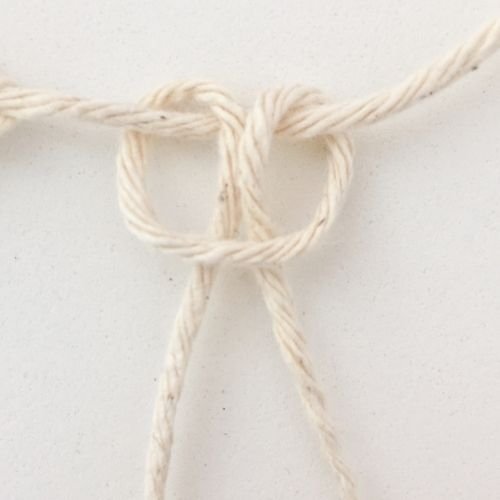
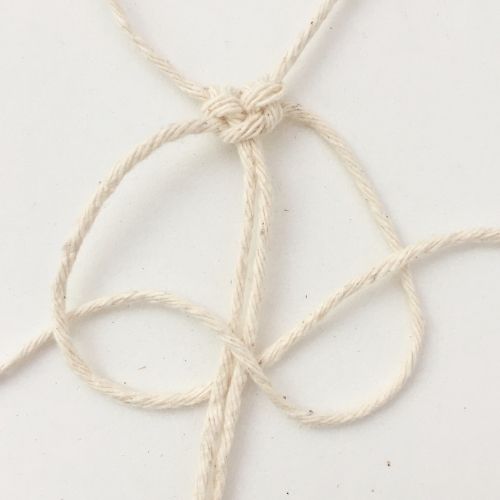
2nd Photo: Do the opposite with the right string by placing it under the center strings and over the left string. And pull tight. This is the first part of the Square Knot.
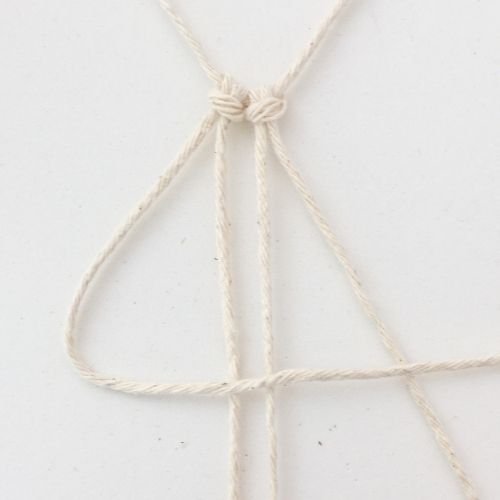
Now do the opposite by placing your right string over the 2 center strings and under the left right string.
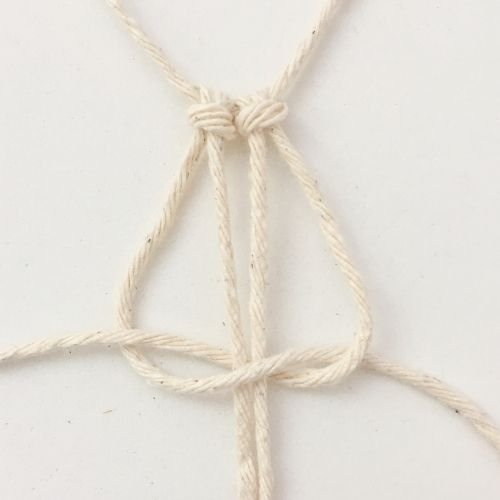
Do the opposite with the left string by placing it under the center strings and over the right string. And pull tight.
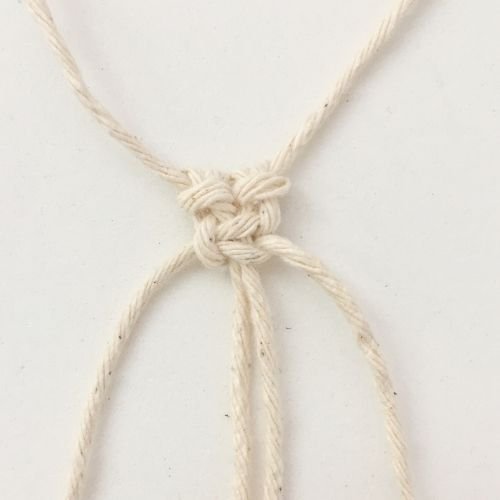
That completes 1 square knot.
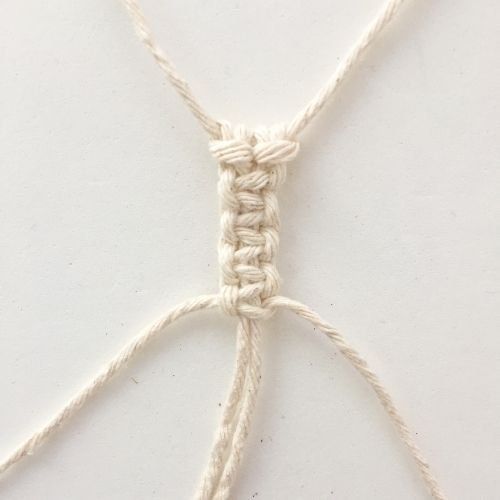
Add 3 more square knot for a total of 4 square knots.
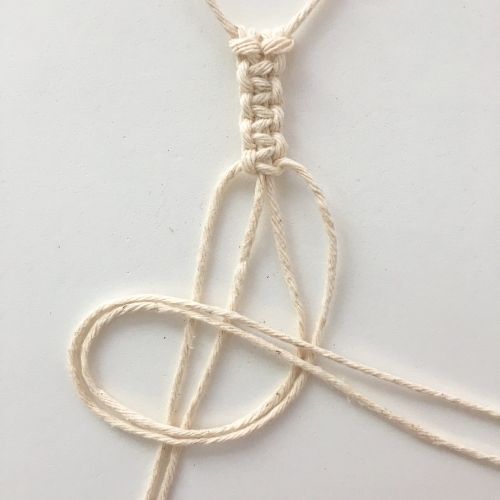
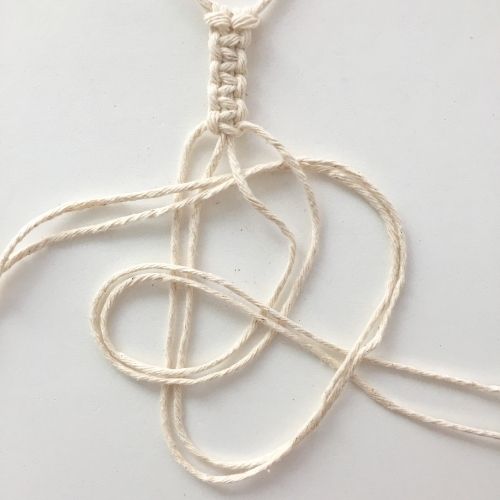
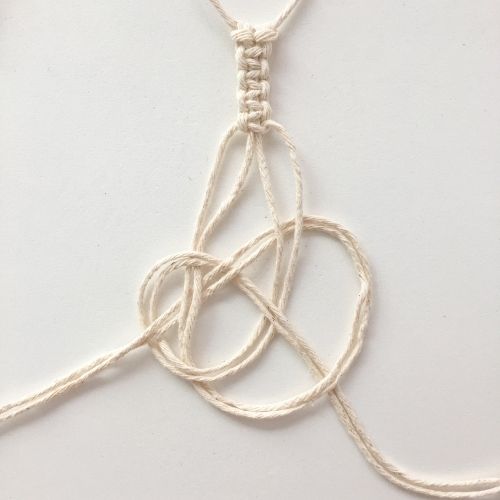
For this next section, you work with 2 strings together. So, you take the 2 strings on the right side and loop them over the left 2 strings.
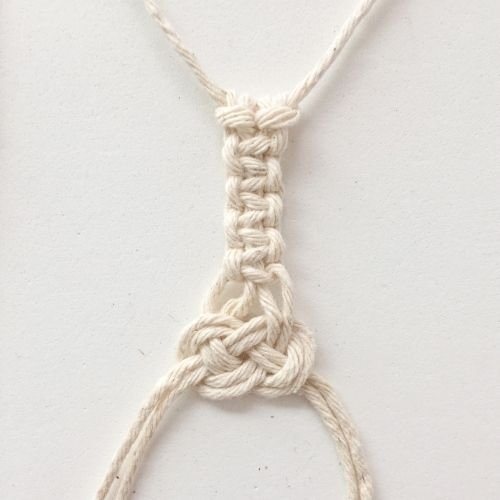
Then you take the left 2 strings and bring them up over the 2 other strings. Then guide them under the 2 right strings at the top, over the 2 strings in the center and under the 2 strings from the left and over the 2 strings from the loop. Then pull everything tight one by one by working on each section individually.
I think it makes more sense looking at the photo and even more if you watch my video tutorial 🙂
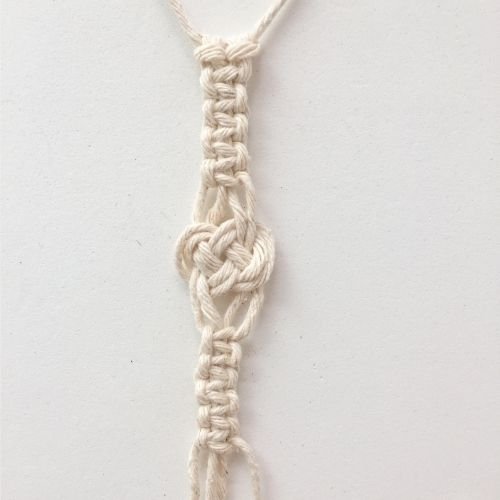
After you are happy with your love knot, create 5 more square knots underneath to mirror the top. You need to add 5 instead of 4 so the love knot will “appear” in the center since everyone will be looking at this macrame ornament slightly from the top. It’s just how things work!
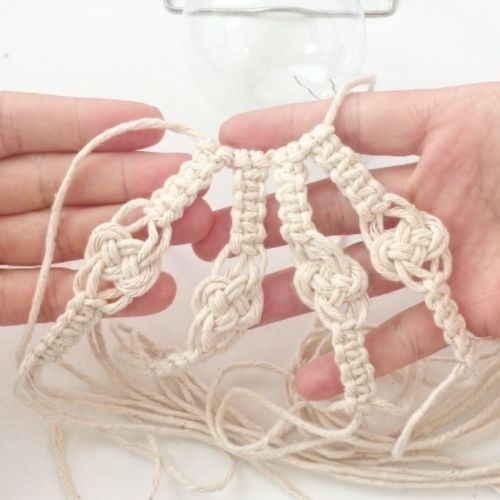
Now repeat this pattern with the other 3 sections until you have 4 complete patterns and one double strand left.
Take your glass ornament and tie the main string around the top of the ornament with a regular knot. The last of the strings has to be next to the main string now so you cna create the 5th pattern with those 4 strings.
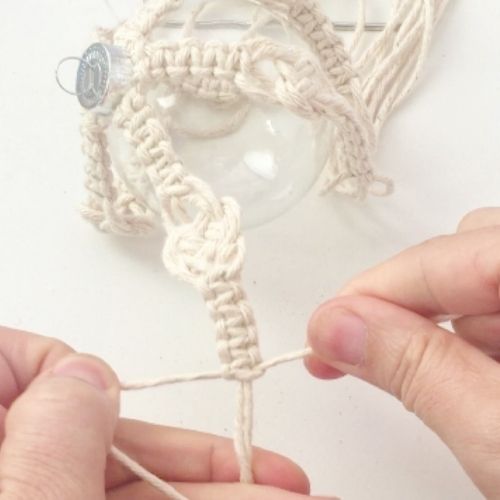
So, go ahead and make 4 square knots, the love knot and 5 more square knots with those 4 strings.
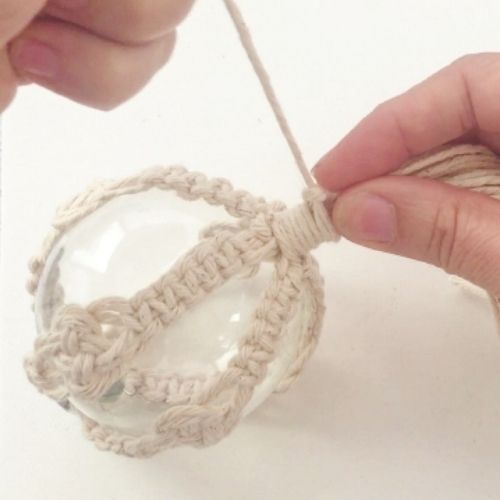
Once all 5 sections are complete, gather them at the bottom and fish out one of the longest strands. You will use this strand to wrap around the other strands a few times and tie it to itself.
Now you just need to pull at the ends of all the strands so it tightens up all the sections. When everything is secure, cut the strands to the size of the shortest one so they are all the same lenght. You can also cut it even shorter if you want a shorter tail.
Use one of the strands that you cut off as a hanger and tie it around the top metal loop on the glass ornament.
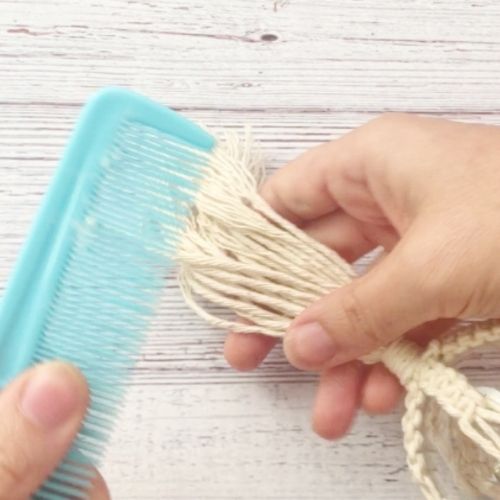
Finally, comb the tail so all the individual strans are seperated and cut one more time so they are flush.
You can add tinsel or glitter inside of the glass ornament to add sparkle or color. For a more natural look, just leave it clear.
Now this macrame bauble ornament is ready to be hung on the Christmas Tree or given as a holiday present!
More Free Holiday Tutorials
Want to make even more macrame accessories? Check out these Crafting on the Fly creations!
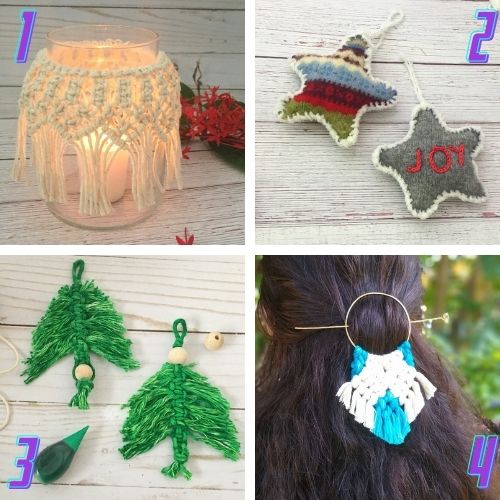
- Macrame Candle Holder – Create a candle holder for your home.
- Star Ornaments – A beautiful DIY from old sweaters to star ornament.
- Macrame Tree Ornament – Add a little tree to your Christmas tree with these Macrame ornaments..
- Macrame Hair Clip – Create a beautiful macrame hair clip with this macrame DIY.

