
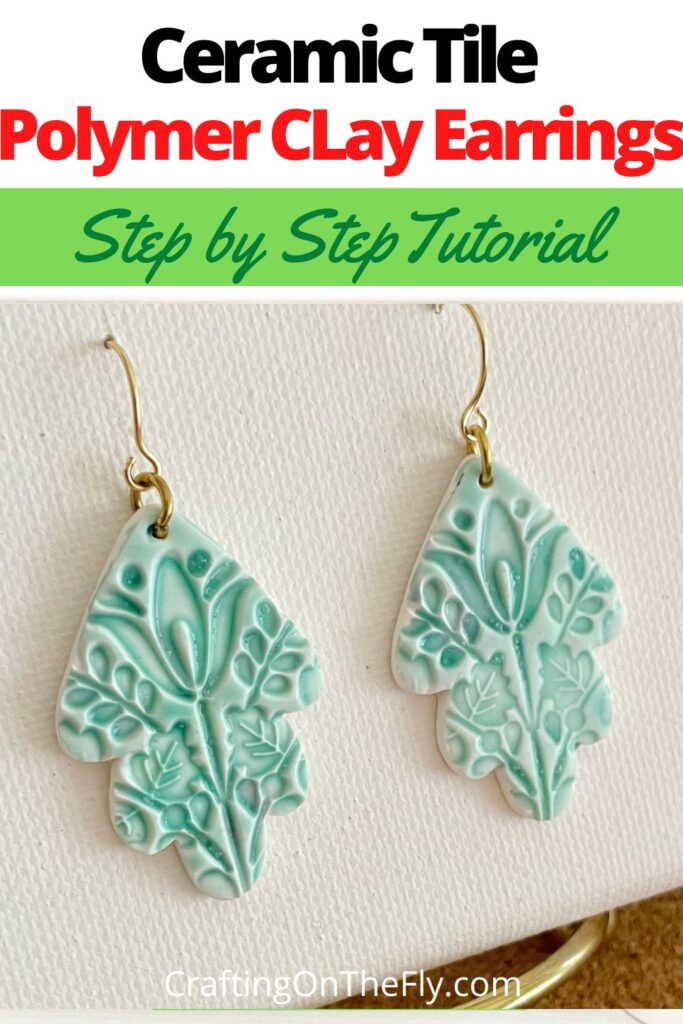
Polymer Clay is a fantastic medium to work with. It is really easy to get started with and you can create so many different kinds of earrings with polymer clay. And the best part, they are super lightweight! Today, I am going to show you how to make polymer clay earrings that look like old world ceramic tiles.

As an Amazon Associate I earn from qualifying purchases. If you make a purchase through my link, I will make a small commission with no extra cost to you. “
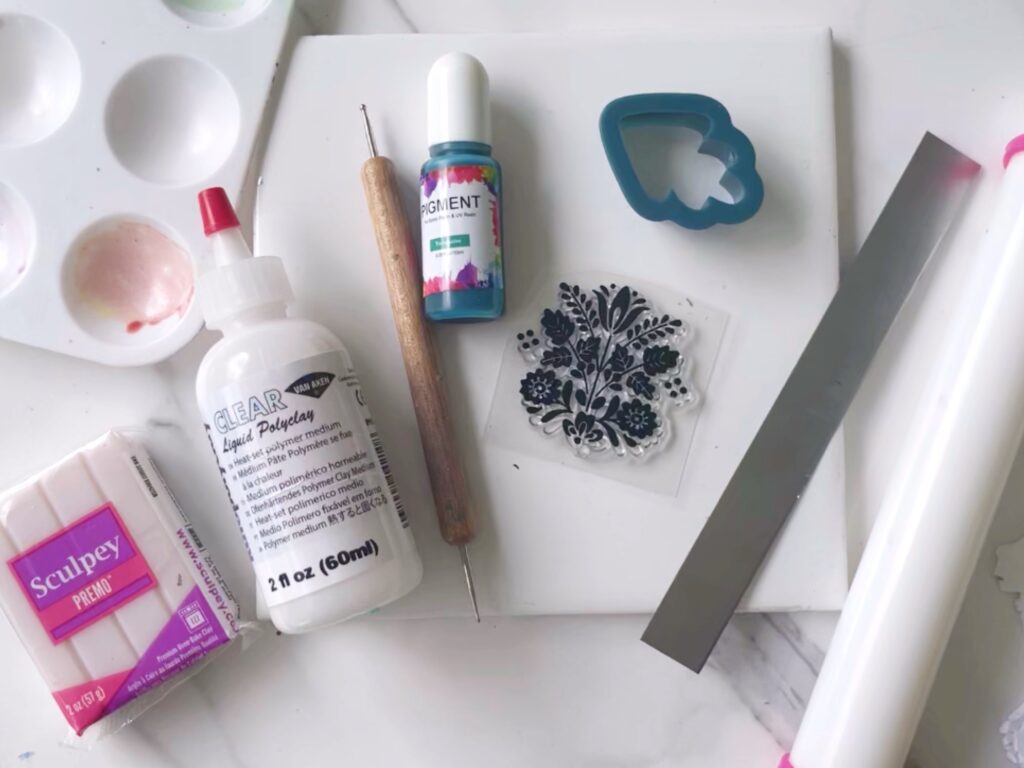
Polymer Clay Earrings Materials:
- Sculpey Premo in white
- Ceramic Tile
- Rolling Pin
- Blade
- Alcohol ink in green
- Kato Polyclay
- Stamp
- Cutter (I used the leaf one from this set)
- jumprings (this set comes with pliers)
- earring findings
- pliers
Step 1. Roll Out Polymer Clay
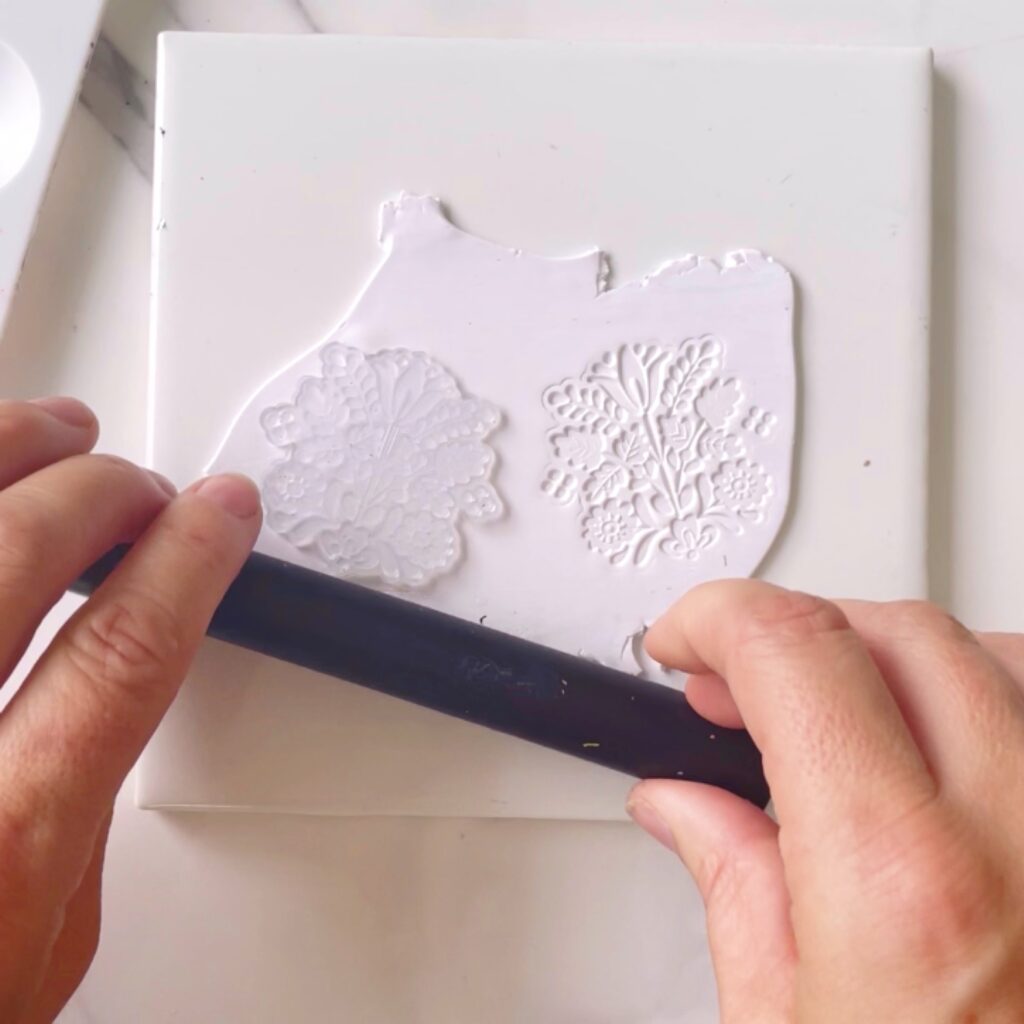
Cut off a piece of the white polymer clay and condition it with the rolling pin. Conditioning it means to roll it out on a ceramic tile and fold it back together a few times until it becomes smooth and soft. Then Roll it out evenly until it is about 2mm thick and stamp your design in it. Roll over your stamp so it creates a nice deep and even impression.
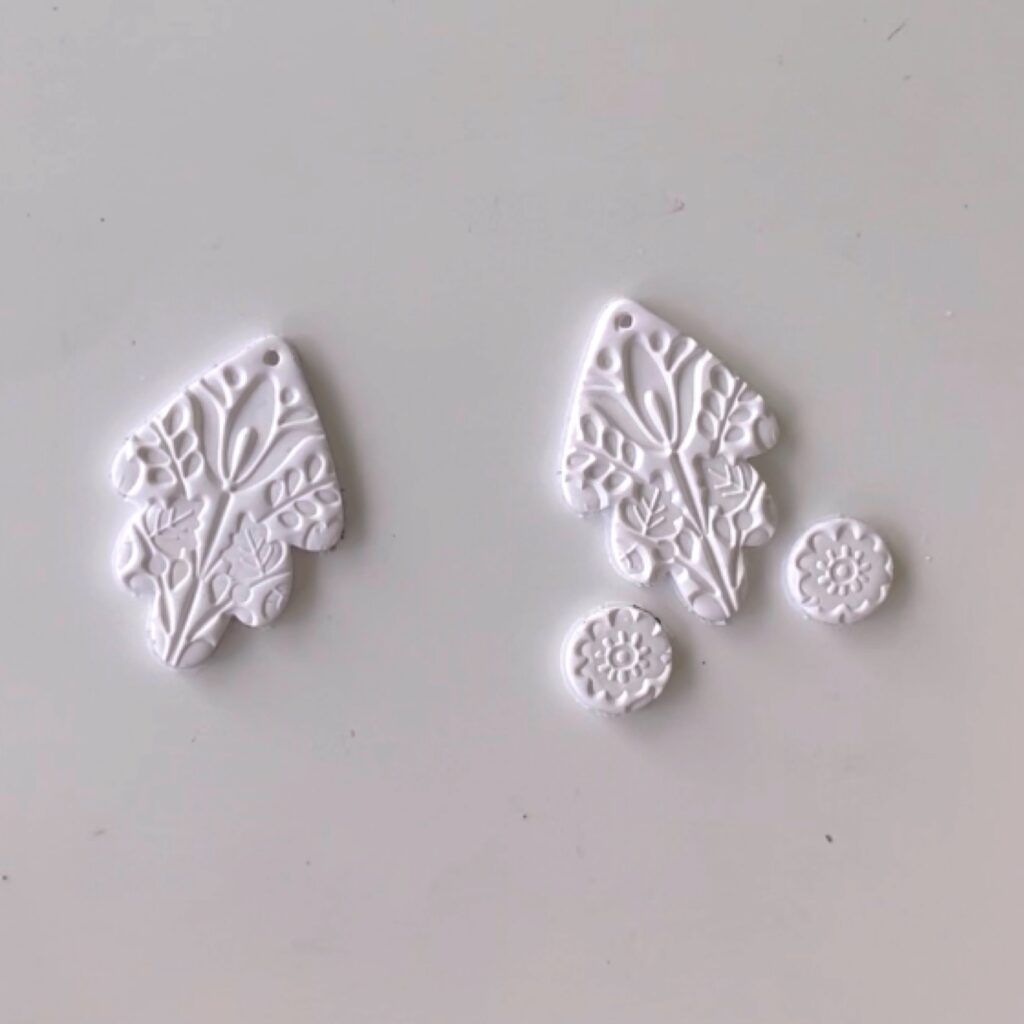
Step 2. Cutting out the shape
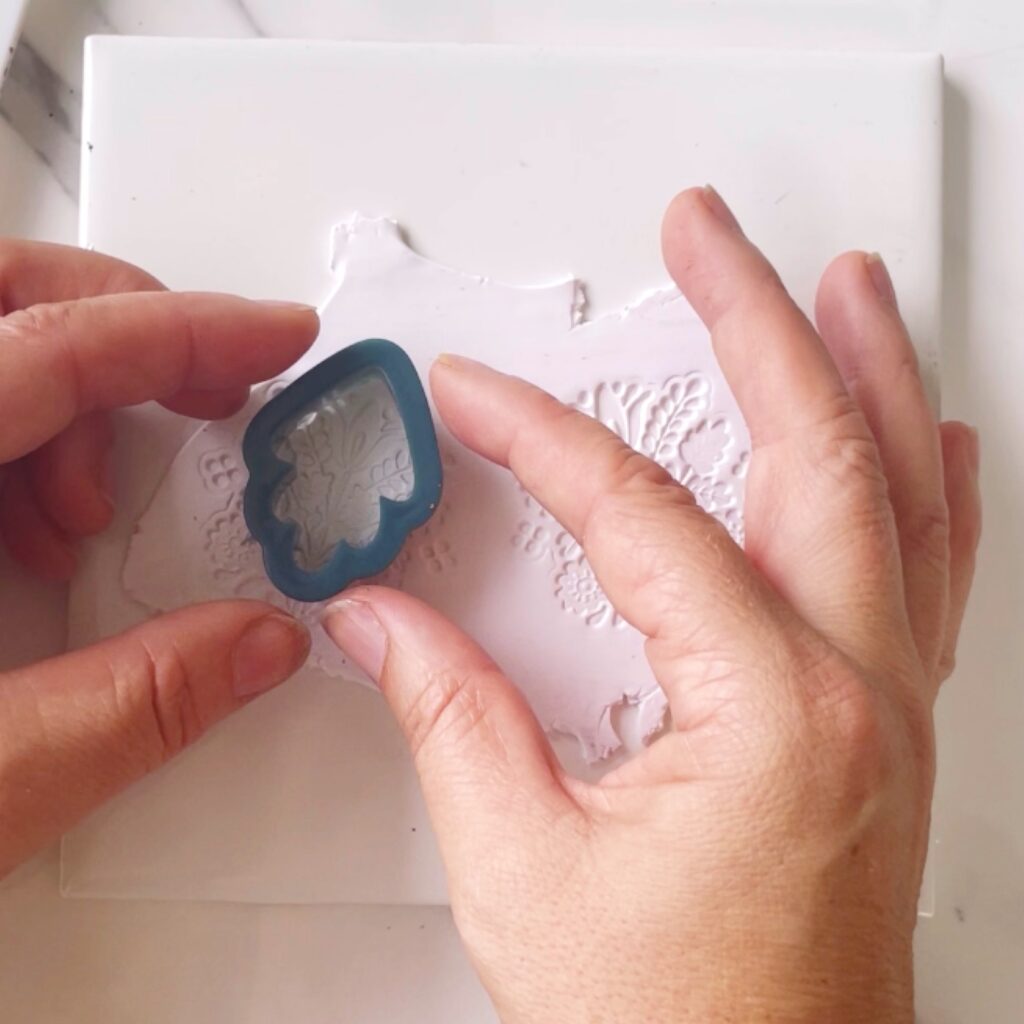
Using the cutter of your choice, select an area you like and cut out the shape. I stamped the design twice to have 2 matching pieces for my earrings. Then take off the access clay
Step 3. Adding holes
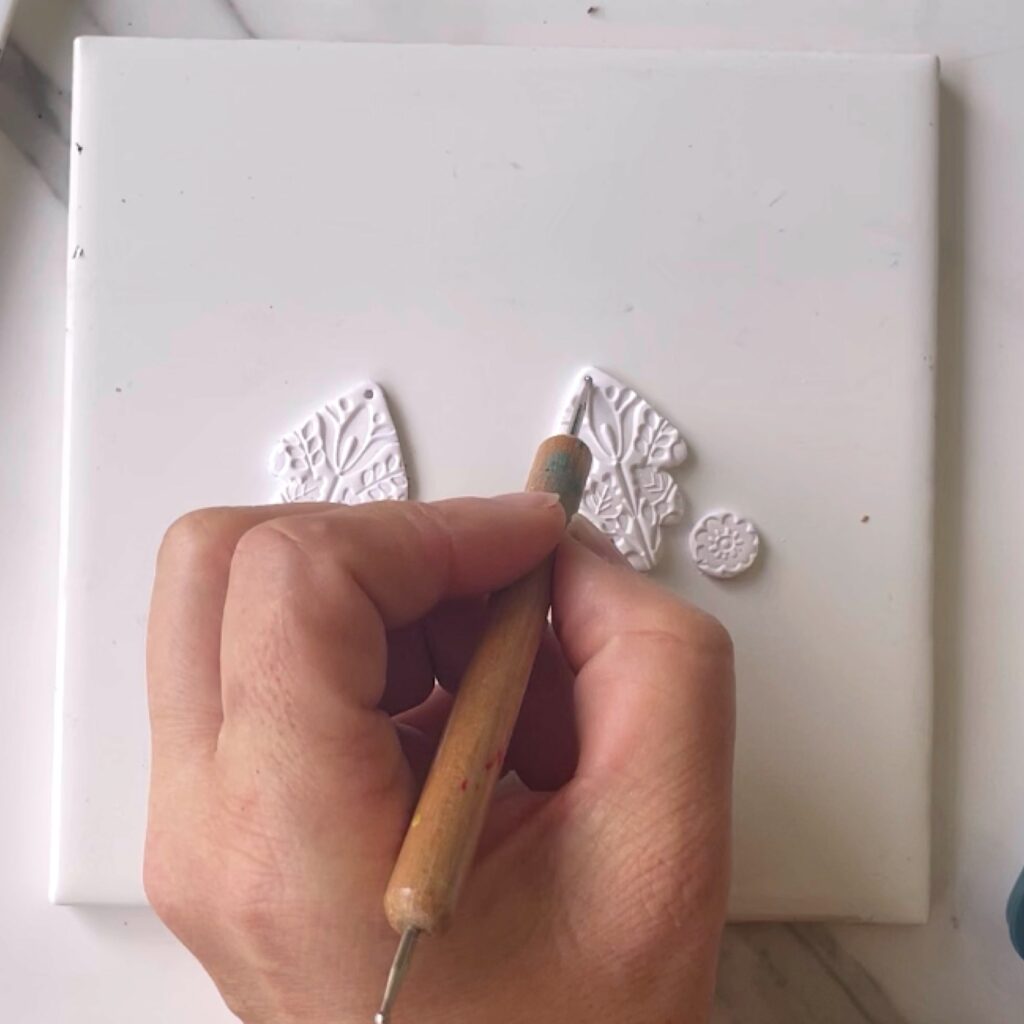
It is best to add the holes to hang the earrings right before baking them. Use a needle or toothpick to make the holes evenly alll the way through.
Step 4. Baking the pieces
Bake the pieces in the oven according to the manufacturer instructions. I normally have the temperature set to 230 and leave it in for 30 minutes. I use the ceramic tile to form all my pieces and use that as the base for baking.
Step 5. Adding colored glaze
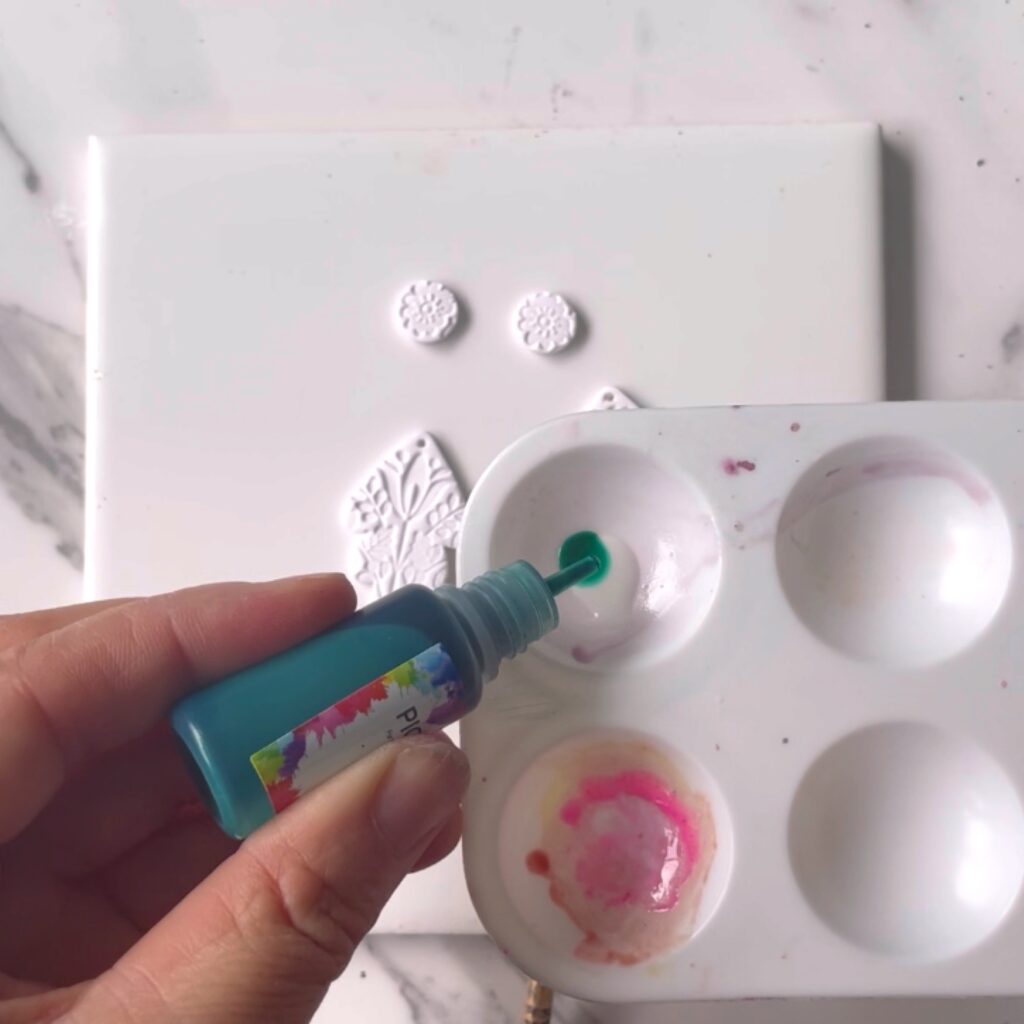
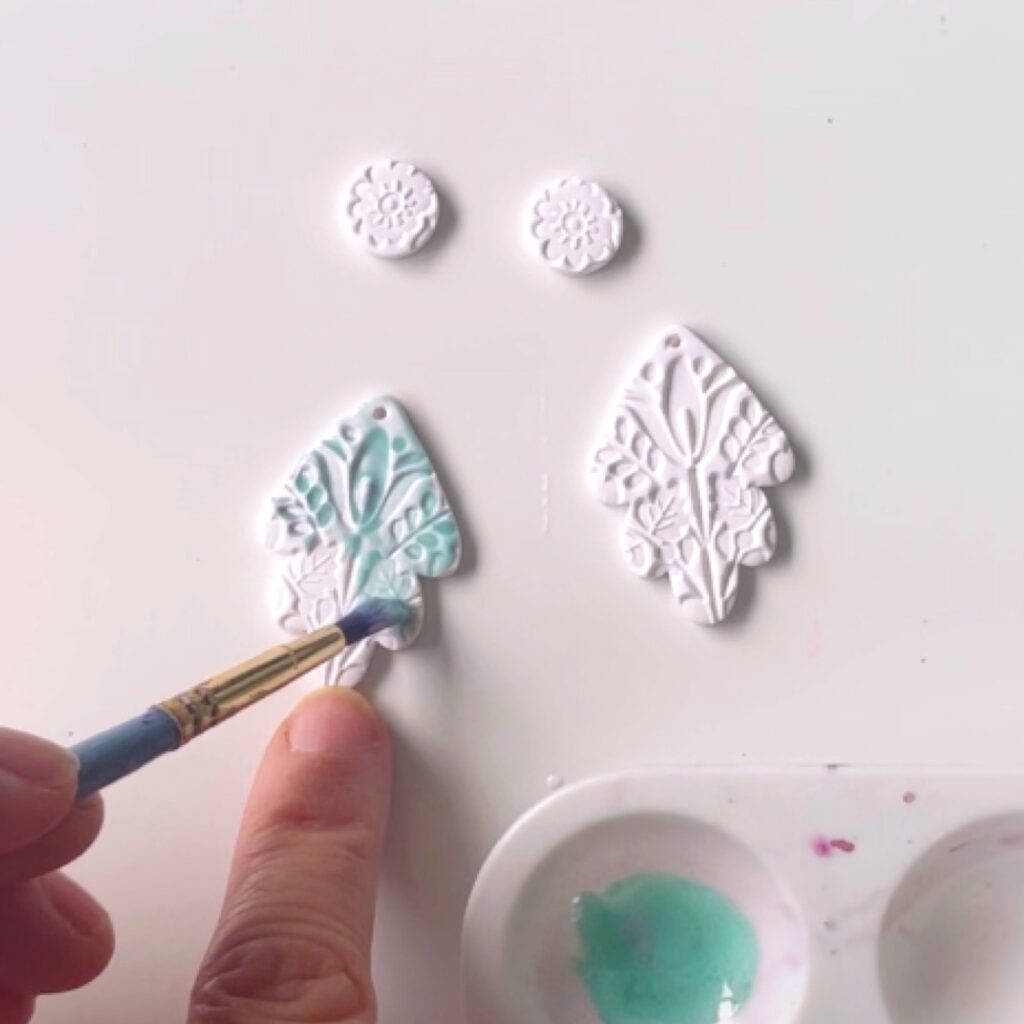
Now it is time to add the magic! Mix a small amount of Ketopolyclay with the pigment ink. Use a brush to mix it all up and to brush it onto the baked polymer clay pieces. Really try to get in all the crevices and to only apply a thin layer on the raised areas. Continue doing that until it looks like a glazed tile.
Step 6. Baking a second time
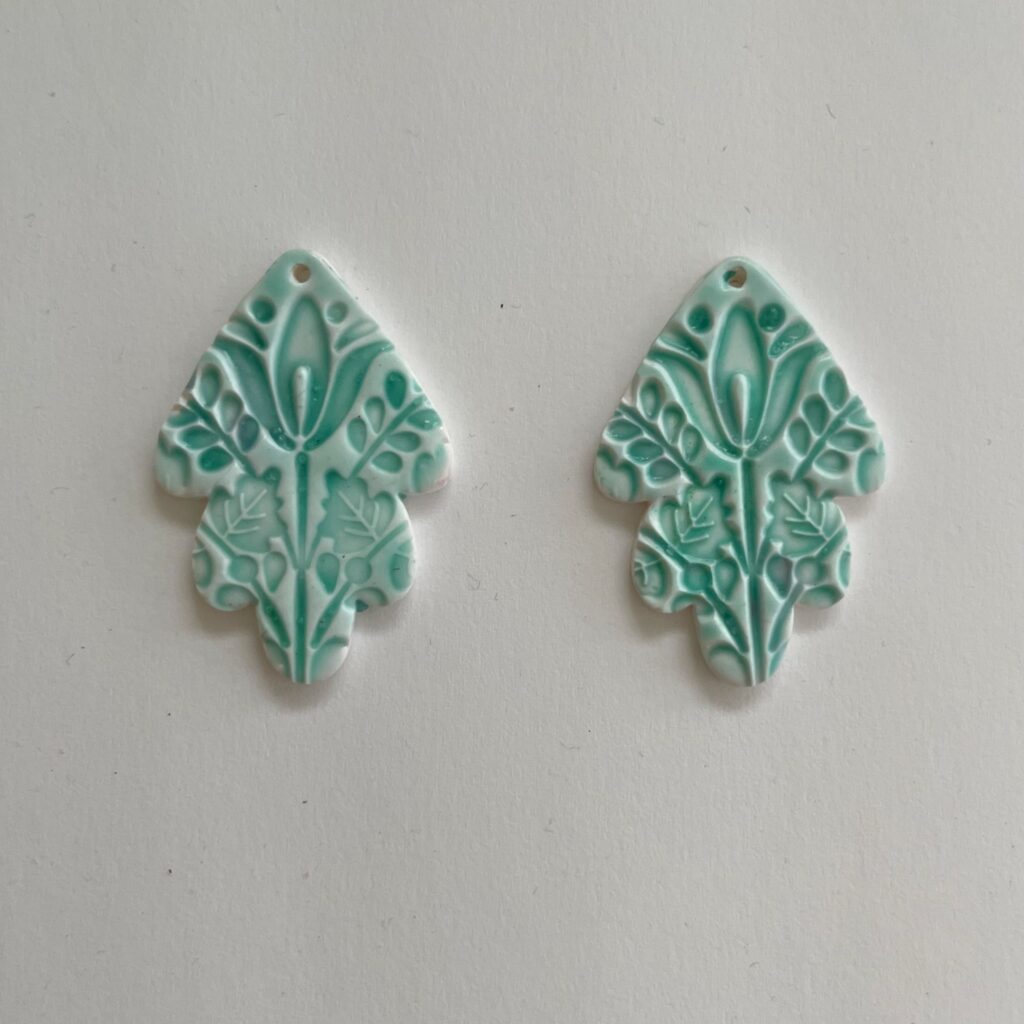
Bake the pieces once more at the same temperature, but for a shorter time since this new clay is such a thin layer. I did for 15 minutes.
Step 7. Adding jewelry findings
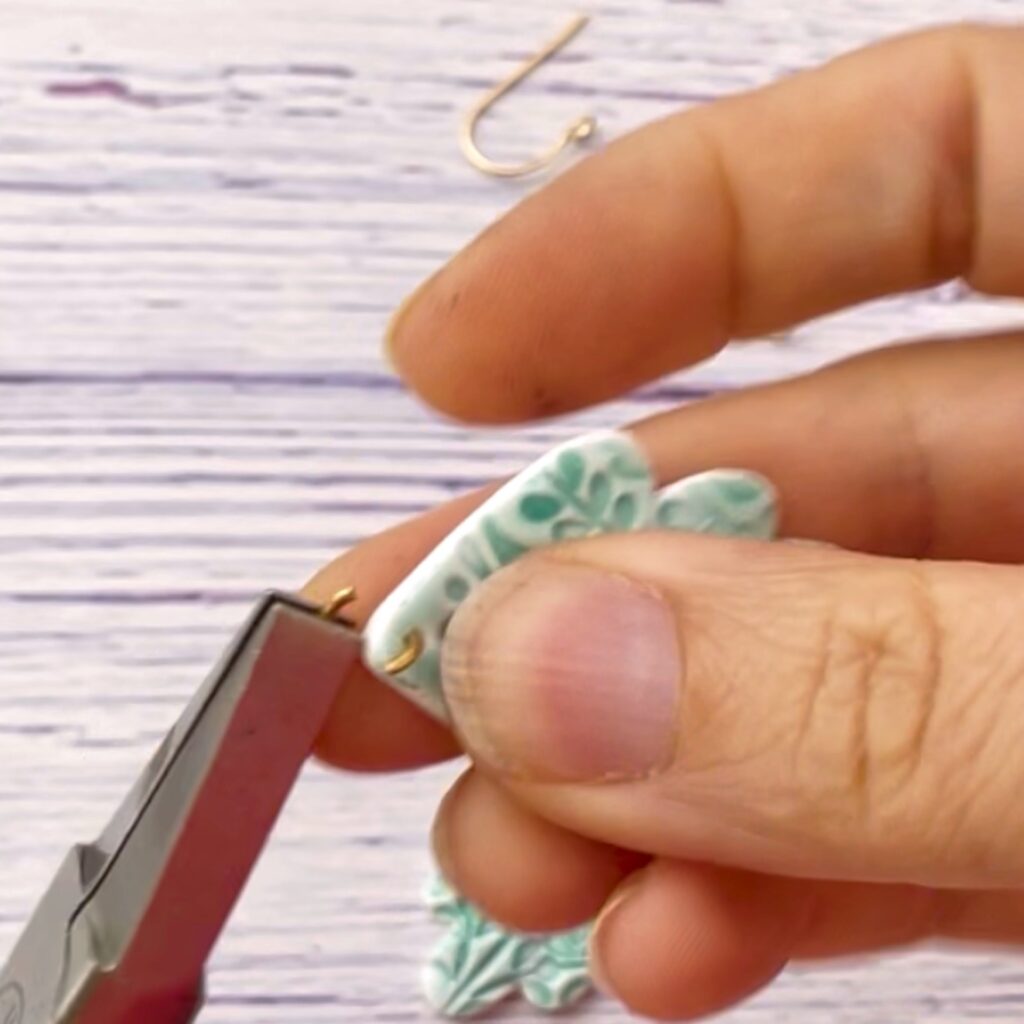
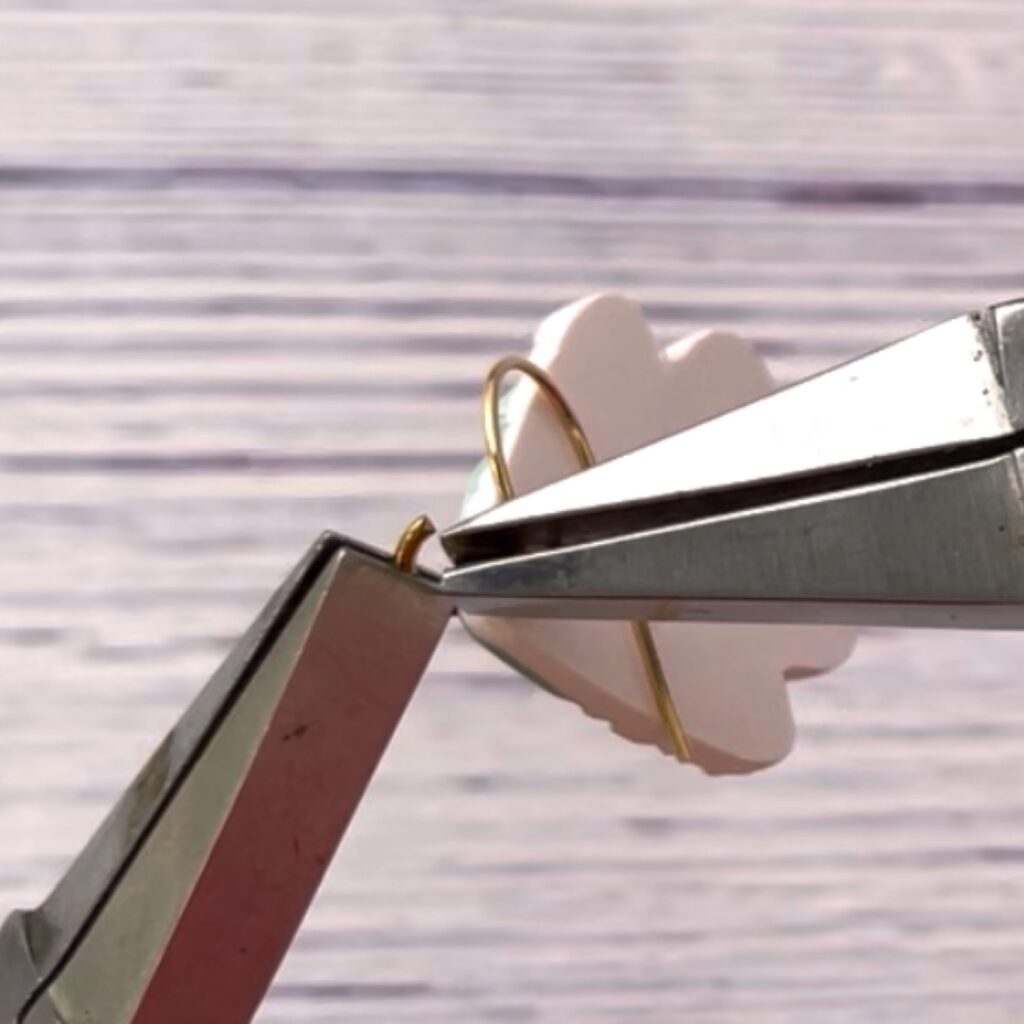
Once the pieces have baked and cooled, it is time to assemble them into earrings. Add jumrings to connect the top. Then add the earring findings as well.
More Free Tutorial
Want to make even more fun pieces? Check out these Crafting on the Fly creations!
- Mushroom Earrings – Create cute mushroom earrings with perler beads
- Crochet Earrings – Crochet fun dangle earrings
- Rainbow Earrings – Stitch these large rainbow earrings
- Marble Earrings – Make these polymer clay marbled earrings