

You know how much I love wearing big statement earrings! These here are my favorite ones for the summer with a little bit of metal, some cute flowers and lot’s of shiny tassels. And of course, these can be created in your favorite colors!
As an Amazon Associate I earn from qualifying purchases. If you make a purchase through my link, I will make a small commission with no extra cost to you. “

Tassel Earrings Materials:
- embroidery yarn (I like using this Shiny Radiant Satin Floss but you can regular ones as well)
- Or you can buy finished tassels
- Oval earring supply
- Gold tone 3.18mm jump rings ( this one is a nice assortment with pliers)
- 14k Gold Filled Kidney Ear Wires
- Plastic Flowers with flat backs
- 401 Instant Glue
- Jewelry making pliers
Now, with this oval base, you can create many different pieces of earrings by switching up the plastic flowers you use and the embroidery thread color to go with it. I played a bit around to arrive at my citrusy combination and just love it!
Here is a quick video of putting it all together!
1. Add flowers to the frame
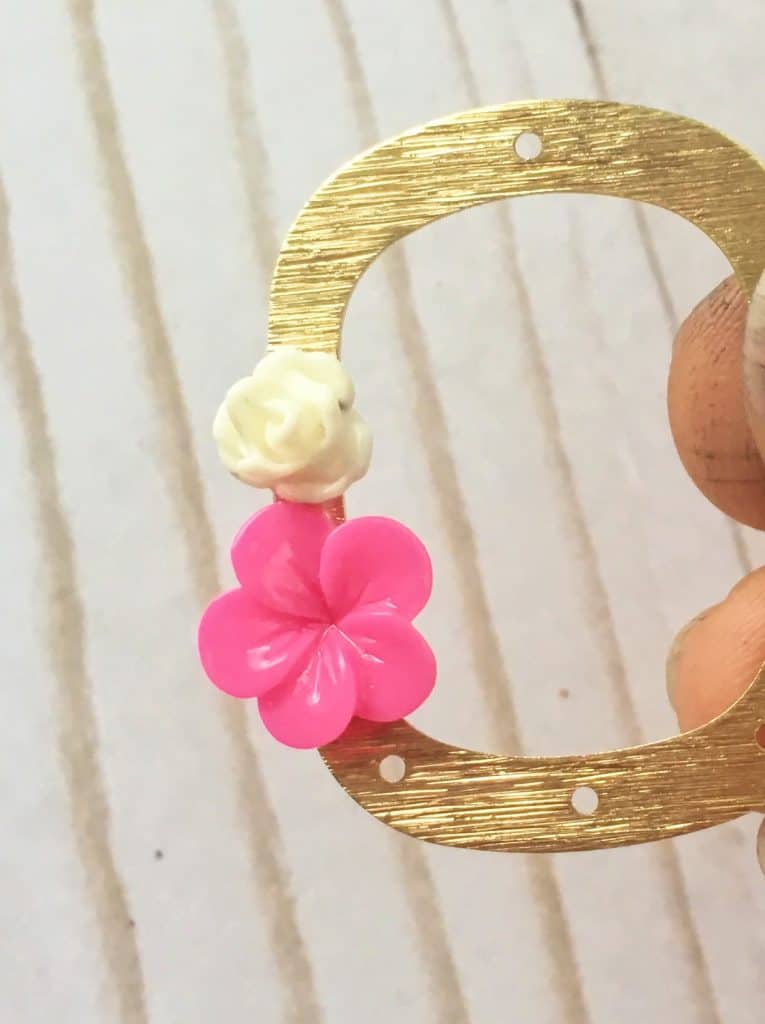
Take your glue and put some on the right side edge of the oval jewelry frame. Select some flowers and put them on the frame immediately and let them dry.
On the other frame, place the flowers the same way but on the opposite side so that you have a mirror image of the first.
2. Create tassels
Now you need to create the tassels.
- take a 1.5″ wide cardboard and wrap the embroidery yarn around it 10 times.
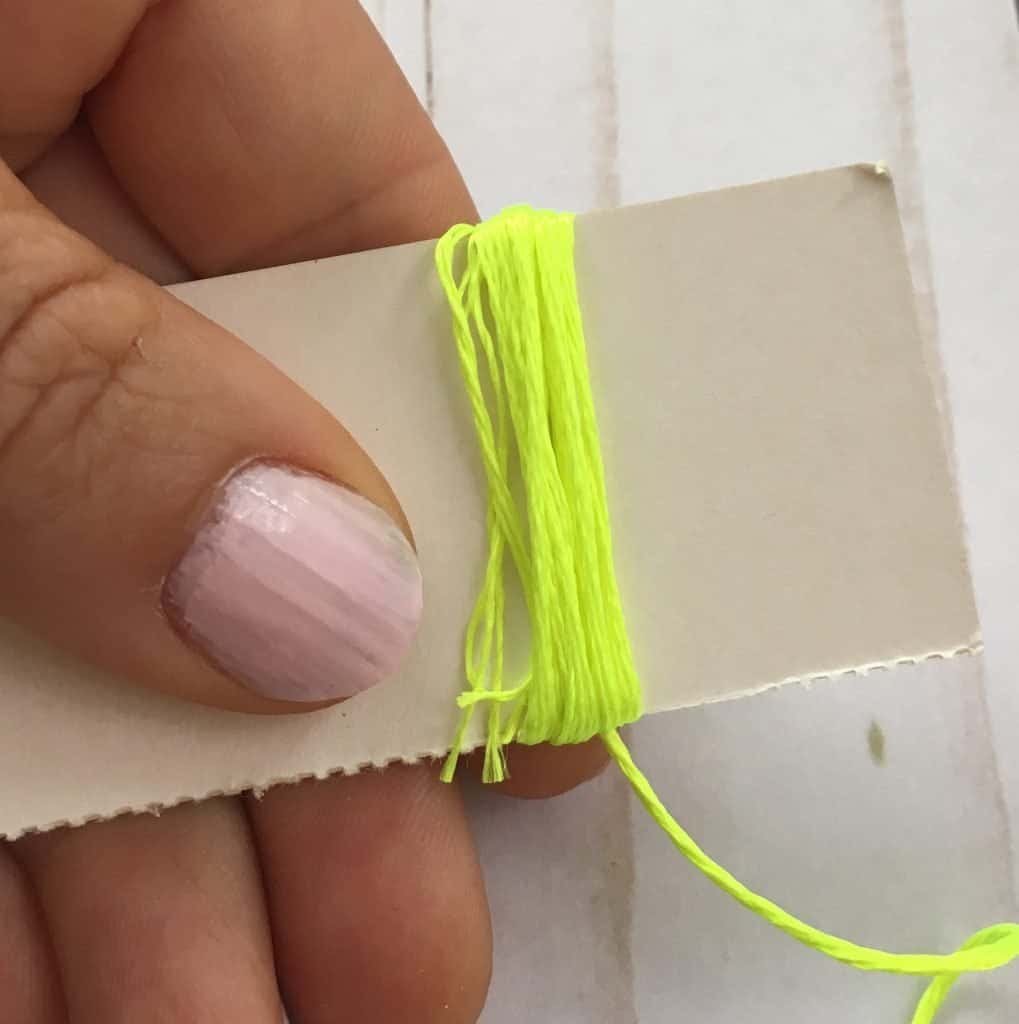
2. Cut the end and tie a knot around the entire 10 strands at the top.
3.Now slide off the yarn and wrap the end around the knot and all 20 strands. Watching the video will help understand this better!

4. Glue the end of the yarn to the wrap around
5. Cut the bottom of the loops and fray all the individual strands. Try to really separate each strand with your fingers or a comb.
6. Now you should have a beautiful tassel!
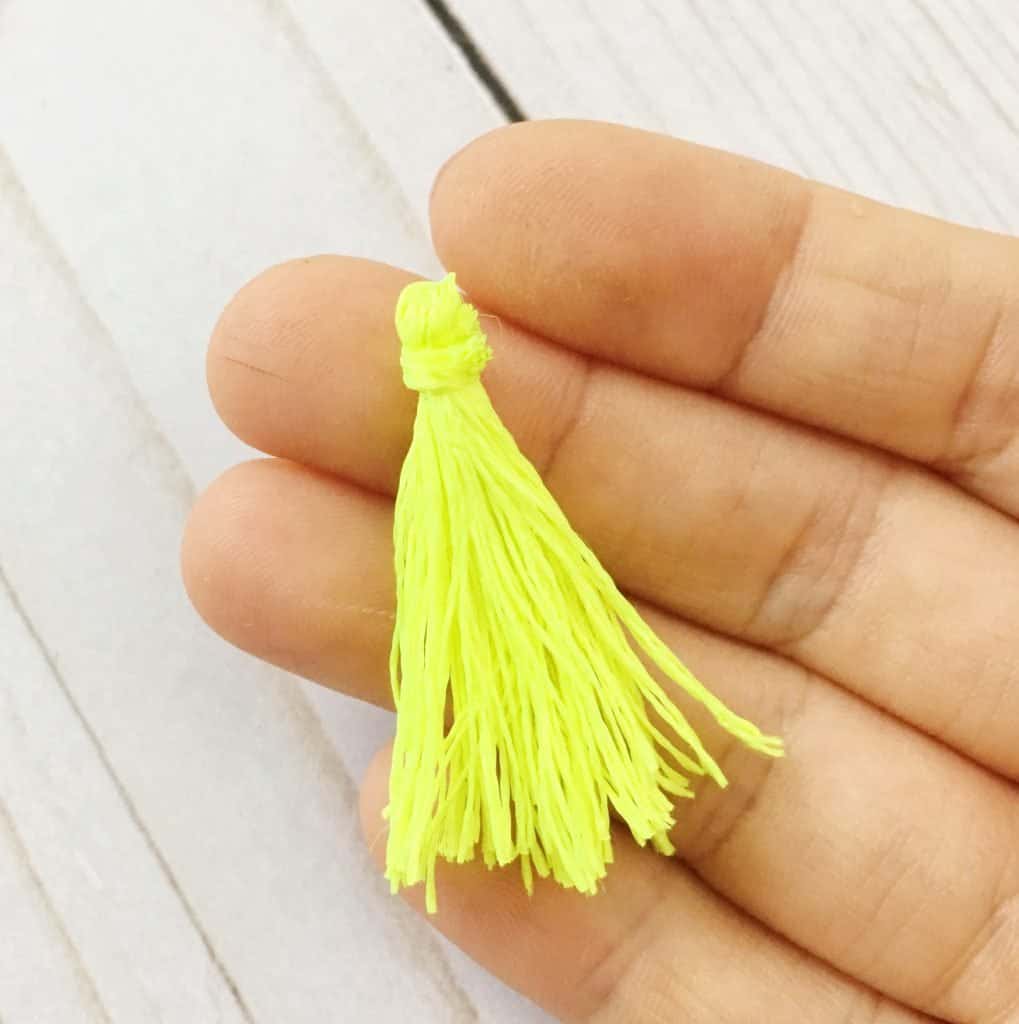
Make 2 more either in the same color or like me, one in a coordinating color.
3.Attach everything
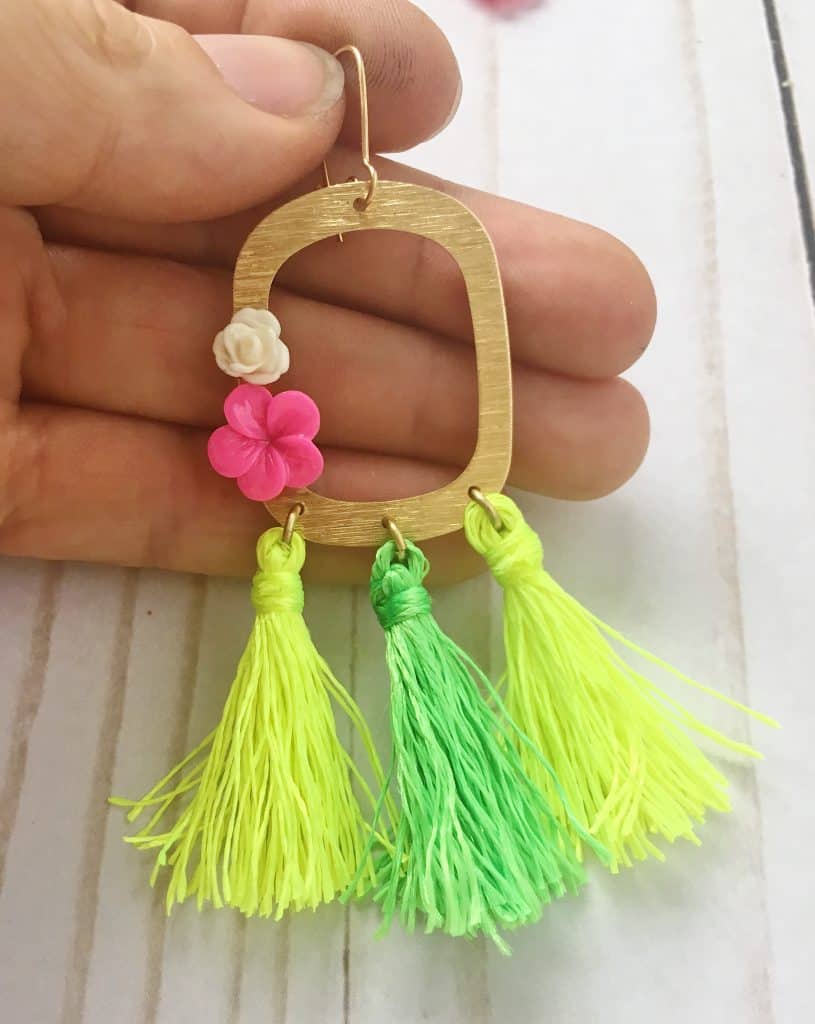
Now all that is left is to attach the tassels with jump rings to the bottom and the ear wires to the top!
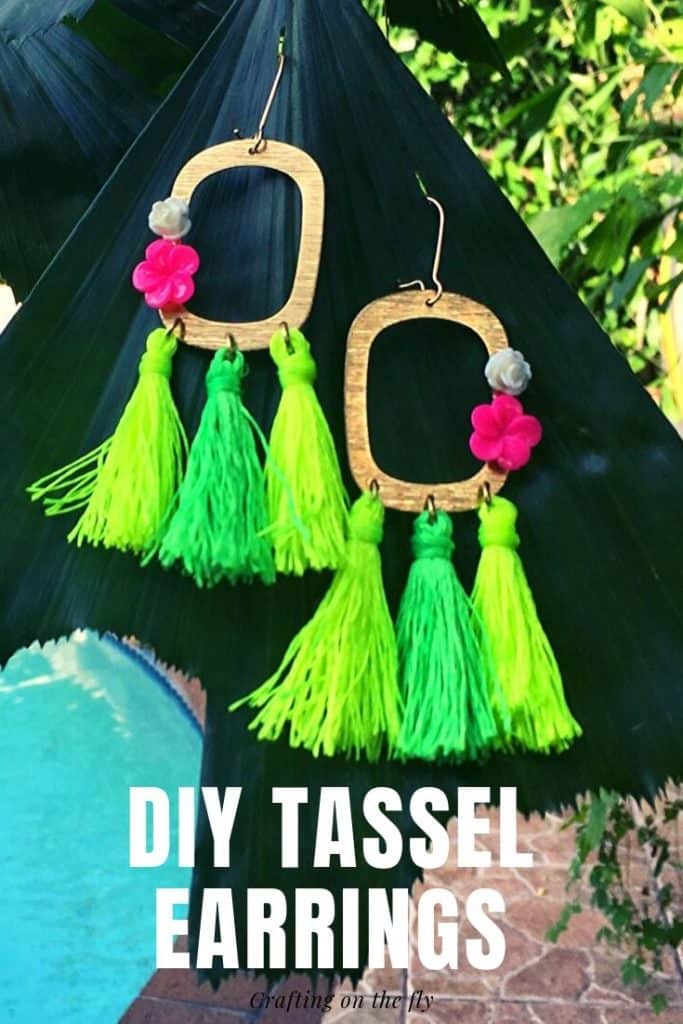
You can change the design even more by adding shorter or longer tassels and also using longer ear wires!
I hope you find these DIY Flower Power Earrings as easy to create as I do. Comment below if you have any questions and show off your creations here and on Instagram #kaileacrafts
More Free Tutorial
Want to make even more fun pieces? Check out these Crafting on the Fly creations!
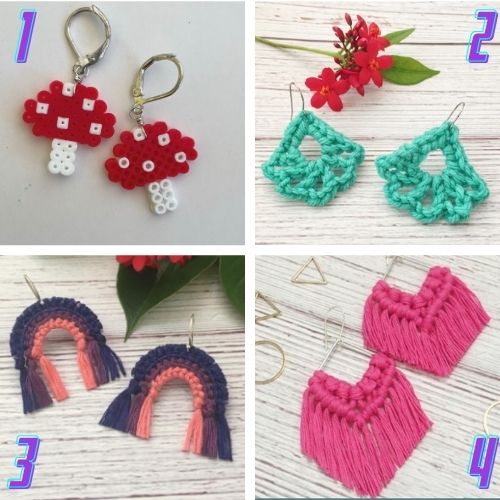
- Mushroom Earrings – Create cute mushroom earrings with Mini Perler Beads
- Crochet Earrings – Crochet fun dangle earrings
- Rainbow Earrings – Stitch these large rainbow earrings
- Macrame Earrings – Make these macrame statement earrings